Homemade Hawaiian Sweet Rolls are so much better than the package
bakingwithtradition.com is a participant in the Amazon Services LLC Associates Program, an affiliate advertising program designed to provide a way for websites to earn advertising revenues by advertising and linking to recommended products. Some of the links below are affiliate links. This means that, at zero cost to you, I will earn an affiliate commission if you click through the link and finalize a purchase.
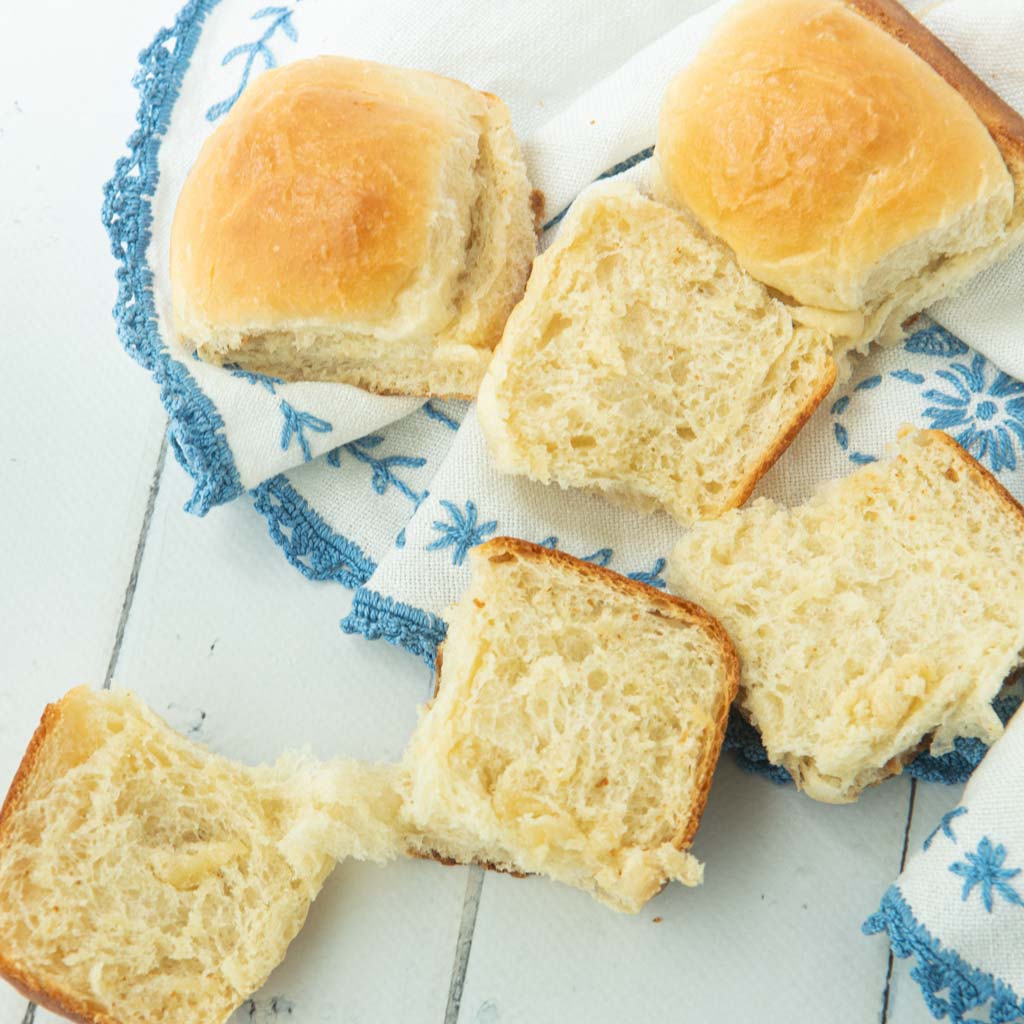
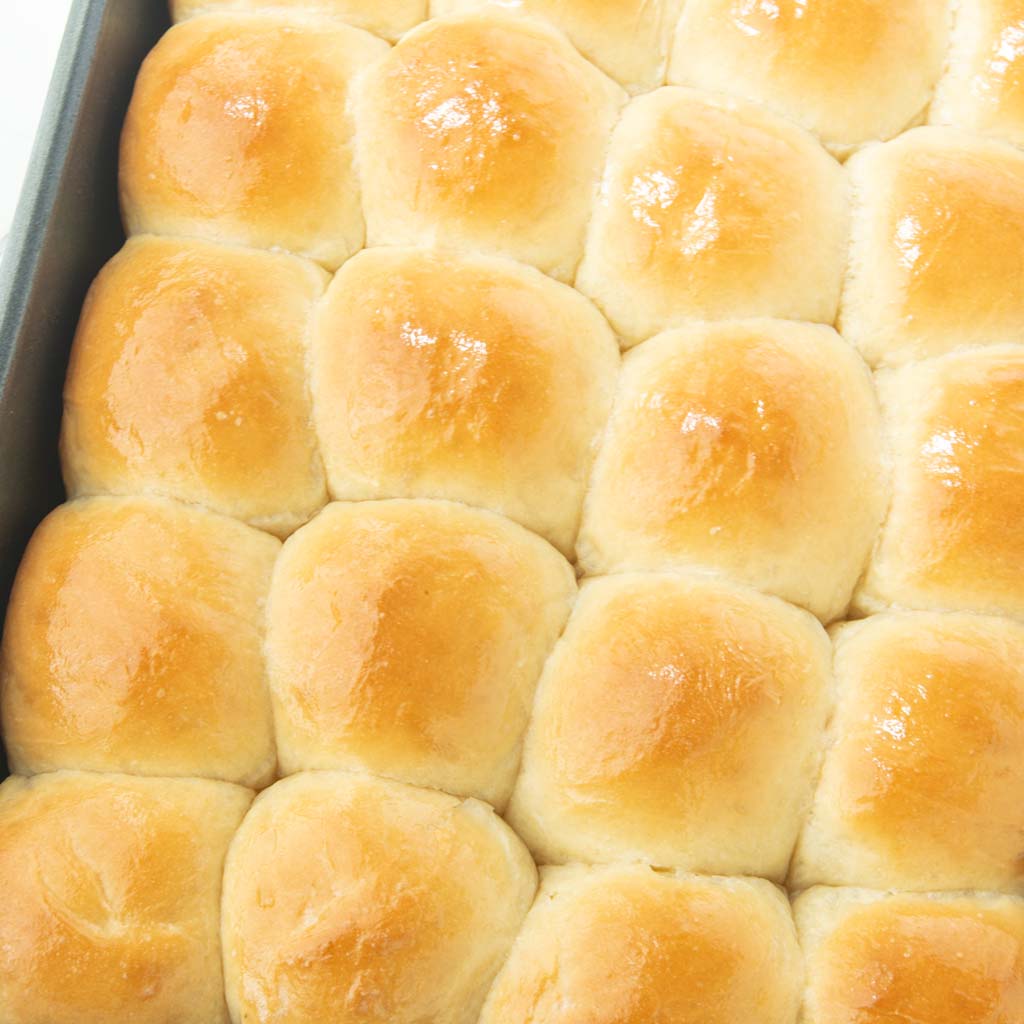
These homemade Hawaiian sweet rolls are ultra soft rolls perfect for party sandwiches and sliders. Don’t be put off by the pineapple: it tenderizes the dough and adds to the light sweetness.
This recipe has been cooking in my brain for a long time. The first time I had rolls like this was when I was out with my husband at a Hawaiian BBQ joint. This place paired these soft rolls with juicy pulled pork and BBQ sauce with a side of macaroni salad. It was love at first bite…except, the rolls were too sweet for me AND they were just a bit too white bread squishy.
Like I always do, into the batcave I went and started testing. It took me a while to find the right balance of sweetness to softness. As much as I love soft bread, it’s nice to have a little bit of crusty outside to hold up to the toppings you through at these rolls.
My rolls are not cloyingly sweet, contain real ingredients and are pretty quick to put together. If you’re a bread snob like me, once you put this into your baking rotation, you’ll never go back to the package!
Affiliate disclosure
bakingwithtradition.com is a participant in the Amazon Services LLC Associates Program, an affiliate advertising program designed to provide a way for websites to earn advertising revenues by advertising and linking to recommended products. Some of the links below are affiliate links. This means that, at zero cost to you, I will earn an affiliate commission if you click through the link and finalize a purchase.
Homemade Hawaiian Sweet Rolls
Why you’ll love this recipe
- Sweet but not too sweet: with just enough sweetness from pineapple juice and sugar to give the rolls amazing texture and flavor without being cloying.
- So so soft: the pineapple juice acts as a tenderizer, making for rolls that are impossibly soft while still holding together.
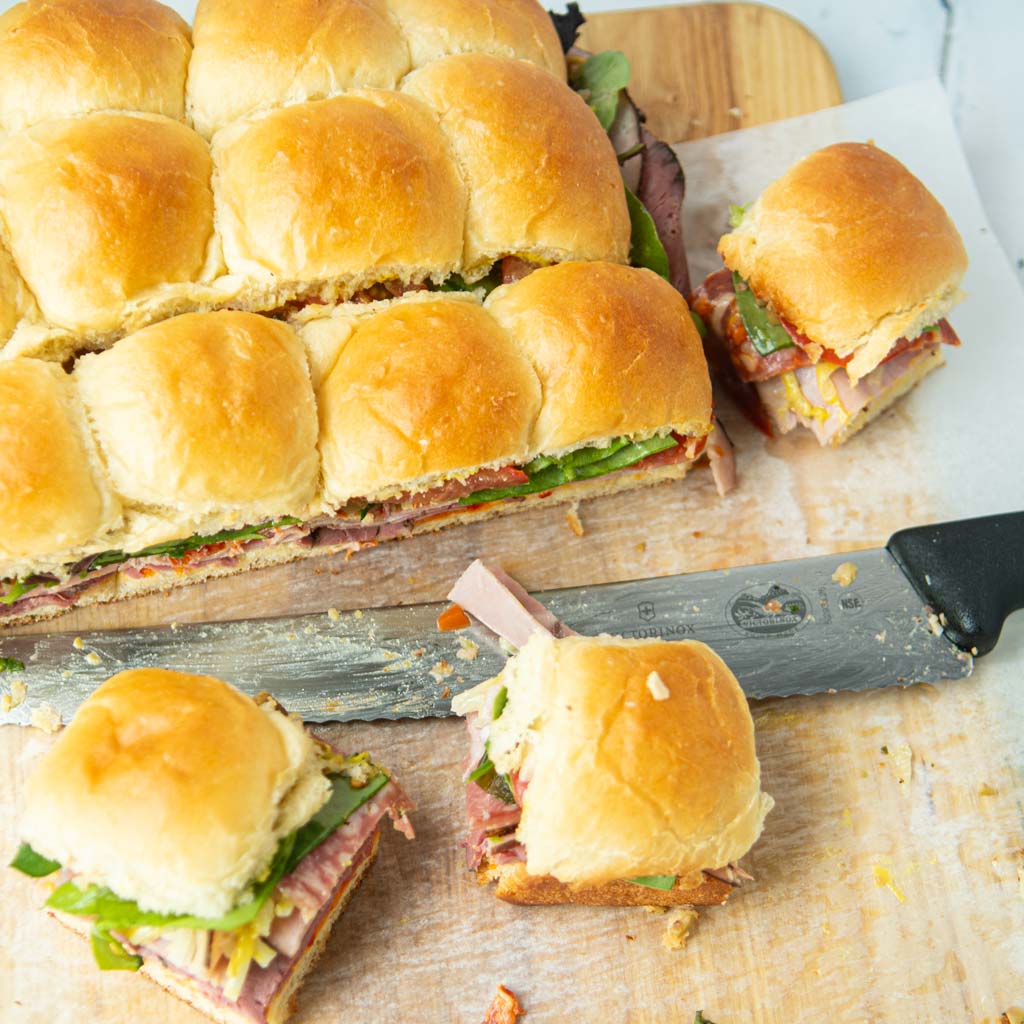
- Amazing for entertaining: these rolls have the ease of a sheet pan bread with easy slicing, so you can make 2 dozen sandwiches at a time!
- Easy shape: ball up the dough and pop them in the pan. That’s it!
Save the Pin below for later:
What even are Hawaiian Sweet Rolls?
Hawaiian sweet rolls are not Hawaiian. King’s bakery in Hilo, Hawaii came up with their version of a Portuguese sweet bread (pao doce) in the 1950s. The original bread, brought by Portuguese settlers to Hawaii is an enriched bread, rich with sugar, butter, and eggs.
Not having had pao doce, I’m guessing that the original bread is much drier and more loaded with butter and eggs. I say this because it’s meant for a celebration bread. Eaten at Easter or Christmas, this family of enriched breads all follow that pattern. I’m thinking of brioche, panettone, or Vánočka to name a few. During the Christmas or Easter season, not just a day, it’s helpful to have breads around that will keep for more than a day (fatty ingredients extend bread’s shelf life) so that your house guests can have something to nibble on. Smart you can also repurpose the bread into amazing French toast to feed the same guests.
While Hawaiian rolls are soft and enriched, they are much much softer than any of the original breads would be. It’s pure speculation, but it’s my guess that the idea of American squishy white bread got into the mix and gave us the rolls we know today.
The “Hawaiian” term as I understand it was pure marketing. Whatever the case, you’ve probably seen the happy orange packages show up at potlucks and Superbowl parties to go along with BBQ and meatballs to make adorable party sized sliders.
What’s with the pineapple?
If you look at the ingredients on King’s Hawaiian rolls, you will see no pineapple. Instead, there’s pretty standard ingredients you’d see on any processed bread item. Lots of dough conditioners, enriched flour, etc.
That being said, other brands of Hawaiian rolls DO contain pineapple. I found it in Sister Schubert’s, and I’m sure there’s others.
If you think about it, using pineapple juice makes a little bit of sense flavor wise. Hawaiian foods often sweet flavors in their cooking, with teriyaki and pineapple being a favorite ingredient in general.
Chemically, the pineapple juice adds softness to the bread. That’s because it’s acidic, and just like buttermilk, that little bit of acid breaks down some of the gluten, making for a softer roll. A lot of packaged Hawaiian rolls will include vinegar, which serves the same purpose (though less tasty). I assume they use this because vinegar is cheaper than pineapple.
Ingredients for homemade Hawaiian sweet rolls
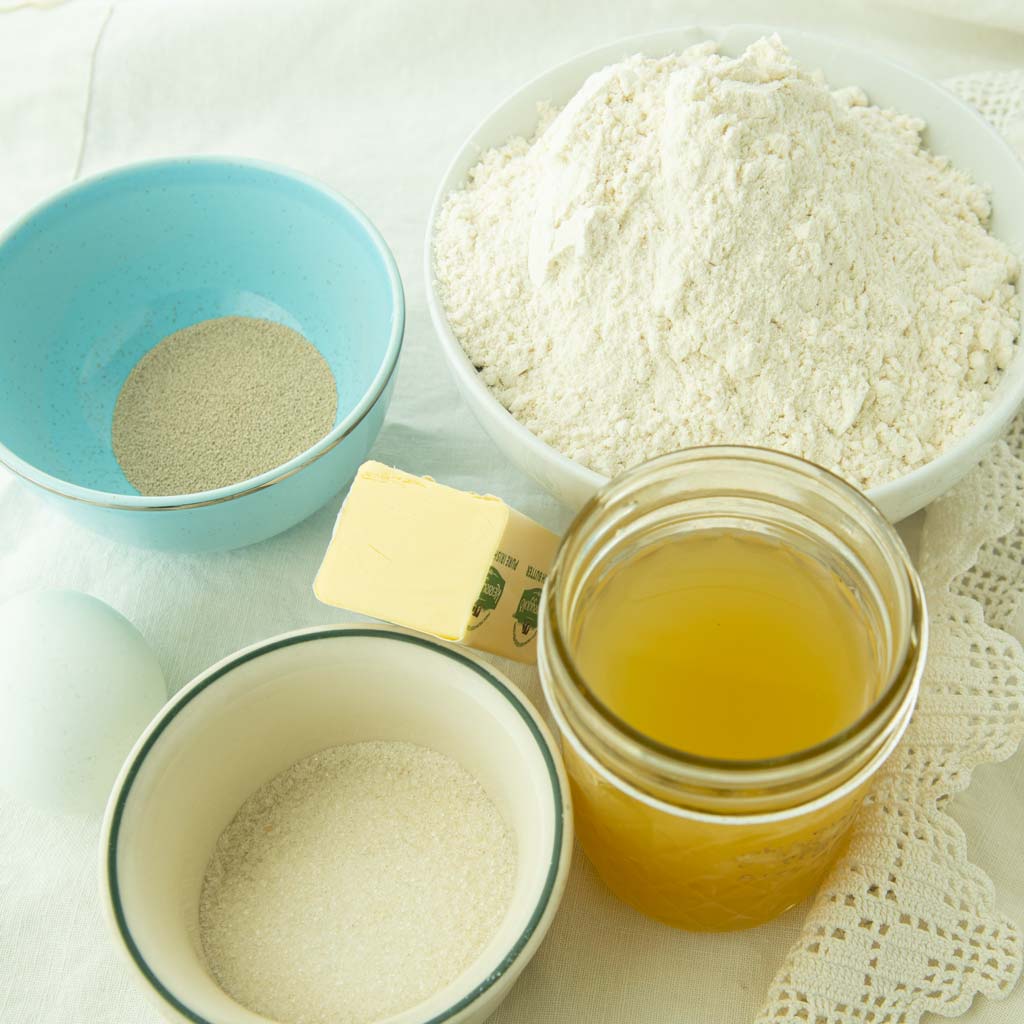
- water: to dissolve the yeast, moisture
- yeast: for leavening
- butter: for flavor, richness
- egg: for protein, structure
- pineapple juice: for moisture, softness, flavor
- sugar: granulated for flavor and texture
- salt: for flavor
Tips for the best Hawaiian rolls
- Weigh the dough: skip this, and your rolls won’t be as pretty as mine. On a gram scale, weigh your dough. I actually have a label with the gram weight of my mixer bowl on it. This way, I can subtract that number from the total weight of the dough. If you don’t do that, take the total weight of your dough and divide by 24. From there, cut off pieces of dough equal to the answer to your division problem. These rolls are about 28-29 grams each. By doing this, you’ll get even sized rolls. In turn the rolls will bake more evenly AND look pretty. Always make pretty rolls.
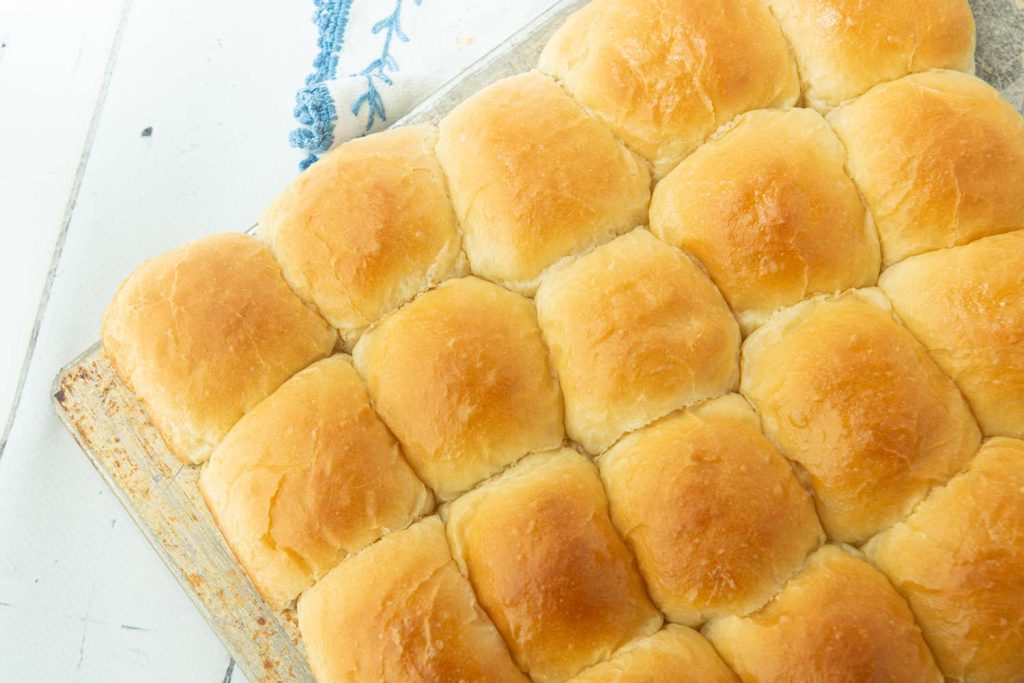
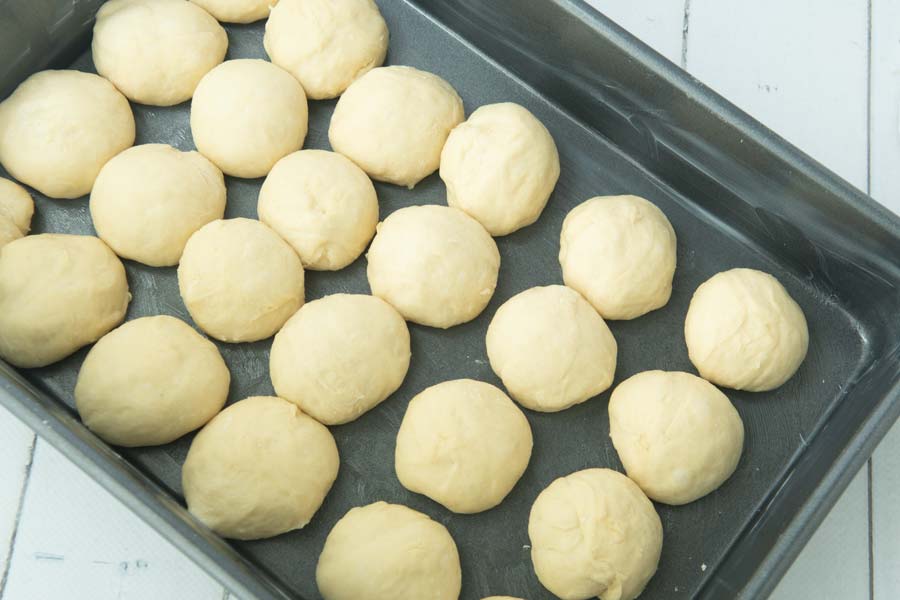
- Hack an 8×12: I discovered an 8×12″ cake pan at the thrift store recently. Since that trip, this $3 pan has become my favorite baking pan. Being just a little bit smaller than a 9×13, cakes and rolls rise just a little bit higher. Most people are not going to have or easily find an 8×12. Because these rolls need to rise together so that you can slice them in half as one complete sheet of bread for serving, here’s an easy way to use a bigger pan. When you space out your rolls in your pan (let’s assume a 9×13), place them no further than 1/2″ apart in any direction. They will bake together perfectly this way.
- Brush with butter: when the hot rolls come out of the oven, brush them with butter. The extra butter will keep the crust soft and add an extra layer of flavor.
Hawaiian Sweet Rolls
- Total Time: 2 hours 35 minutes
- Yield: 24 rolls 1x
Description
Ultra soft rolls perfect for party sandwiches and sliders. Don’t be put off by the pineapple: it tenderizes the dough and adds to the light sweetness.
Ingredients
- 1/4 cup warm water (59 mL)
- 2 tsp instant yeast
- 4 Tablespoons butter (57 g) plus about 2 more tablespoons for brushing rolls and the pan
- 3/4 cup pineapple juice (177 mL)
- 2 Tablespoons granulated sugar (25 g)
- 1 tsp salt
- 1 large egg
- 2 and 3/4 cups all-purpose flour (360 g)
Instructions
Make the dough:
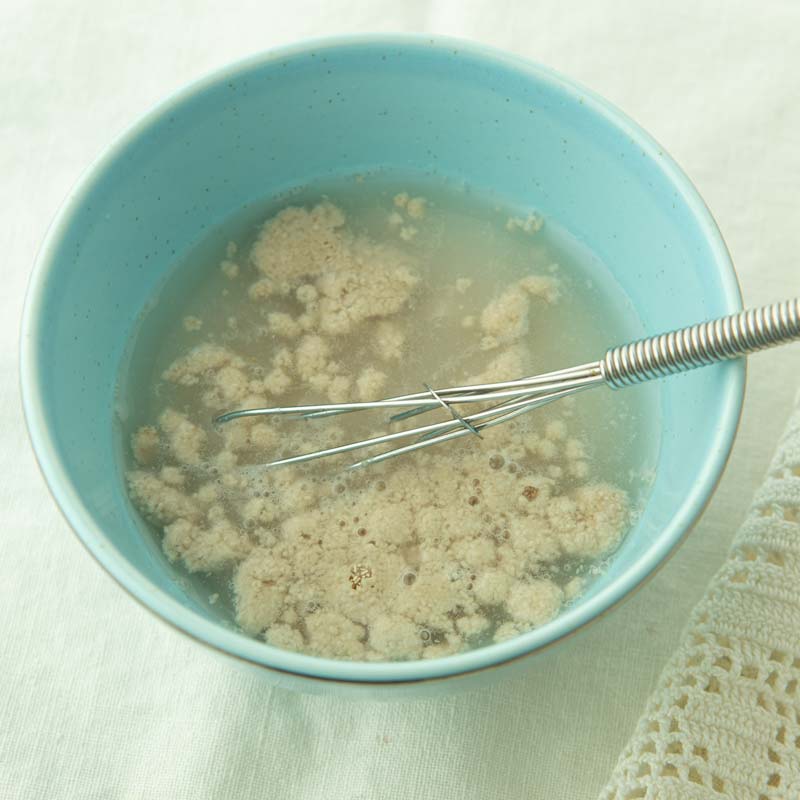
- Sprinkle the yeast on the warm water in a small bowl with a pinch of the sugar. Set aside for about 5 minutes until the yeast is foamy.
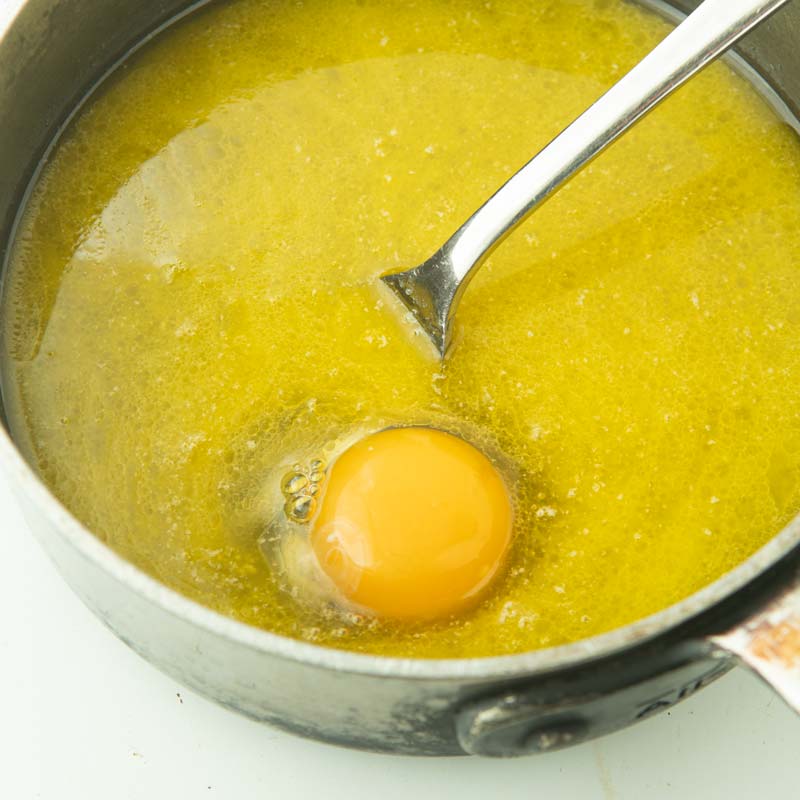
- Melt the butter in a small pan, then add in the pineapple juice.
- Add the sugar and salt to the melted butter/juice and stir to combine.
- Crack the egg and use a fork to whip it into the butter/juice mix.
- Put the flour into a large bowl or your stand mixer bowl. Make a well in the center with your hands, then pour in the butter mixture then the yeast mixture.
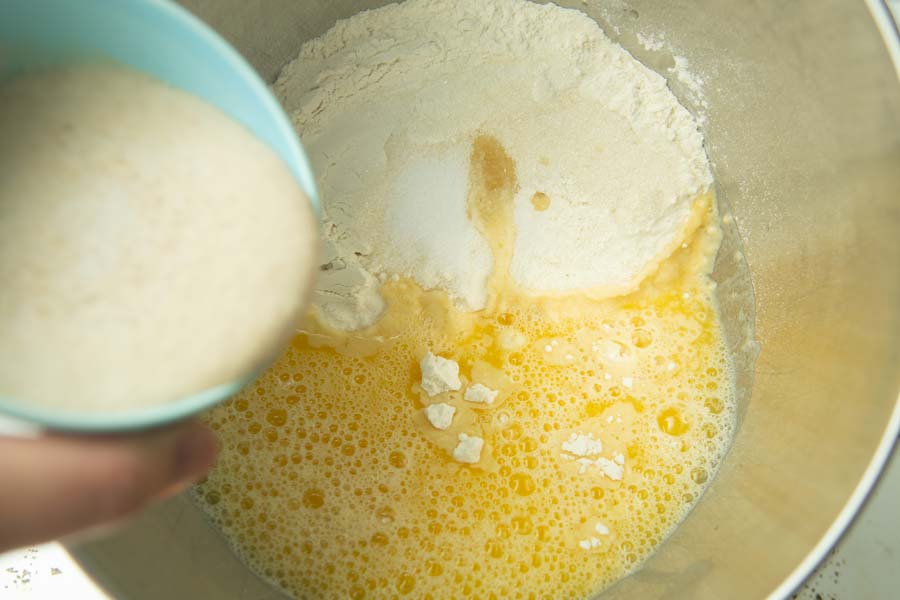
- Stir with a spatula or the dough hook attachment to make a rough dough.
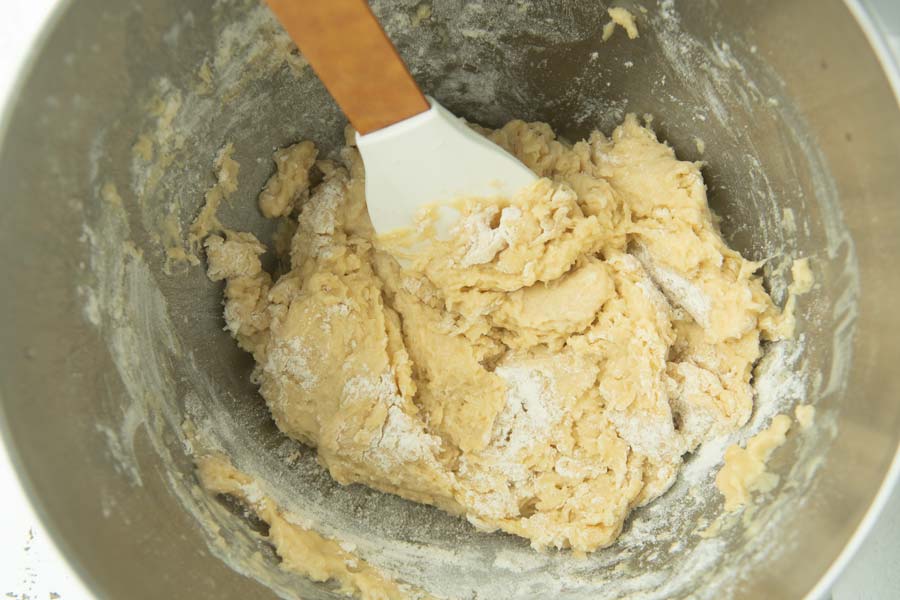
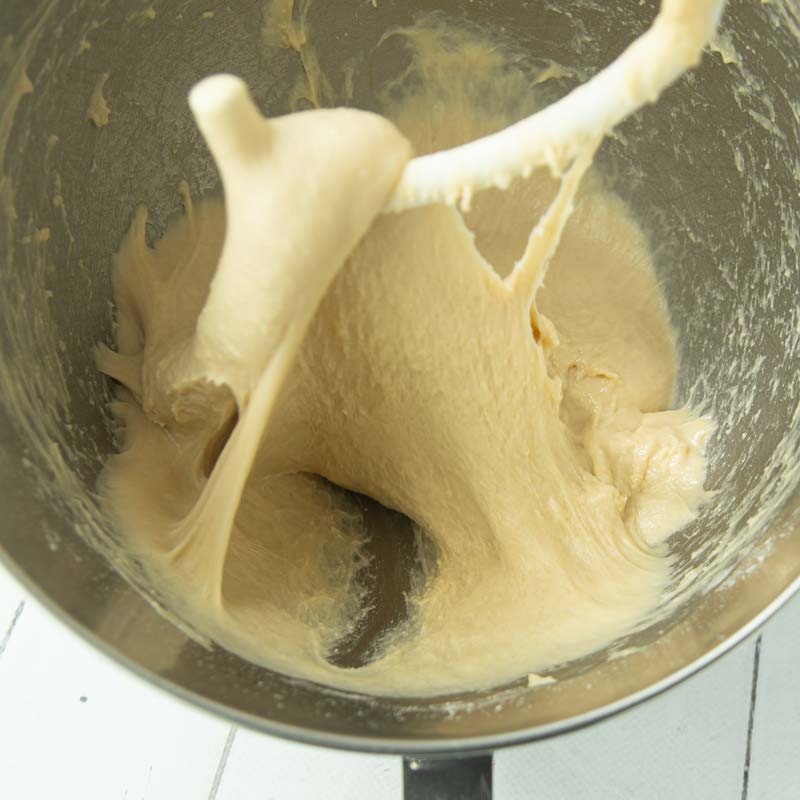
- After that, with a dough hook on your stand mixer, beat the dough for about 5 minutes on low speed (2 on a Kitchen Aid) until you get an extremely elastic dough that you can pull in heavy strings off the dough hook. This dough will be very sticky.
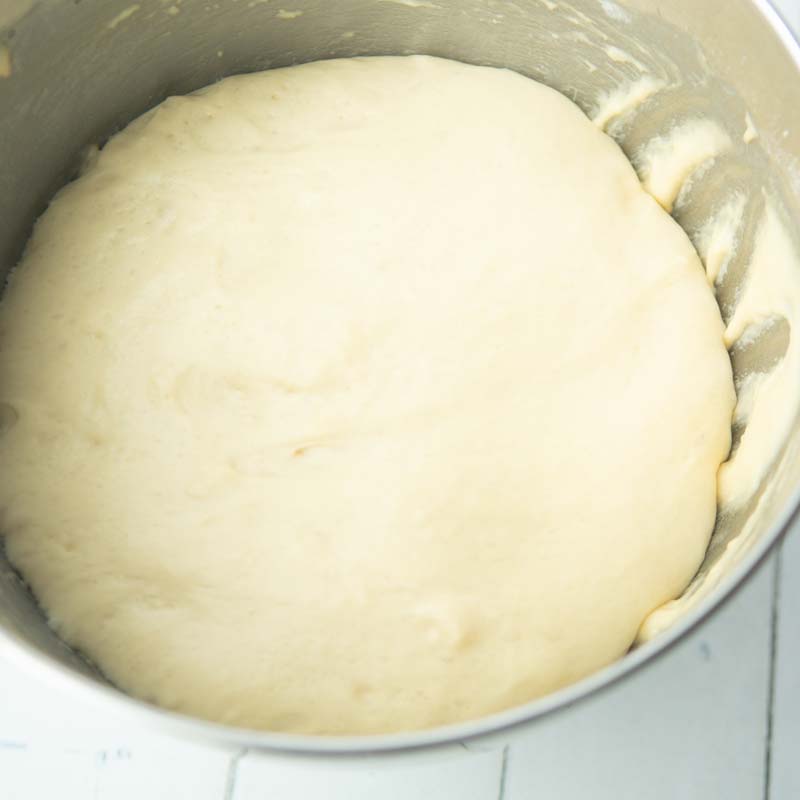
- Cover the dough with plastic wrap and allow to rise on the counter. If you’re working in a space with a warm room temperature, it will take the dough about 1 hour for the first rise.
- The dough is ready to shape when it is about double in bulk and visibly poofy.
Shape the rolls:
- Melt the remaining 2 tablespoons of butter and brush a 9×13 cake pan with about half of the butter.
- Scrape the dough onto a lightly floured surface and divide it into 24 pieces.
- Form your hand into a dome, then turn a piece of dough inside your hand dome around clockwise and few times. This will neaten up the edges and make a nice round shape.
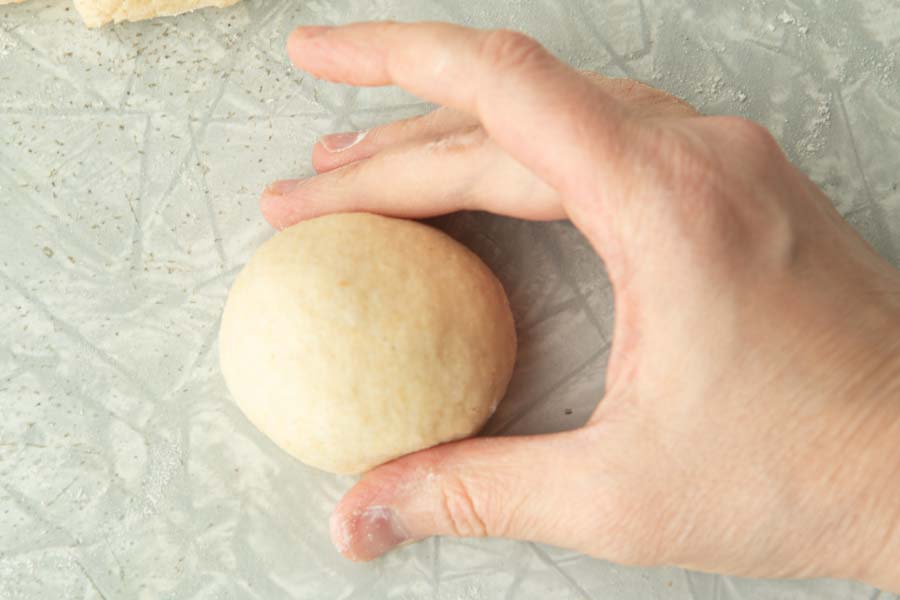
- Set the rolls inside your prepared pan with very little space between the rolls. Cover the rolls to rise for 30 minutes.
Bake the rolls:
- Towards the end of the 30 minutes, preheat the oven to 350 F (180 C).
- Bake the rolls for 20-25 minutes until the tops are golden brown.
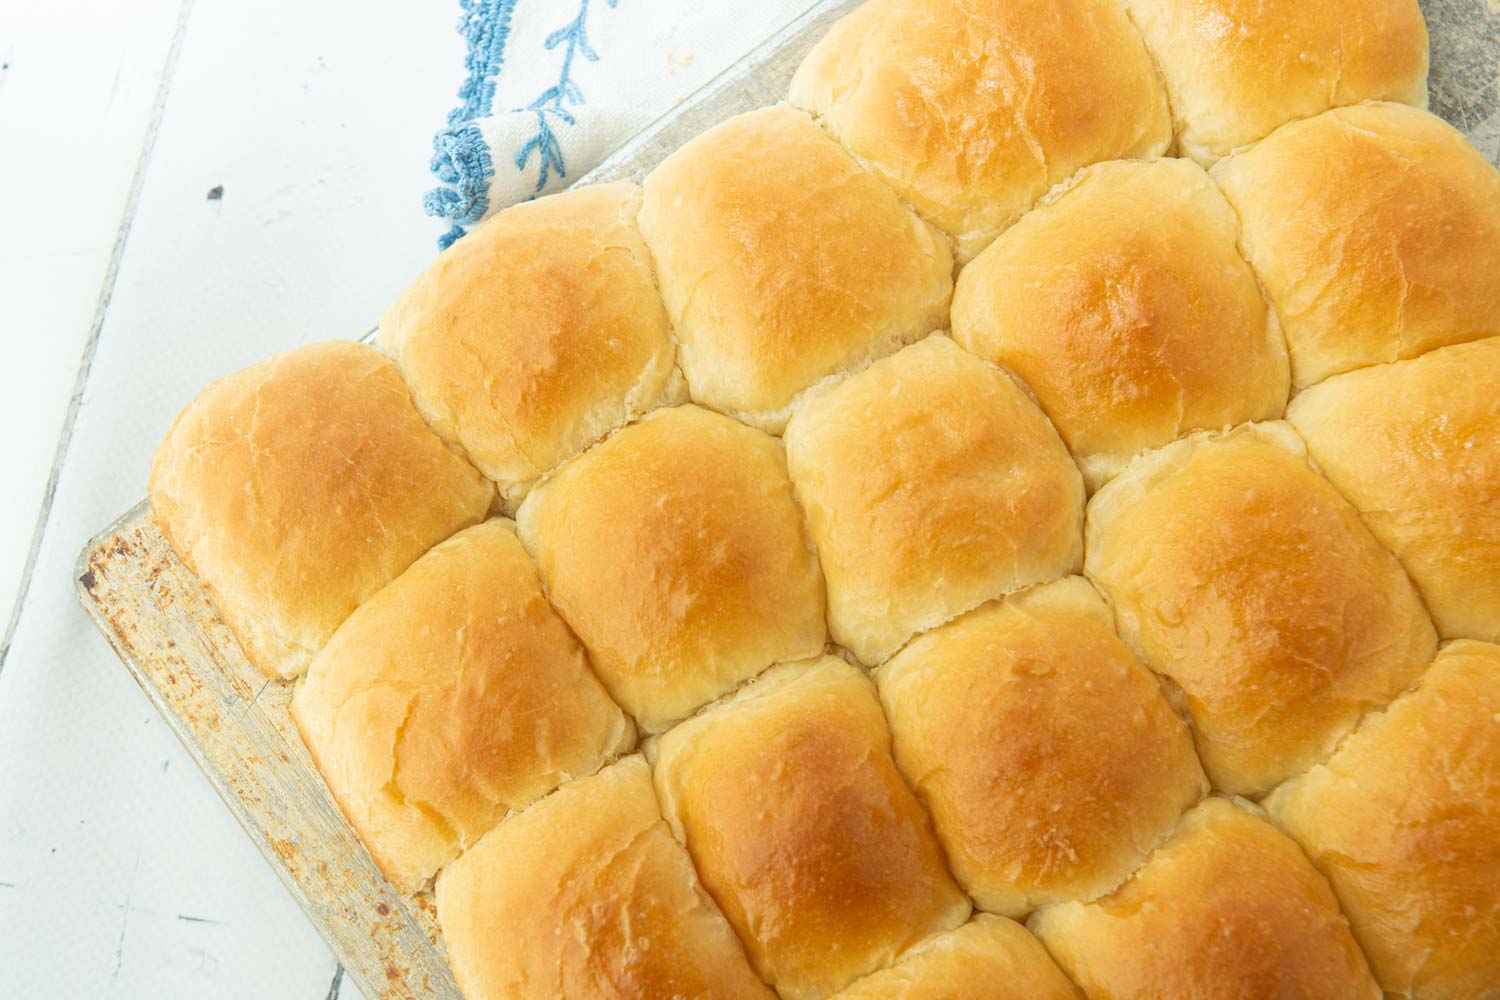
- Melt the remaining butter and brush it over the tops and sides of the hot rolls.

- These rolls are best the day that they’re made, though they freeze like a champion. To freeze a batch, let them cool down completely, then transfer to a plastic bag. Remove all the air from the bag, then freeze flat for up to 3 months.
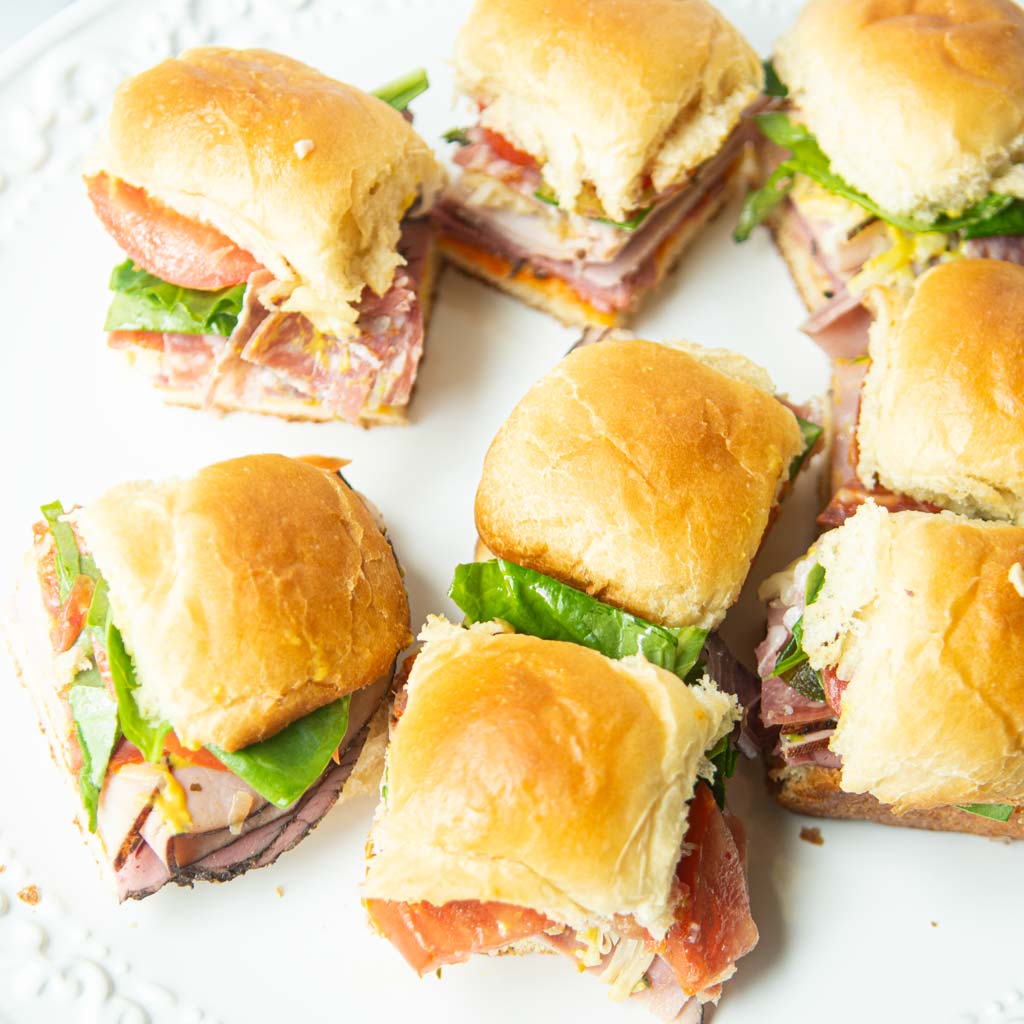
Almost instant party sandwiches
To make these into party sandwiches:
-
- Cut through the bread rolls horizontally so it makes two complete sheets of bread.
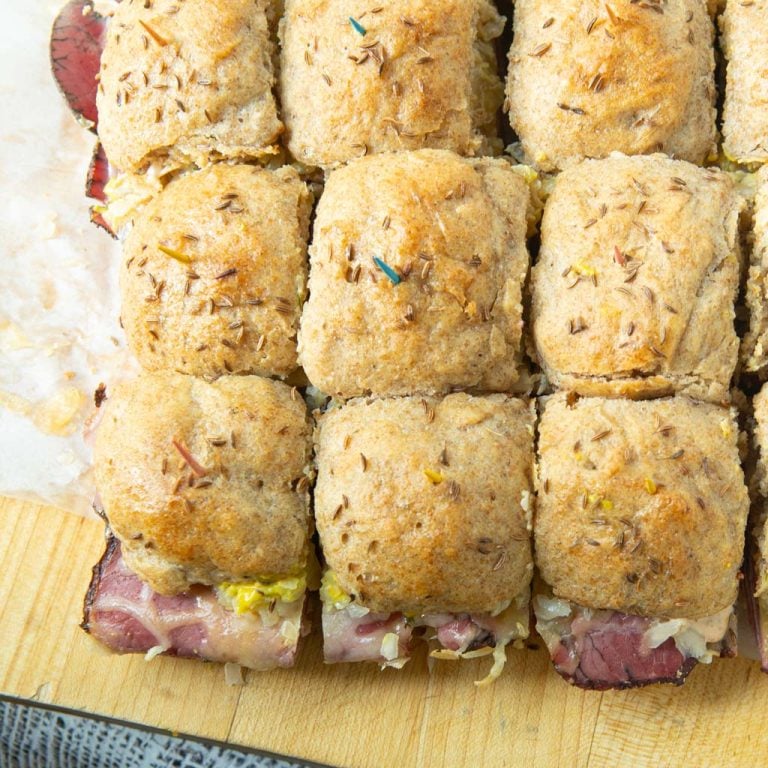
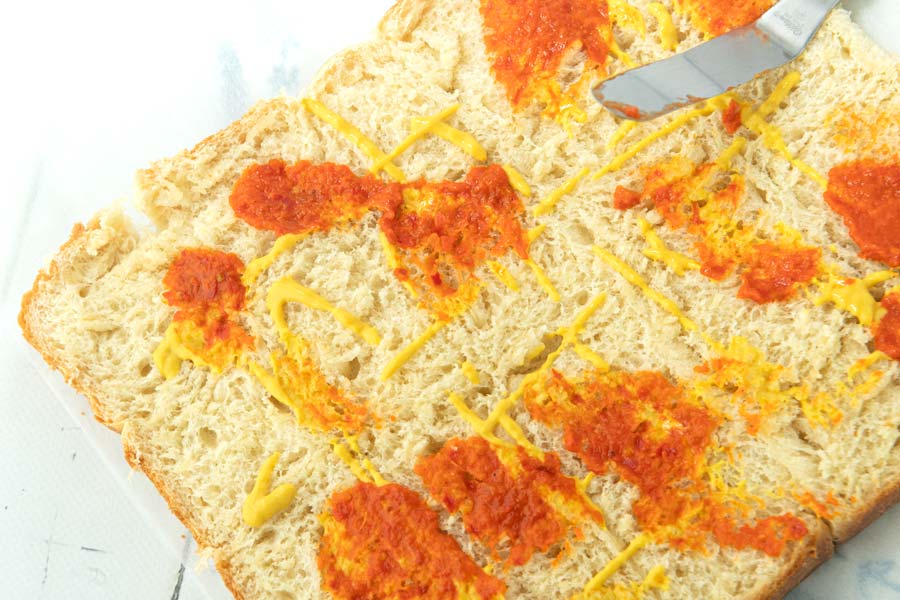
- Spread on your favorite condiments (that mustard and avjar for me), then meat and cheese on one side. (I’m using roast beef and shredded chive monterey jack).
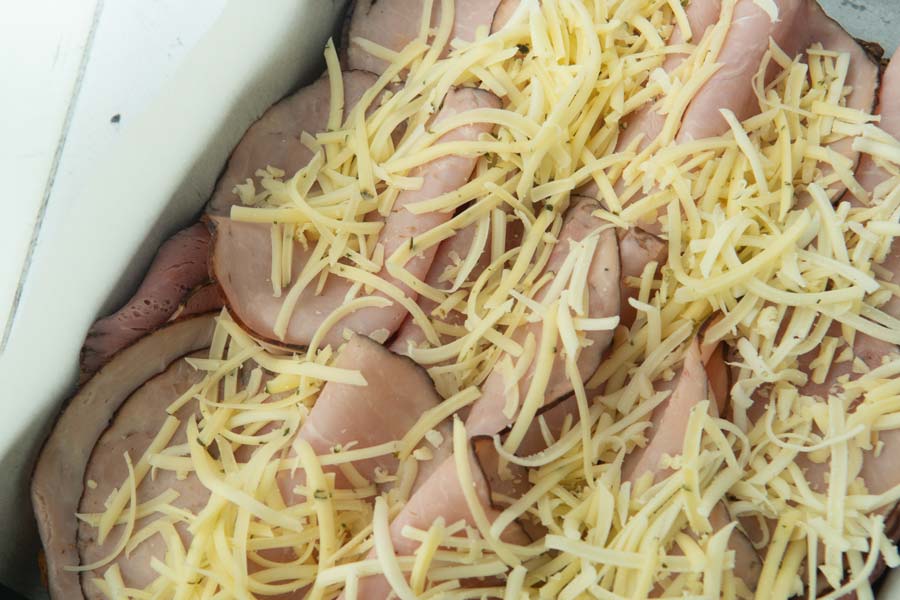
- Pop the cheesed up size of the rolls back into the oven for 5-10 minutes until the cheese melts.
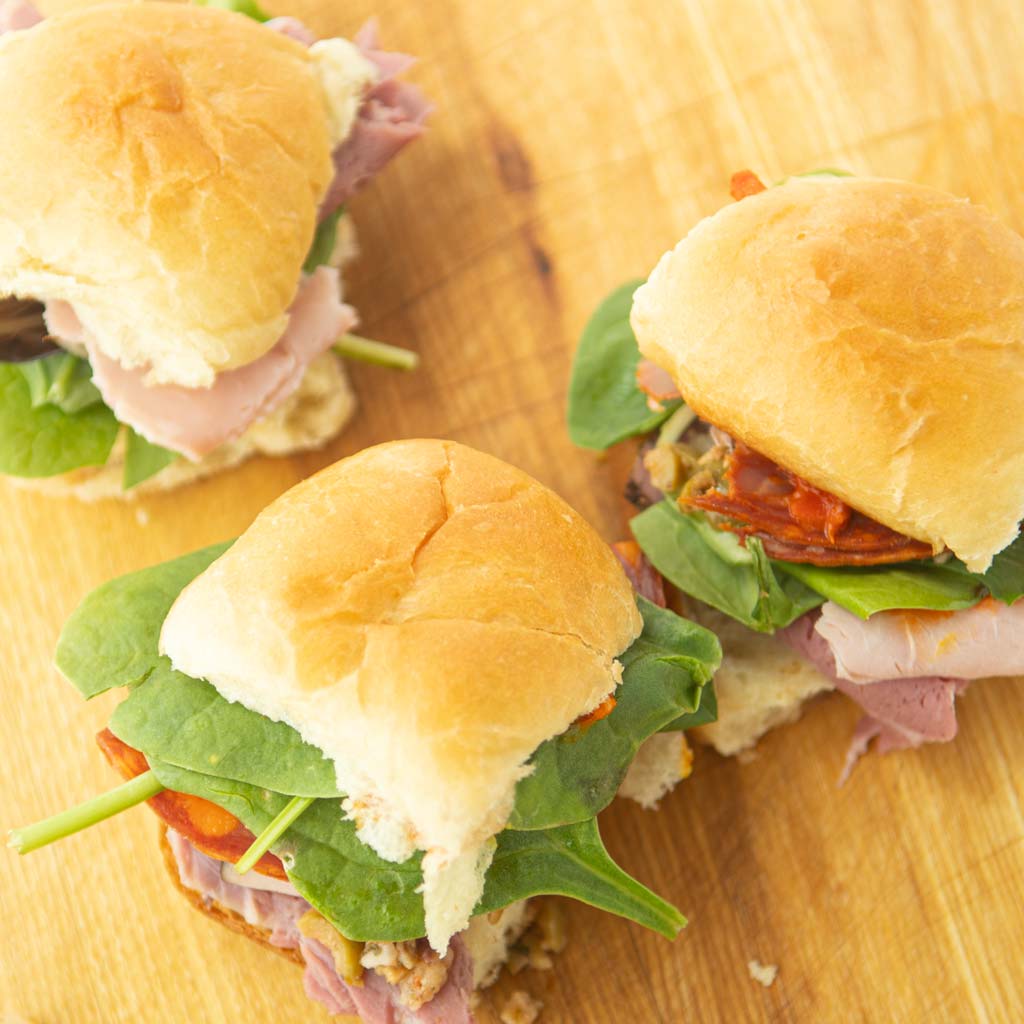
- Top the hot side of the rolls with more meat (salami, ham, turkey), lettuce, and tomato slices. Sometimes I throw on olives or sliced shallots.
- Spread the top of the buns with more mustard and mayo or whatever condiments you like.
- Pop a toothpick through each roll, then slice through the buns along the lines.

Notes
Precise or eyeball?: For rolls like this, I really prefer to weight out the dough balls to get evenly sized rolls. To do so, put a piece of plastic over your gram scale, then tip out the dough on top of it. Divide the total weight by 24. Round to the nearest gram, then cut small pieces and weigh them cutting off or adding dough as necessary to get to that amount. My pieces were about 29 grams. Of course you can skip this and just eyeball it. Sometimes you feel like a nut; sometimes you don’t.
Let that bread cool: this bread, as soft as it is, is a bit fragile. Do let it cool down completely before cutting to make your sandwiches. I know it’s pure torture, but giving it 15-20 minutes will help the slicing and give the buns a better texture. You’ve already went through the trouble to make good bread, so respect it by letting it cool before you knife it!
Use the toothpicks, Skipper: Toothpicks really do help hold the sandwiches together while you’re cutting between them. I didn’t use them because I was in a hurry, and I unceremoniously slid the contents back into each bun. Just use the toothpicks. It’ll be better for you!
- Prep Time: 20 minutes
- Additional Time: 1 hour 50 minutes
- Cook Time: 25 minutes
- Category: Breads
- Cuisine: American
Nutrition
- Serving Size: 1 roll
- Calories: 80
- Sugar: 1
- Sodium: 16
- Fat: 2
- Saturated Fat: 1
- Carbohydrates: 13
- Fiber: .51
- Protein: 1
- Cholesterol: 5
How to make your homemade sweet rolls into almost instant party sandwiches


- Cut through the bread rolls horizontally so it makes two complete sheets of bread.
- Turn over a sheet tray and scootch the top part of the buns onto it.
- Spread on your favorite condiments (that mustard and avjar for me), then meat and cheese on one side. (I’m using roast beef and shredded chive monterey jack).
- Pop the cheesed up size of the rolls back into the oven for 5-10 minutes until the cheese melts.
- Top the hot side of the rolls with more meat (salami, ham, turkey), lettuce, and tomato slices. Sometimes I throw on olives or sliced shallots.
- Squeeze on some extra mayo or mustard over the last of the fillings.
- Slide the tops of the buns back over the bottoms, lining everything up nicely.
- Pop a toothpick through each roll, then slice through the buns along the lines.

