How to make Homemade Pita Bread that puffs up every time
bakingwithtradition.com is a participant in the Amazon Services LLC Associates Program, an affiliate advertising program designed to provide a way for websites to earn advertising revenues by advertising and linking to recommended products. Some of the links below are affiliate links. This means that, at zero cost to you, I will earn an affiliate commission if you click through the link and finalize a purchase.
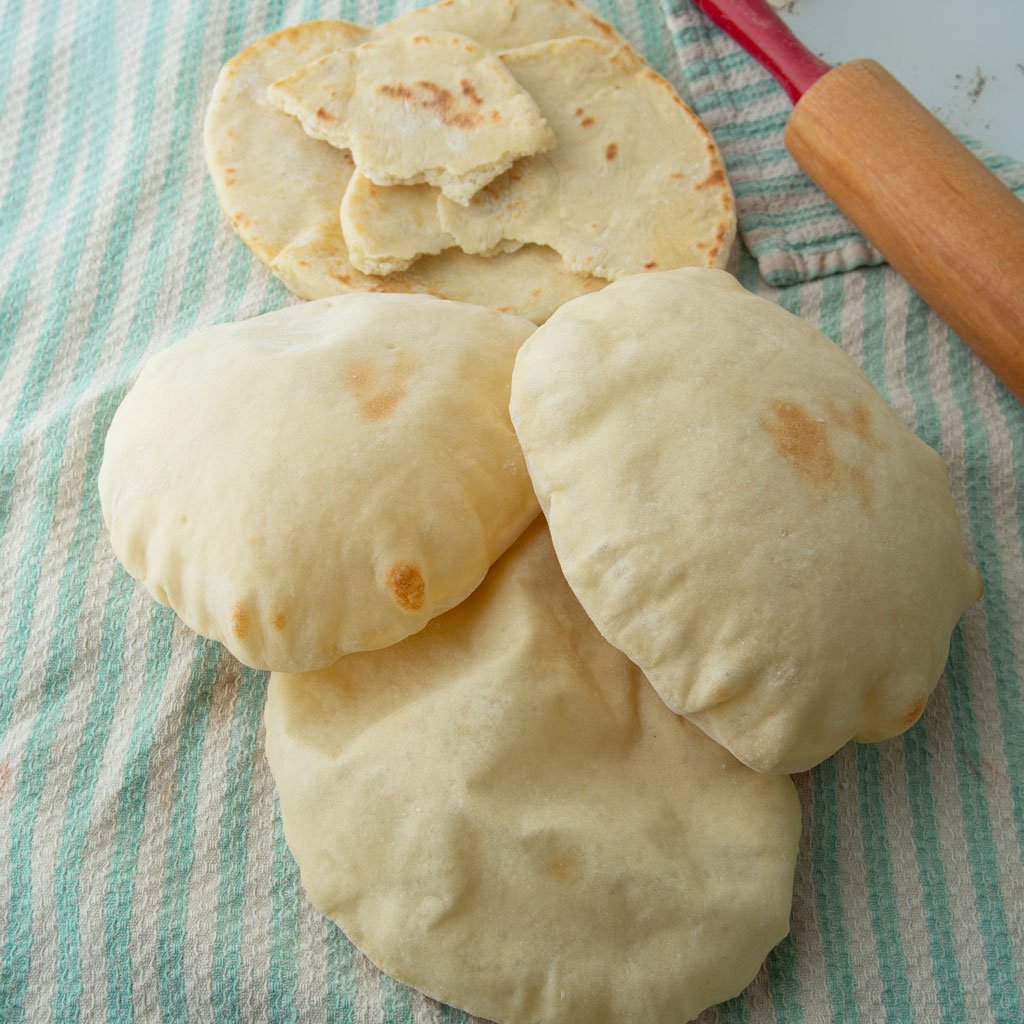
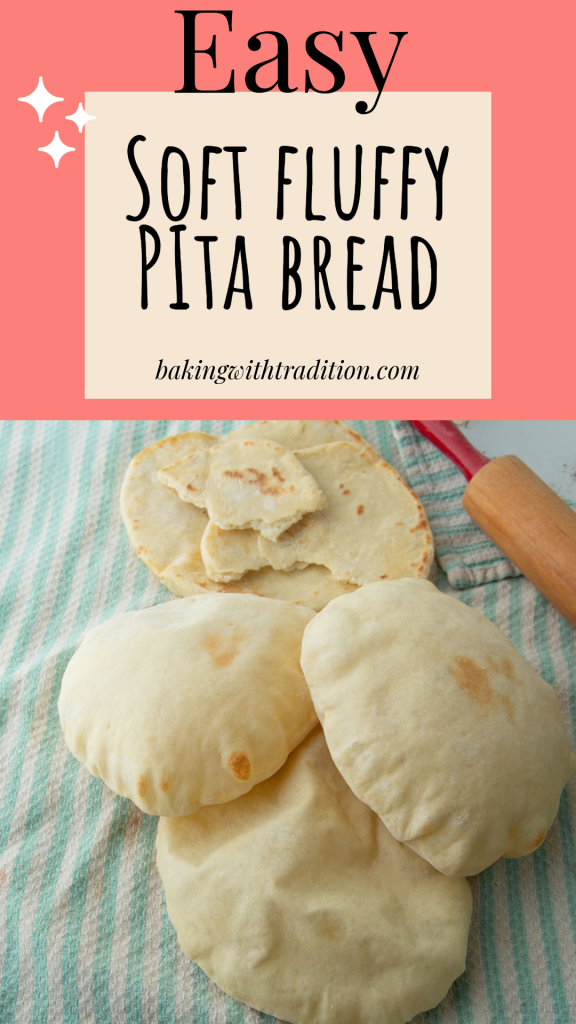
This homemade pita bread is easy to make, is fun to work with and will puff up every time as long as you follow my easy steps to perfect pita pockets.
I have made thousands of pieces of homemade pita bread. Literally. This is the bread that paid for ALL of my books in college. I’m not kidding about that. My Mom and I baked with my aunt when I was in college in the summer for the Farmer’s Market in Colorado Springs. Mom made an assortment of baked goods, like her legendary lemon tartlets. As for me, I baked up about 50 pounds of pita a week.
Since then, I’ve continued my own personal pita education, working and working to try and make it better. It’s only in the last few years that I can without fail produce pita that inflates reliably every time.
The good thing for you, is that you can learn from my decades of experience and shortcut your way to homemade pocket bread success.
Let’s roll!
Homemade Pita Bread
How I got started making pita
When I was in junior high, Jeffrey Alford and Naomi Duguid’s classic Flatbreads and Flavors came out. I stalked it at the bookstore for months before I bought it with my own money (one of the few books I’ve paid full price for). I read it from cover to cover, fascinated with all the amazing flatbreads from every corner of the globe.
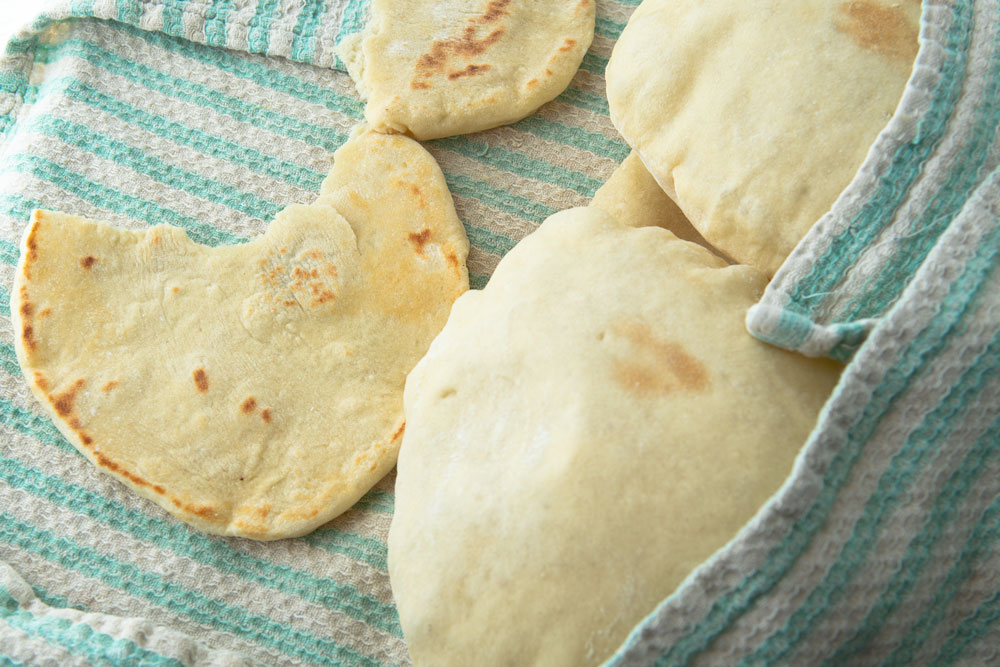
For some reason, pita captured my heart. It’s just so versatile. Tear it up, it’s a spoon for a good dip or soup, cut a pita pocket open, and it makes the perfect self-enclosed sandwich. I’ve eaten my share too of pita fresh off the griddle, maybe dipped in extra virgin olive oil. To me, it’s the perfect bread for almost every occasion and instance.
As a testament to how many times I made the recipe in that book, that page fell out and is delicately wedged in place in the middle of the book by nothing but hope.
I’ve since tweaked the original recipe more for my own tastes and scale.
Why you should make your own pita bread
Let me tell you I have opinions on store-bought pita.
Almost without exception it tastes like cardboard. There, I said it.
I don’t blame the bakeries. The thing is that pita is in a class of breads that’s meant to be eaten as soon as it gets made. Tortillas are like that too. When I took the pictures for this post, I literally rushed it to the table–because I know. Pita that sits is pita that gets stale, especially in our dry Colorado air.
Beyond the fact that you’ll get better tasting, fresher bread, homemade pita bread is fun to make. You don’t need any fancy equipment–just a bowl, a rolling pin, and your own two hands. It’s relaxing to make pita. There’s a rhythm and a pace to it that’s genuinely satisfying. And the first time you see your pita inflate like a balloon–it’s happy dance time.
Homemade Pita Bread ingredients
- Flour: all purpose flour is mostly what I use. 50% all-purpose and 50% whole wheat flour makes nice bread too. I do not care for pita made with bread flour as it is a little too stiff to work with in my opinion.
- Water: I use filtered water, but tap or spring water are all good.
- Yeast: instant yeast or active dry.
- Extra virgin Olive oil: for taste and texture.
- Honey: just a little bit to help make the yeast active and bubbly.
- Salt: for taste
Step by step homemade pita bread recipe directions
Make a sponge starter
If you have a little extra time in your day, making a sponge starter will give your pita better overall texture and flavor.
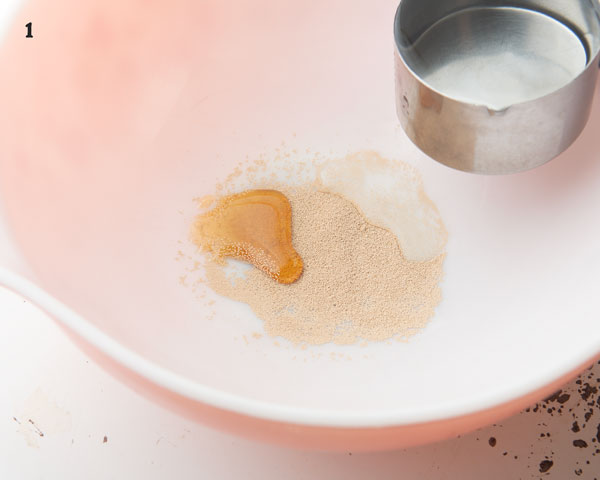
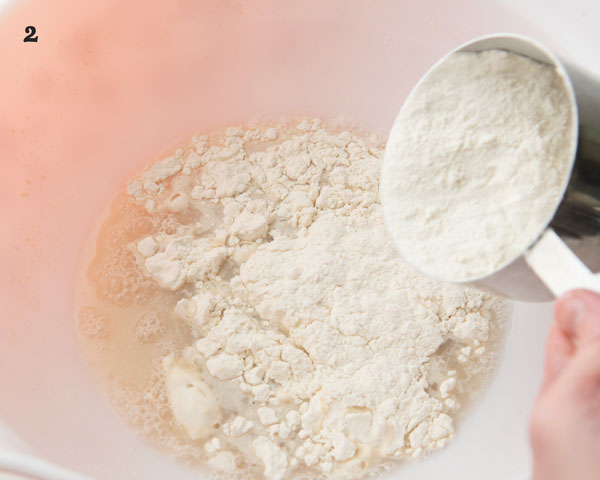
Dissolve the yeast and the honey in 1/2 cup lukewarm water and add a 1/2 cup of flour. Stir for about a minute in one direction with a wooden spoon. Cover the bowl with a piece of plastic wrap and set aside until the sponge is bubbly and active. An hour is ideal, but if you’re short on time, letting the sponge sit for 15 minutes is adequate.
Make the final dough
Add the olive oil and salt to the sponge, then add 1 3/4 cups of flour. Stir with a wooden spoon until the dough comes together.
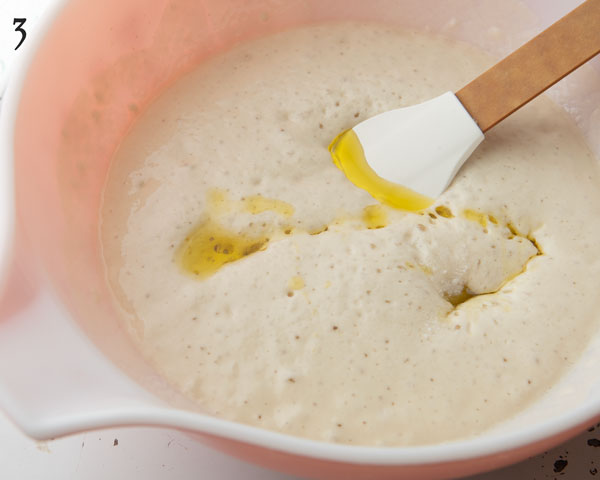
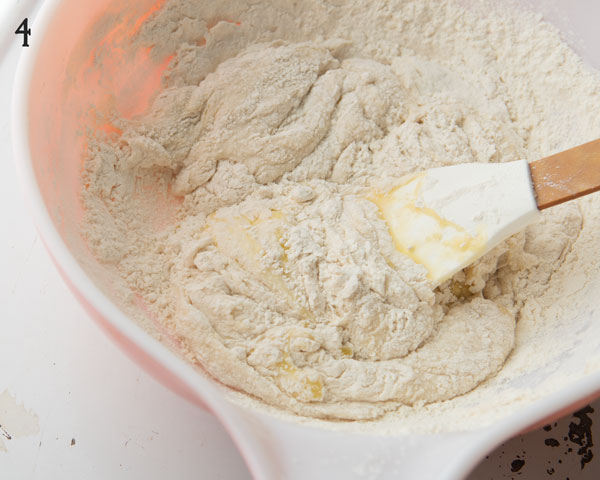
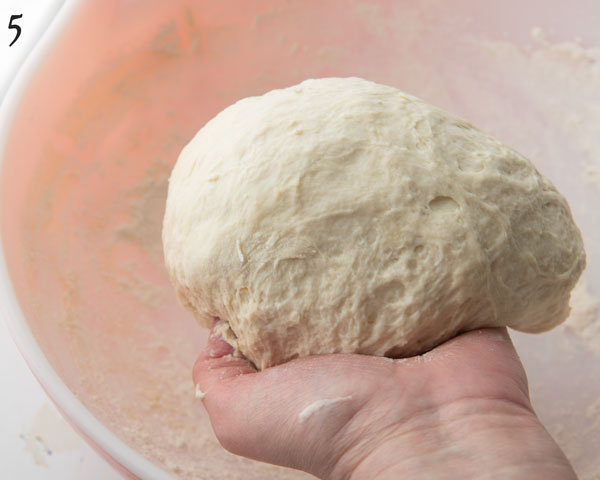
To knead it, fold the dough back over on itself inside the bowl, scooping from the bottom to the top of the dough in the center. Fold the dough over on itself in such a way for about 20 turns, until you have a smooth-ish soft dough. In the recipe below, I share an alternative more no-knead approach. What I’ve described here works equally well. The success of pita has more to do with the rolling technique and time than the kneading.
Cover the dough with plastic wrap and allow to rise in a warm place for about 1 hour.
Preshaping
Once the dough has doubled in bulk, use a bench scraper or a serrated knife to cut the pita dough into 8 roughly equal pieces. It’s okay if your pieces aren’t completely even in size.
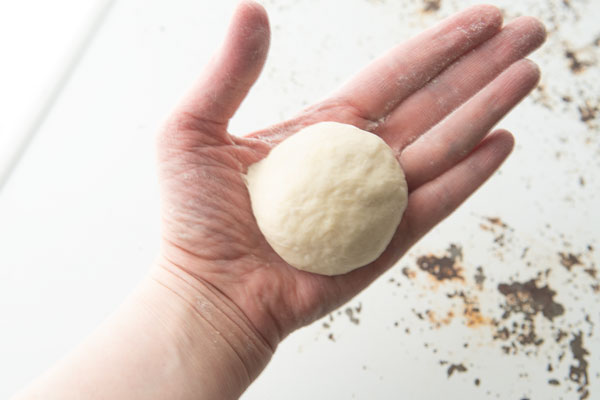
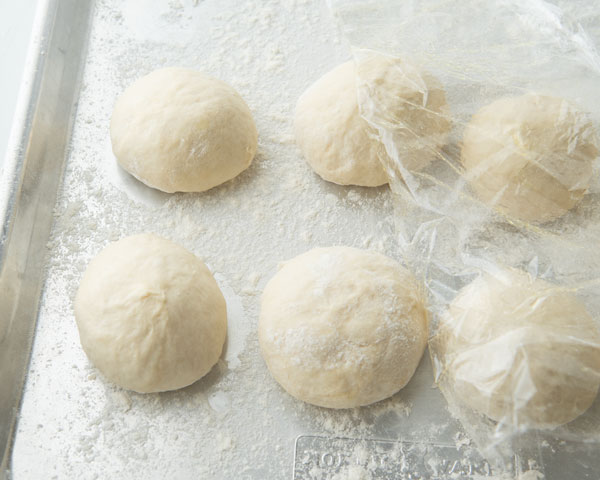
Liberally sprinkle flour on a clean work surface. Roll each piece through the flour, then roll it into a ball. To do this, make your hand into a dome shape, and roll the dough under your hand in a counterclockwise direction (or clockwise if that’s more comfortable for you).
Set each dough ball on a floured baking tray and cover with a damp kitchen towel. Allow the dough to rest at room temperature for about 10-15 minutes before proceeding.
Secrets to perfect homemade pita bread that puffs every time
If you have pita that doesn’t puff up, you are not a failure. Your homemade pita will still be delicious. That being said, learning how to make the pita puff takes a little practice and it’s not that hard if you keep a couple things in mind.
Homemade pita bread needs 4 things to inflate into a balloon when it bakes:
- Flour: extra flour helps you roll the pita without sticking to your work surface. If the dough sticks, it could get a small tear or hole which will prevent the pita from puffing.
- Good rolling technique: Only roll as far as the pita wants to roll, then stop. If you work too quickly on one piece of dough, you can tear the dough and then it will not puff. Let the dough relax for a minute as you work on another piece of dough. By going back and forth with two pieces of dough, you’ll give one a chance to rest before you finish the other. Also make sure that the dough doesn’t fold onto itself as you roll. This can make weird flat parts on your pita or stop the puff entirely.
- Time: After you roll the dough, the pitas need to rest for 10-15 minutes. This will give them time for the dough to rise, making it easier to puff up.
- Heat: Bake the pita on a scorching hot surface. When the cold dough hits the hot surface, it will immediately start to inflate just like a hot air balloon. If your cooking surface isn’t hot enough, it’ll be difficult for the dough to inflate. I’ll show you how to achieve this with a cast iron griddle (cast-iron pan works the same), an inverted baking tray, and a baking stone. They all work; what you choose is a matter of what works for you. The how is more important than the what!
Preheat your oven/cast-iron skillet/baking sheet
If you’re using a cast-iron pan or a cast-iron griddle, set it on your stove over medium-high heat. It’ll take about 5 minutes to preheat fully. If you see smoke coming off the surface in that time, lower the heat slightly. Medium low is about where I like my heat on my stove after the initial preheating.
If you’re baking in the oven, set your oven to the hottest setting. In most home ovens, that’s around 450 F (232 C).
If you have a pizza stone, set it in the oven as it preheats. By the time you’re finished rolling and resting the pieces of dough, it will be hot enough to bake on.
If you don’t have a cast iron pan or a pizza stone, no worries. Take a baking sheet and turn it upside down to heat up in the oven. It sounds weird, but it’s a great surface for baking pita.
Rolling the pita
Take two of your pieces of dough and set on a well floured surface. Be generous here; you want to make sure there’s enough flour so that the dough never has a chance to stick.
With a light hand, roll one piece of dough. Pick it up periodically and turn it. This will make sure that it’s not sticking and it’ll also help it become more more round dough circle. When it feels like the dough won’t roll any further, stop.
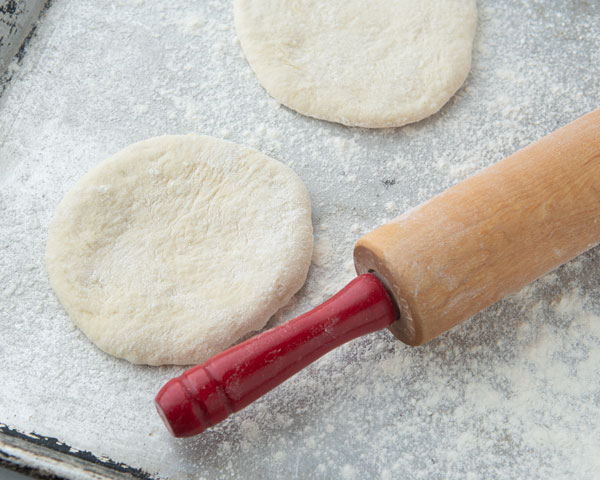
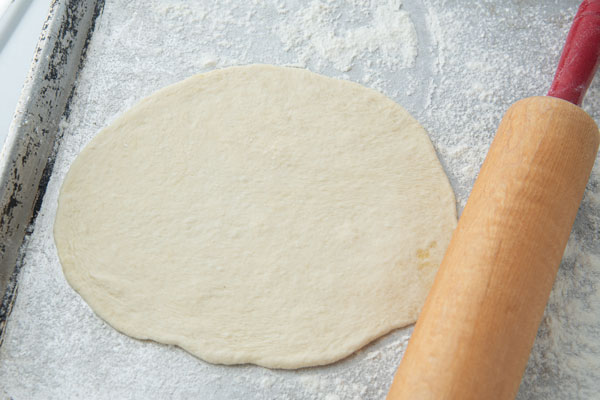
Repeat with the second piece of dough. When you feel that resistance, stop, and switch back to the first piece of dough.
Go back and forth between the two doughs until each piece is very thin and about the size of a small plate. Set these pieces of dough on a floured surface and cover with a clean kitchen towel. Lightly spray some water on the top of the towel.
Repeat the rolling process with all the pieces of dough. Pay attention to the order you rolled them in; you’ll want to bake them in the same order. This’ll let the pitas rise before they bake which will also help them puff.
Bake the pita
Oven baking (pizza stone or hot baking tray)
Whatever your baking surface, you’ll need to pick up the pita and place it on the cooking surface. If you have a pizza peel, add some flour to it, then place the pita on it to slide into the oven.
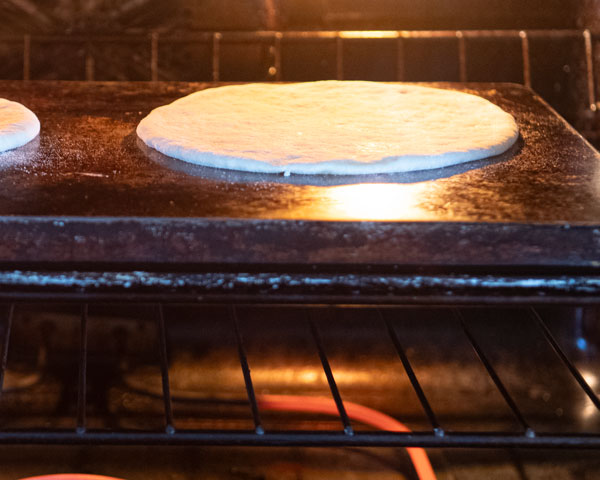
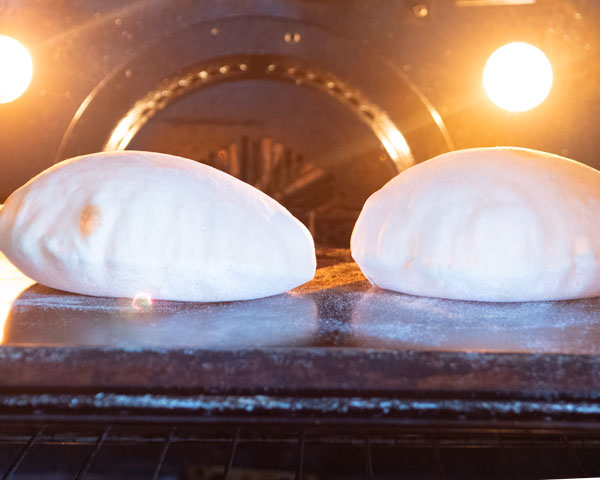
Do not use parchment paper here as it will burn at such high temperatures.
If you don’t have a pizza peel, flip a sheet tray upside down. Sprinkle on some flour, then you can slide the breads onto the hot tray in the oven or the pizza stone.
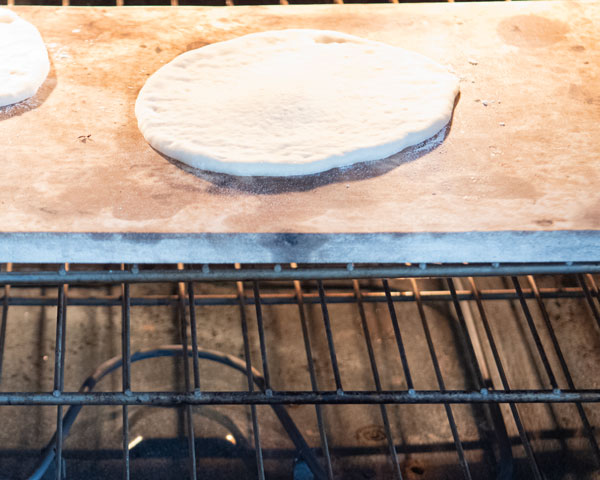
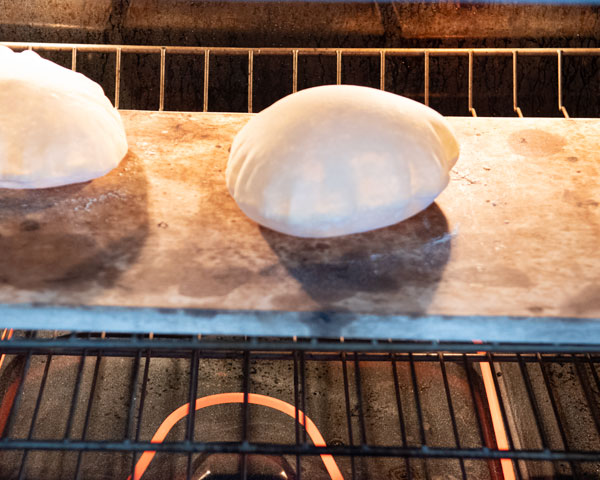
Bake for 4 minutes. Pull them out of the oven with a long spatula and wrap the hot breads in a clean kitchen towel.
Cast Iron Griddle/Cast-iron pan:
On a griddle, simply lift the bread off the counter and place it on the hot griddle (or cast-iron pan).
Cook 1 minute on the first side. You should see some bubbles on the surface. Flip it over to the second side with a spatula. You’ll notice some light golden brown spots on top. Sometimes the pita will inflate on the first side, and sometimes on the second side. Just watch it.
Since the griddle’s hot surface doesn’t have the hot air surrounding it like the oven, you may need to press down on the pita so that both sides of the bread cook evenly. This might mean that you have to deflate your awesome balloon. Boo. I know. You can see in the last picture how the inflated pita got a lot more color on the bottom but not the edges of that side. That’s because that’s where the dough hit the heat.
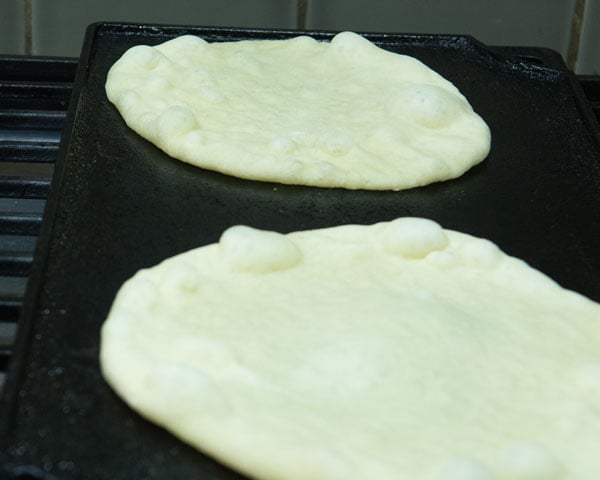
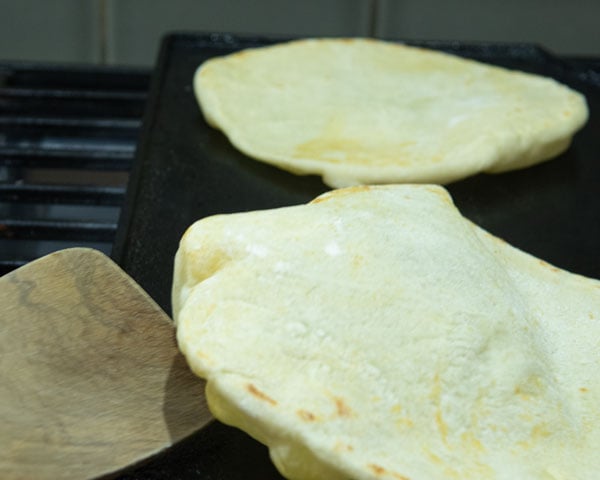
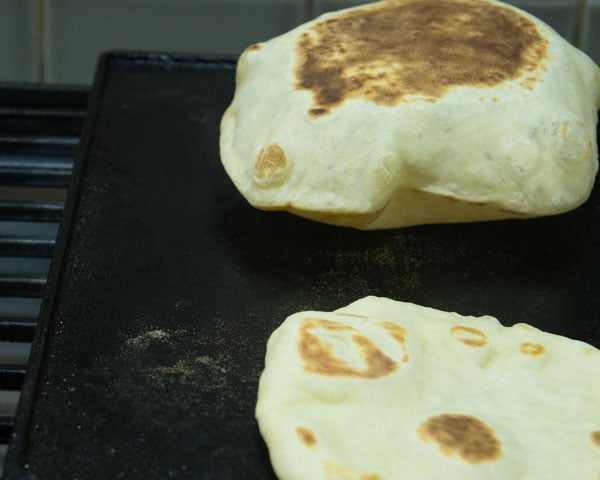
After about 2 more minutes, the griddled pita should be done. You’ll know they’re done because both sides will have light golden spots and the surface will be dry.
Finish the breads
Wrap hot breads in a kitchen towel as you finish cooking them.
Finish off by brushing off any excess flour from your breads with a pastry brush.
Ways to use your pita
Enjoy your pita with anything Mediterranean. In my house, we love it chicken souvlaki or gyro meat. My Mom never skips the feta cheese. It’s also great tearing off chunks to dip in things like hummus or soup. Slice it open to make an easy sandwich. Now that you know how to make your homemade pita bread puff up, you’ll have the perfect pita pocket sandwich in no time.
Make cheeseburger pizzas: using pita as a base, you can make pizza in almost no time.
You can freeze any leftover pita in an airtight ziploc for up to 3 months.
Print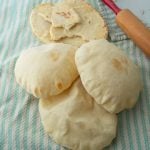
No Fail Pita Bread
- Total Time: 2 hours 8 minutes
- Yield: 8 large pita breads 1x
Description
This soft fluffy homemade pita is 1000% better than its cardboard facsimile you can buy. It will disappear in your home at an alarming rate.
Ingredients
Sponge starter
- 1/2 tsp instant yeast or active dry yeast
- 1/2 cup warm water
- 1/2 cup all-purpose flour
- 1 tsp honey
Final dough
- All of the sponge starter
- 1/2 cup warm water
- 2 tablespoons olive oil
- 1 and 3/4 cups all-purpose flour
- 1/2 tsp salt
- extra flour for rolling
Instructions
- 2 hours to overnight ahead of time: mix all of the sponge ingredients together in a small bowl into a thick paste. Allow to sit at least 2 hours, though you’ll get the best results by covering the bowl and refrigerating overnight. (See note below if you’re short on time.).
- Uncover the risen sponge. It should be extremely active with many bubbles on the surface, and it will have a light sour smell to it if it’s been in the fridge overnight.
- Scrape the sponge into a larger bowl, then pour in the 1/2 cup of water and 2 tablespoons of oil. Form your hand into a claw and break up the sponge in the extra liquid.
- Add in the 1 and 3/4 cups of flour and the 1/2 tsp of salt. Stir to form a rough dough, then briefly knead the dough until it’s roughly smooth.
- Drizzle a little additional oil on the dough, then cover it to rise until double in bulk, about 1 hour.
- Folds: During the hour rising time, scoop under the dough with an oiled hand and and fold it back in on itself 3 or 4 times. Do this twice during the rising time.
- Pizza stone directions: If you’re using a pizza stone, heat up your oven now while the dough is rising to 450F with the stone inside your oven.
- Divide the risen dough into 8 pieces.
- Roll each piece into a ball: On a lightly floured surface, make your palm into a dome shape with a piece of dough resting in the center of the dome. Use the tension on the counter and a circular motion to form the dough into a smooth ball. Set the balls on a well-floured surface, then cover and allow to rest for 10 minutes.
- Rolling pita: Keep a small cup or bowl of flour handy. You need to be liberal with flour here to get pitas that will inflate reliably. (If they don’t, they’ll still be delicious, but the pita balloon is one of the fun things about making pita!). Flour your surface well, then use a small rolling pin to roll out one ball. Lift the dough periodically to make sure it’s not sticking to your counter. When the dough starts resisting, move on to another piece of dough. Work back and forth between 2 or 3 pieces of dough at a time, rolling until the dough starts resisting rolling any further. The goal is to get a pita that’s about 8″ across. Once you’ve achieved this, set the rolled pita on a floured surface and cover with a towel. Spray the top of the towel with water lightly to keep the dough from drying out (alternatively, cover with oiled plastic wrap). Keep rolling pitas until you’ve rolled them all. Let pitas rest for 15 minutes before baking (that’ll be about 5-10 minutes after you finish rolling the last pitas).
- Pizza stone baking: if you’re using a pizza stone, you should have already heated it up per step #7. If using a pizza stone, flour a pizza peel, then slide rested breads on to the hot stone to bake for 5 minutes. Flip over the pita about half way through baking.
- Hot sheet tray baking: if you don’t have a pizza stone, heat up a heavy sheet tray upside down in a 450 oven for about 10 minutes. Bake the breads from here as you would with a pizza stone.
- Cast iron pan or griddle baking: Heat up a cast iron pan or griddle on your stove over medium heat for 5 minutes. If it starts smoking, lower your heat slightly. Use your hands to transfer breads to the hot pan. Bake on the first side for about 1 minute until the top looks slightly dry. Flip over, and bake for another 1-2 minutes. You can keep flipping every 30 seconds or so in this time to encourage the pita to inflate. If you see black spots, lower your heat.
- Towel wrap: Stack and wrap finished pitas in a clean kitchen towel to keep them warm and from drying out. Brush off any excess flour. Eat immediately.
Notes
- A pita that inflates requires 4 things: 1. A HOT surface to bake on (pizza stone, hot sheet tray, cast iron skillet or griddle), 2. Extra flour to keep it from sticking to your work surface, and 3. The dough can’t fold on itself during rolling or cooking. 4. (the most important): time to rest once you’ve rolled out the dough. This gives the yeast a little more time to work. I find 10-15 minutes to be about the perfect amount of time to let the yeast work without taking too much extra time.
- Short on time? You can skip the sponge starter step by combining all of the sponge ingredients with the final dough if you are short on time. If you do this, increase the yeast to 2 tsp.
- Flour substitute: I love using Italian 00 flour sometimes instead of the all-purpose. The dough tends to be stretchier and oh so wood fired pizza like. I get mine from Central Milling.
- Taste for salt: I used to make this dough much saltier until I spent time in Perugia in the Umbria region of Italy where their flatbread of choice is saltless. There’s some interesting history in why they do that, but the basic idea is that if you’re eating your bread with savory, salty things, why add more salt? Since then, I tend to use less salt in my pita, though it tastes a little too flat to eat it like an Umbrian! If my salt amount tastes too flat to YOU, you can increase the total salt in the recipe to 1 tsp.
- Flat pitas still taste good: Don’t get discouraged if your first few attempts at getting puffy pitas fail. Flat pitas are still delicious. Pita is a dough with its own DNA just like other unique doughs. Over time, your hands will get a feel for how to work it.
- Prep Time: 5 minutes
- Additional Time: 2 hours
- Cook Time: 3 minutes
- Category: Breads
Nutrition
- Serving Size: 1 pita
- Calories: 162
- Sugar: .81
- Sodium: 147
- Saturated Fat: .54
- Carbohydrates: 27
- Fiber: 1
- Protein: 3
What are your favorite things to eat with your pita?
-
Quick Easter Brownies perfect for your Easter lunch
bakingwithtradition.com is a participant in the Amazon Services LLC Associates Program, an affiliate advertising program…
-
Cashew butter cookies (date-sweetened) for the perfect after school snack
bakingwithtradition.com is a participant in the Amazon Services LLC Associates Program, an affiliate advertising program…
-
Homemade hot dog buns are a cinch to make yourself and loads better
bakingwithtradition.com is a participant in the Amazon Services LLC Associates Program, an affiliate advertising program…
-
Pillow soft chocolate sandwich cookies for a happy fridge
bakingwithtradition.com is a participant in the Amazon Services LLC Associates Program, an affiliate advertising program…
-
The best krautburgers: a full meal in your hand for happy families
bakingwithtradition.com is a participant in the Amazon Services LLC Associates Program, an affiliate advertising program…
-
Deli Rye Pan Buns for the most perfect Reuben sliders
bakingwithtradition.com is a participant in the Amazon Services LLC Associates Program, an affiliate advertising program…

