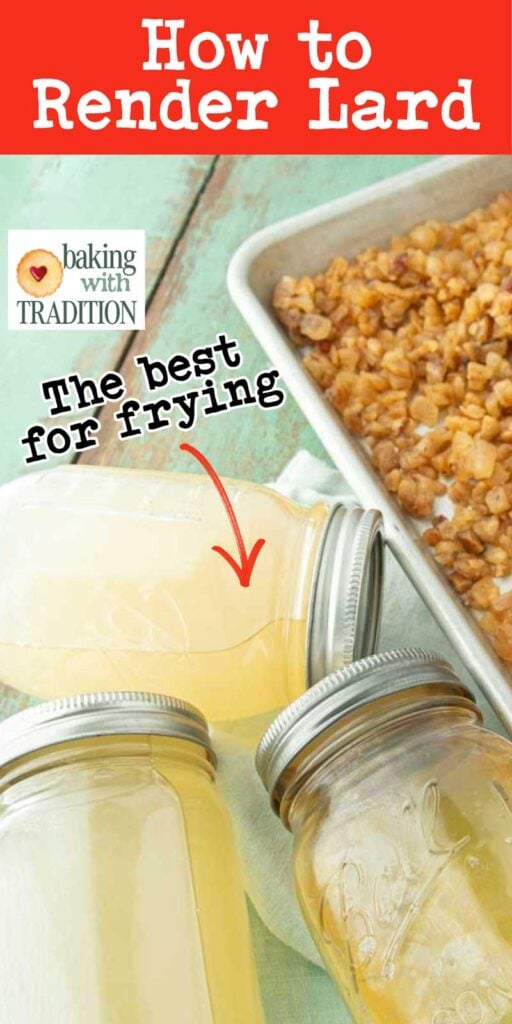
How to render lard: old-fashioned better fat
bakingwithtradition.com is a participant in the Amazon Services LLC Associates Program, an affiliate advertising program designed to provide a way for websites to earn advertising revenues by advertising and linking to recommended products. Some of the links below are affiliate links. This means that, at zero cost to you, I will earn an affiliate commission if you click through the link and finalize a purchase.
Today I’m going to show you how to render lard.

If that sounds like watching paint dry, I’m here to convince you otherwise. My grandmothers knew how to do this as did probably yours. Fresh lard used to be a necessity, born out of not wanting to waste anything. At some point though we forgot about these simple things and replaced them with industrial equivalents.
I’m always looking for ways to eat closer to the source because I think doing so is fundamentally better for us. Making your own lard at home is an easy, affordable way to do just that. Plus you’ll rack up some farm girl points, and that’s always a good thing.
Let’s render some lard!
How to render lard

What is lard and why lard fell out of favor
Once upon forever people have been using lard. Lard is just pig fat melted down into a solid fat not unlike butter in consistency.
It has always been prized for its neutral flavor, the flakiness that it contributes to baked goods, and its high smoke point for frying. We all know about the magical flavor of bacon fat, lard’s smoky cousin that makes everything taste better!
In the 20th century, lard and butter to a lesser extent went through times of being vilified. Concerns over saturated fats and heart disease drove people to demonize lard and butter and praise vegetable oils.
Still, it’s never made sense to me why a highly processed, chemically treated product such as vegetable oil could even possibly be better for you than something that you literally chopped up and melted. While consuming a little canola oil is probably not going to wreck your life, it’s also likely that animal fats like butter, lard, and tallow are not as unhealthy as we’ve been led to believe.

Traditional fats vs. industrial seed oils
In America, we’re going through a food Renaissance of sorts where people are asking good questions about where and how our food is made. Just because you can ship an apple 1000 miles doesn’t mean that you should. We all know that apple will taste better you picked it yourself off the tree in your backyard.
Considering lard and its place in history is something more and more people are doing.
To make seed oils, seeds like soybean, rapeseed (canola), sunflower, safflower etc often undergo chemical extraction with hexane and processing with high heats that damage their vitamin levels. Deodorization processes might also occur. Everything it takes to get from a plant growing in a field to a bottle on your table requires industrial processes.
In contrast, making butter requires you to beat heavy cream until it solidifies. Likewise lard are tallow are made by simply melting them from chunks of fat. That’s it.
Any time that you can cut out chemicals in your life, you should be doing that. As such, I truly believe that the simplicity of lard that allows us to eat closer to the source makes it worthy a try.
I do my absolute best on Baking With Tradition to avoid using oils in general. When I do use them, I use unrefined coconut oil and extra virgin olive oil–two things far less processed.
My personal experience with using lard over seed oils
- Frying: A couple times a year I fry things. We make schnitzel, we have our annual apple fritter fest, and in February, I make paczki (Polish donuts) for Fat Thursday. I used to exclusively use canola oil. Back when I was a kid, my Mom would fry apple fritters in Crisco (essential hydrogenated soybean oil). Universally, I would feel terrible eating these things. I experienced huge sugar crashes and my face felt like it was on fire. When I switched over to frying in lard, I did not feel that “blech, I just ate a donut” feeling. Oddly too, I’ve found that I can eat just one fritter and feel totally satisfied.
- Perfect strudel: Strudel dough is special. It uses a very small amount of fat in this very unique unyeasted dough that you pull into a paper thin pastry. Many recipes use oil or butter, but almost since I learned how to make strudel I’ve been using lard. It makes for the more supple possible dough, making it easy to stretch with very little chance of getting holes. Keeping holes out of your strudel dough is always a goal! Both butter and oil do okay, but after testing this over years of practice, lard is simply better.
- Flaky lightness: Pie makers have always known that lard makes for an extra flaky pastry. While it doesn’t have the flavor of butter, the flakiness is truly wonderful. Carol Field in The Italian Baker recommends a small amount of lard in her Neapolitan pizza crust. Just like with my strudel, this seemingly insignificant amount of lard makes for a noticeably lighter and crunchier crust in her recipe.
Quality matters: where to find the best fat for lard
Skip the grocery shelf (worst choice): while it’s true that you can get lard in the baking aisle in paper wrapped packages, shelf stable lard has undergone hydrogenation. It’s basically animal Crisco. While I don’t worry about eating a little of this once in a while, it’s still more processed than my own homemade lard.
Butcher (decent choice): For years I would get my pork fat from the butcher at our local Asian market. It was always good quality back fat that made good lard, and it was 99 cents a pound! The only downside is that I had no way of knowing how that pig was raised. Talk to your butcher about where they’re getting their fat from. You might do better than I could here.
Jarred lard (good choice): jarred lard made by companies like Fatworks or Epic are made from pastured pork. “Pastured pork” is what you want to look for in getting your fat for lard. Pastured pigs hang out outside, eating what pigs should be eating and getting more vitamin D. Happy pigs make for healthier for you lard. The only downside to jarred lard is the price; it’s much much cheaper to render lard yourself.
Find a farmer (best option): Google “pastured pork ________(fill in the blank where you live). I’m lucky to live within easy driving distance of any number of small family farms where I can get pastured pork fat for lard. If you do not, it’s probably likely that you live closer to a pig farmer than you think. I’ve found it’s significantly cheaper to buy pig fat locally.
What you’ll need to render your own lard
- Pork fat: either pork back fat (probably the most common) or leaf lard (from around the loins and kidneys).
- Crockpot: a slow cooker is ideal for rendering lard. The low temperature makes for the cleanest, less smelly lard.
- Sharp knife: you’ll be cubing up a lot of fat. I use my 10″ chef’s knife here after a fresh sharpening for easy cutting.
- Food gloves (optional, but so helpful): food gloves are so helpful when you’re cutting the fat as they help you get a better grip on your knife, which can get slippery with the fat.
- Strainer: for straining out the cooked cracklings from the lard.
- Bowl or glass measuring cup: strain the lard into one or the other.
- Pint Mason jars: the easiest thing to store your lard in.
Homemade Lard
- Total Time: about 6 hours
- Yield: about 5 cups 1x
Description
Fresh pork lard is a perfect fat to have on hand for pastries, frying, and cooking in general. That it’s easy to make is a bonus!
Ingredients
-
3 lbs pork fat (either pork back fat or leaf lard, taken from around the loin and kidneys of the pig)
Instructions
- Freeze the lard for about 1 hour before you want to start rendering your lard.
- If your lard is already frozen, set it out for about 1 hour before cutting it up. Partially frozen lard is much easier to work with! If you have them, wearing food gloves will keep your knife from slipping around.
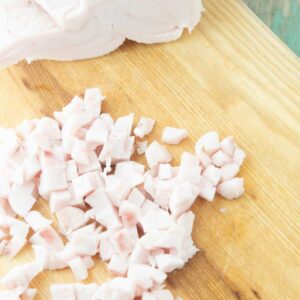
- Cut the lard into slices a little less than 1/2” thick. Cut down the slices into cubes that are about the same size as the thickness of the slices. This will take a while. If you have an extra family member, pass him a knife!
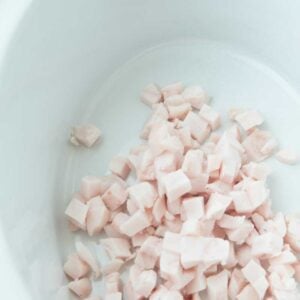
- Turn your slow cooker on high. Place the fat in the slow cooker.
 Cook for about 2 hours, stirring periodically. When you start seeing bubbles around the edges, lower the heat to low.
 - Cook for another 2 hours on low.
- When you start seeing the fat pieces floating freely in fat in the bottom of the slow cooker, it’s time to start straining the lard. Scoop out the floating pieces of fat and the liquid into a strainer set over a liquid measuring cup. Press on the fat pieces with a spoon to get the most lard into the cup.
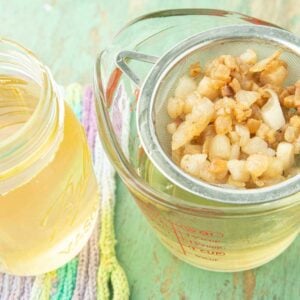 Return the fat pieces to the slow cooker. Continue to strain the fat until there is little fat left in the slow cooker.
 - Keep cooking the fat pieces until they are lightly golden and crispy. This will take about another hour. At this point, strain the rest of the fat pieces into the strainer.
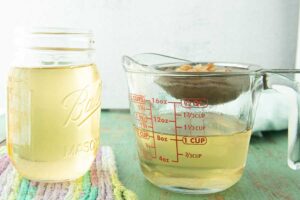
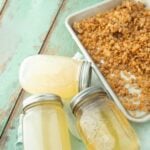
- Pour the liquid lard into pint Mason jars. Let them cool on the counter. When the jars are no longer hot, place them in the fridge. You can also freeze lard for longer storage.
- Sprinkle the cracklings with salt. They’re crunchy little bits of deliciousness that are great on salad or as a low carb snack on their own.
Notes
Can I make more at a time: You bet! I always peter out after cutting 3 lbs of fat because it hurts my hand! If you’re sturdier than me, you can make as much lard at a time as you have slow cookers and will power enough to do.
Can I bake this?: Absolutely! I used to render my lard this way. Use a glass Pyrex 9×13 pan. Bake at 250 F, stirring the pieces every 30 minutes or so. Be careful with this method as the fat pieces like to stick on the bottom of the pan.
- Prep Time: 30 minutes
- Cook Time: 5 hours
- Category: Baking building blocks
- Method: Slow cooker
- Cuisine: American
Nutrition
- Serving Size: 1 tablespoon
- Calories: 130
- Sugar: 0
- Sodium: 0
- Fat: 14
- Saturated Fat: 4.5
- Unsaturated Fat: 0
- Trans Fat: 0
- Carbohydrates: 0
- Fiber: 0
- Protein: 0
- Cholesterol: 15