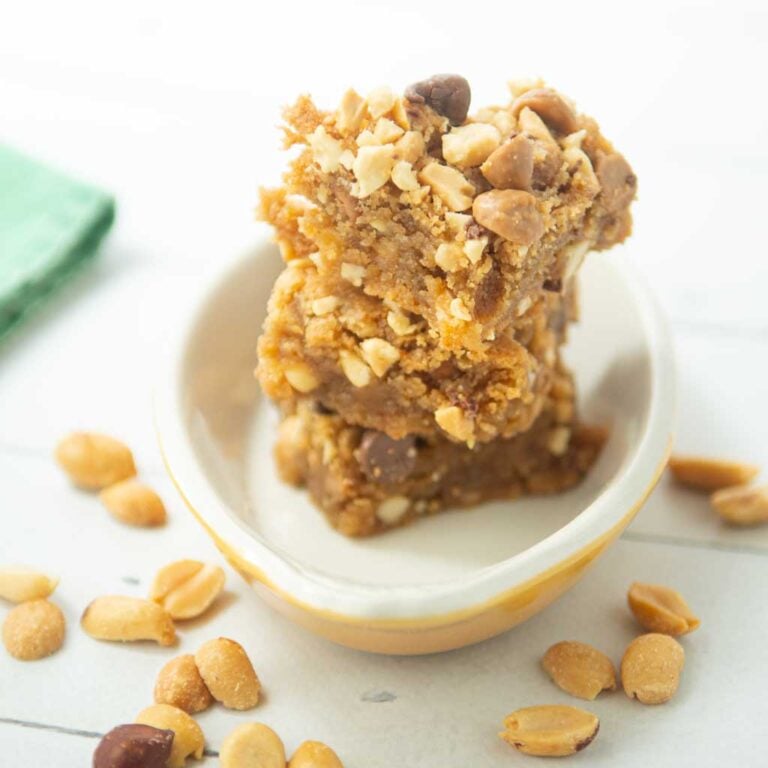
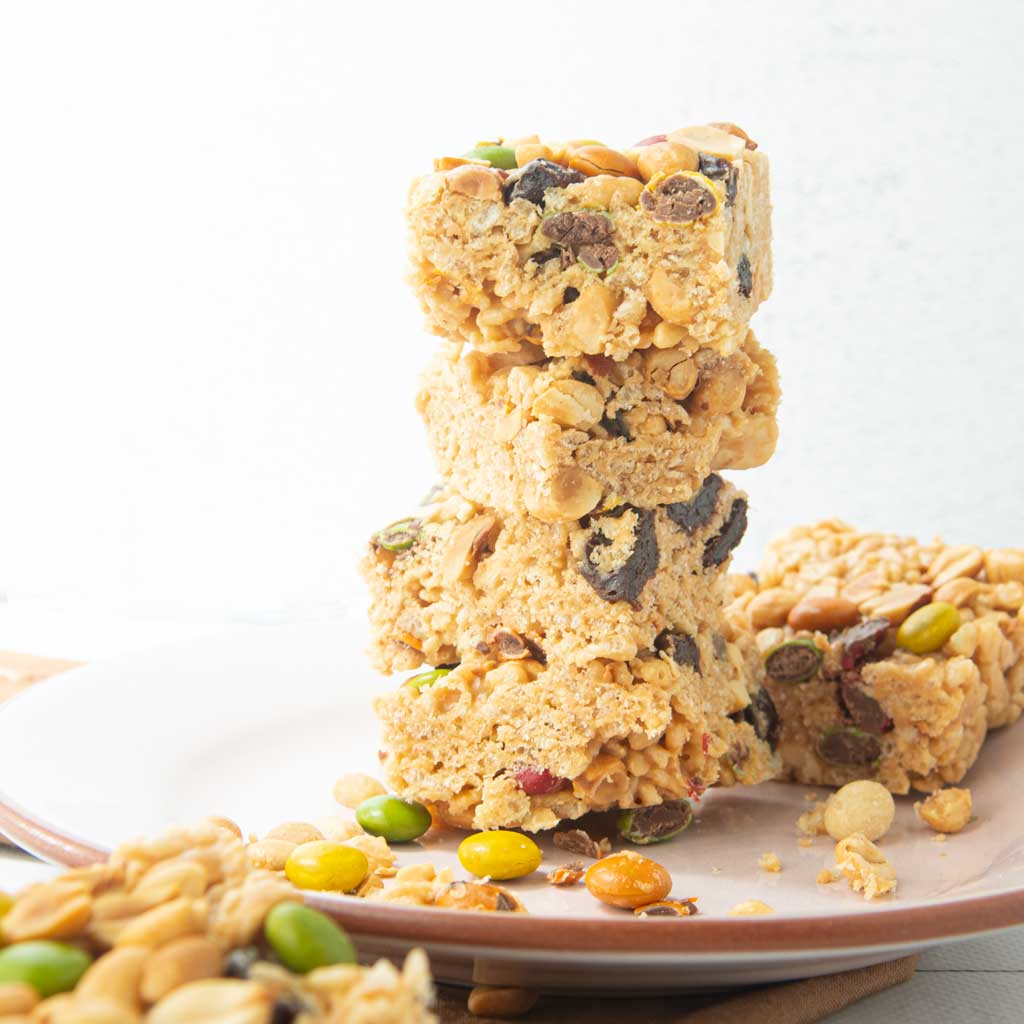
Peanut Butter Rice Krispie Treats are your favorite but better
bakingwithtradition.com is a participant in the Amazon Services LLC Associates Program, an affiliate advertising program designed to provide a way for websites to earn advertising revenues by advertising and linking to recommended products. Some of the links below are affiliate links. This means that, at zero cost to you, I will earn an affiliate commission if you click through the link and finalize a purchase.
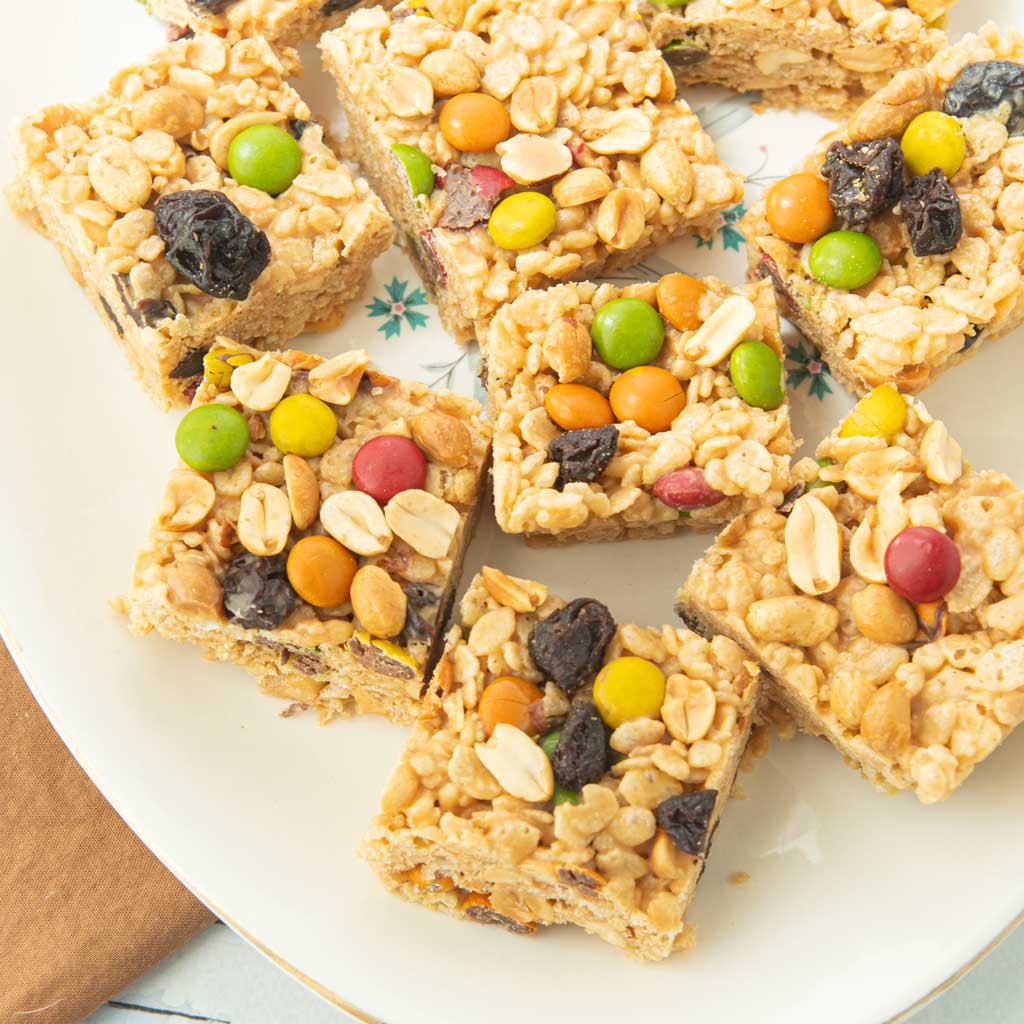
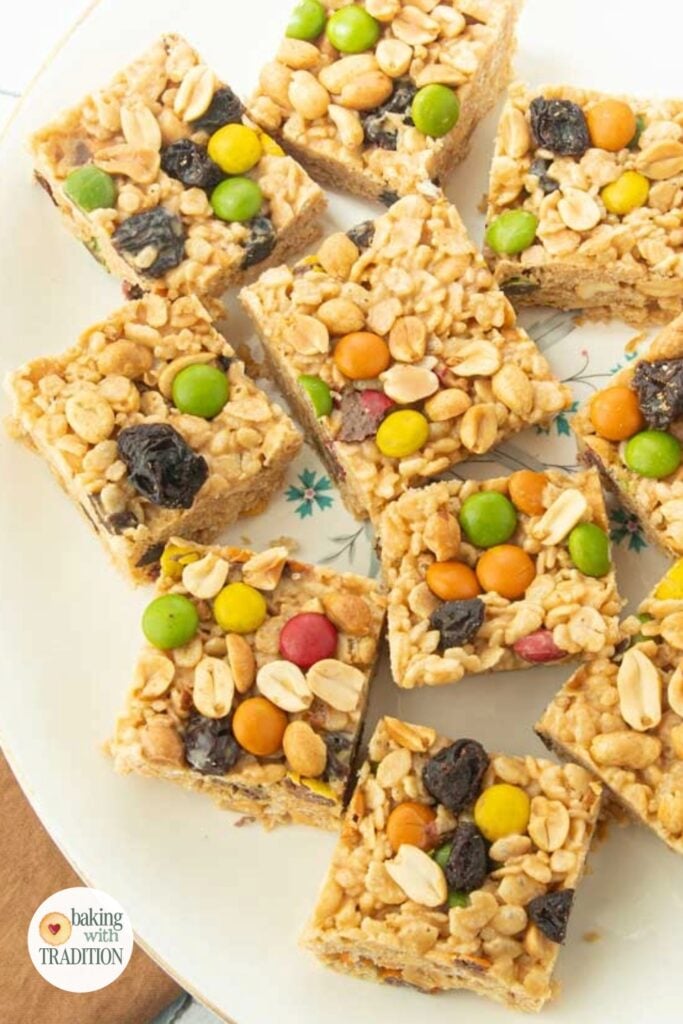
Peanut butter rice krispie treats are everything you love about classic rice krispie treats–that marshmallowy pull apart goodness and crispy chewy texture but made better with the addition of peanut butter and trail mix.
My aunt has always made Special K bars. If you’ve never had them, Special K bars take a peanut butter, corn syrup goo and pour it over Special K cereal. Then you cover the whole thing with chocolate chips and spread the chocolate as it melts. These bars are so darn tasty, but I, like you don’t usually keep corn syrup on hand.
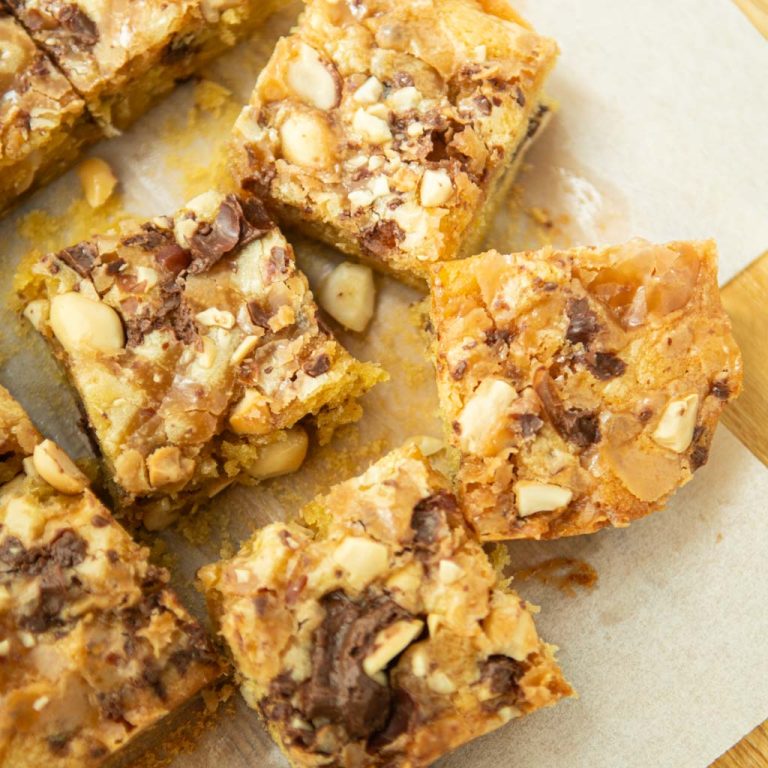
In this version, you get the best of both worlds with the creamy peanut butter and that satisfying marshmallow gooeyness. I’ll warn you now, just like with my peanut butter blondies, you want to make a batch of these bars when other people are around to help you eat them. They are diet busting good!

Peanut Butter Rice Krispie Treats

Why peanut butter rice krispie bars are better than regular ones
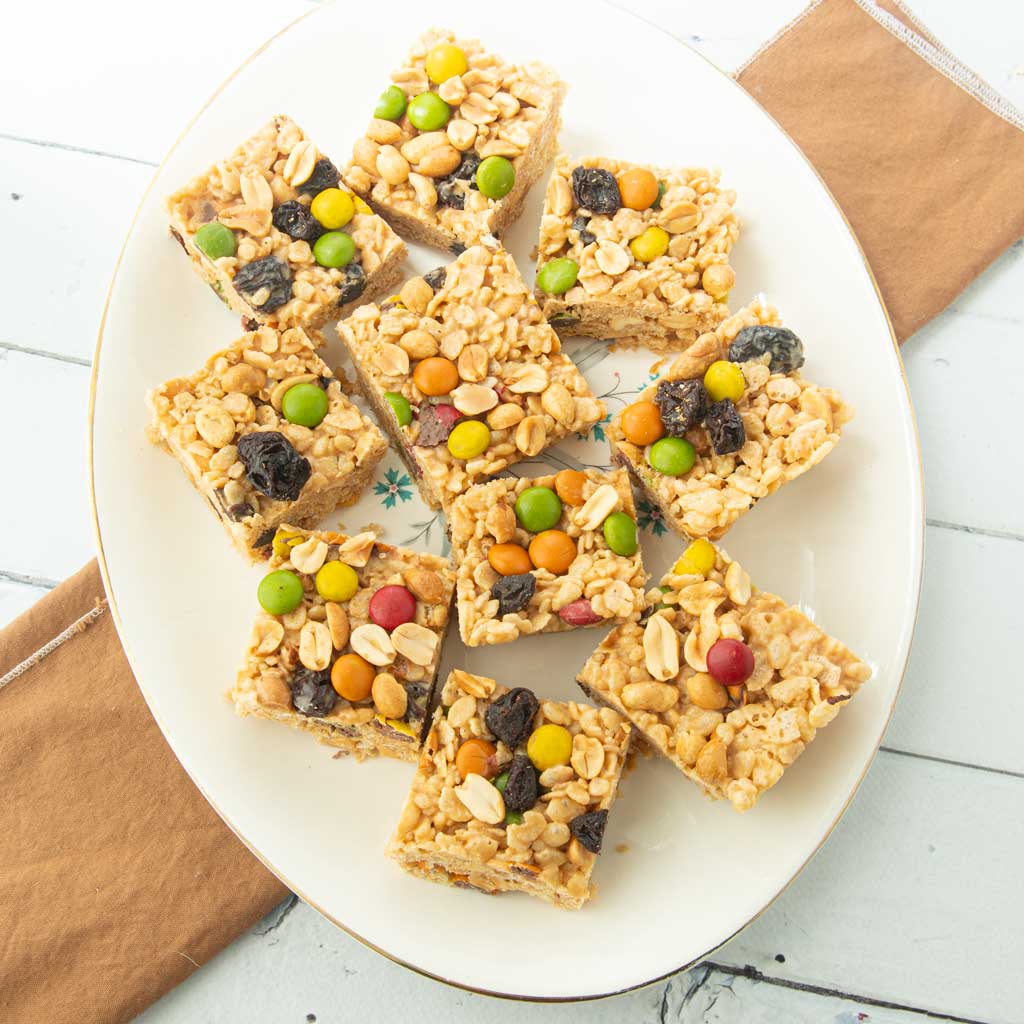
- Extra flavor and texture: between the added G.O.R.P. (good old raisins and peanuts) trail mix and the peanut butter, you’ve got extra layers of flavor and texture that make these both tastier and prettier than normal rice krispie bars.
- Bake sale heroes: These bars are just pretty! Package them up in cellophane bags, and they’ll sell out immediately in a bake sale. Our neighborhood has a yearly garage sale, and my boys drive cookies around while people are shopping, and these bars are always a consistent winner. People love knowing what they’ll get in a cereal treat bar, and when it’s got a delicious little twist, you’ll win them over.
- “Rice krispie treats are too bland”: says Son #3. He likes the added flavor of the peanut butter, which he feels like cuts the pure sweetness of marshmallows a bit.
Ingredients for Peanut Butter Rice Krispie Bars
- Mini marshmallows
- Smooth peanut butter: I’m using Skippy, but Jif is good too. Don’t use natural peanut butter as it doesn’t melt as well.
- Butter
- Vanilla paste (optional)
- Rice Krispie cereal (160 g)
- Trail mix with peanuts, raisins, and M&Ms
Other things you could add to peanut butter cereal treats
- Use a different cereal: Chex, Special K, Cheerios, or something trashier like cocoa krispies would all be good here.
- Mix in something besides trail mix: chocolate chips, whole marshmallows, chopped up Twix or other chocolate candy would be good. Leftover Halloween candy is always an issue in our house, so I love having options of ways to reinvent it.
- Add a topping: melted chocolate poured over the top of the bars is gilding the lily here. This will get you closer to that classic Special K bar taste.
- Add sprinkles: sprinkles make everything prettier with no added effort. I keep seasonal sprinkles all the time because my students love adding them to things.
How to make the best peanut butter rice krispie treats

- Cover the marshmallows: as you’re melting the marshmallows with the butter and peanut butter, cover the pan with a lid. This will help the heat transfer to the top side of the marshmallows before the bottom side burns.
- Keep your heat low: as fun as it is to burn marshmallows when you’re making s’mores, the taste is no good here. Worse yet, burned marshmallows won’t coat the cereal well enough for it to stick together into perfect cereal treat bars. Low heat = perfect marshmallows.
- Weigh your peanut butter: Cleaning up a measuring cup after digging your hand into the bottom of a Costco sized peanut butter jar to then load up your measuring cup is 0% fun. At some point, I got smart and multiplied out the gram weight of peanut butter, and I will never look back. Put the pan you’re melting the marshmallows in on top of your gram scale and scoop in the peanut butter.
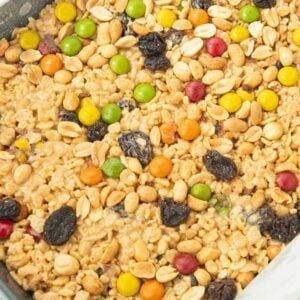
- Save some trail mix for the top: Do mix in the trail mix with the cereal, but save some for decorating the top. Rice krispies are kind of boring looking on their own, so make your bars look better by putting the colorful bits on top.
Peanut Butter Rice Krispie Treats
- Total Time: 10 minutes + about an hour to set
- Yield: 24 bars 1x
Description
These are rice krispie bars for peanut butter lovers chock full of extra peanuts from trail mix. Best thing is that these bars can be made in about 10 minutes flat. If you love a fluffernutter sandwich, you will LOVE these bars.
Ingredients
- Cooking spray
- 10 oz mini marshmallows (283 g)
- 1 cup smooth peanut butter (256 g)
- 1 stick butter (113 g)
- 1 teaspoon vanilla paste (optional)
- 6 cups Rice Krispie cereal (160 g)
- 1 pound trail mix with peanuts, raisins, and M&Ms (454 g)
Instructions
- Spritz a 9 x 13 pan with a little cooking spray. Then line the pan with a sheet of parchment that covers the bottom and extends up the long sides of the pan.
- Melt the butter, peanut butter, and marshmallows in a large skillet over low heat, stirring occasionally.
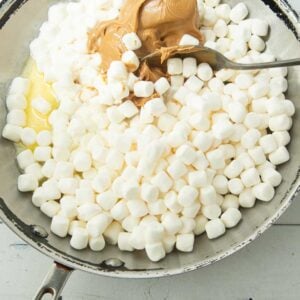 It’s important to keep the heat low so that the marshmallows don’t burn. Cover the pan with a lid or a sheet tray to help melt the marshmallows a little more efficiently.
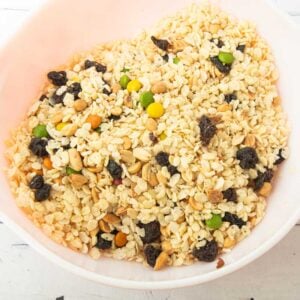
 - Spritz a large bowl with a little cooking spray. Mix the cereal with the trail mix, saving a couple handfuls of trail mix for decorating the top later.
- Once the marshmallows can be stirred into the melted goo smoothly, turn off the heat.
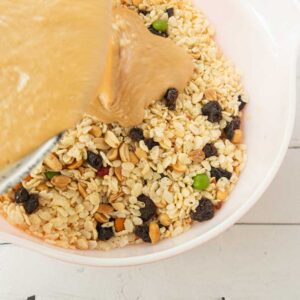
- Pour the melted goo over the cereal and mix with a baking spatula until everything is well coated.
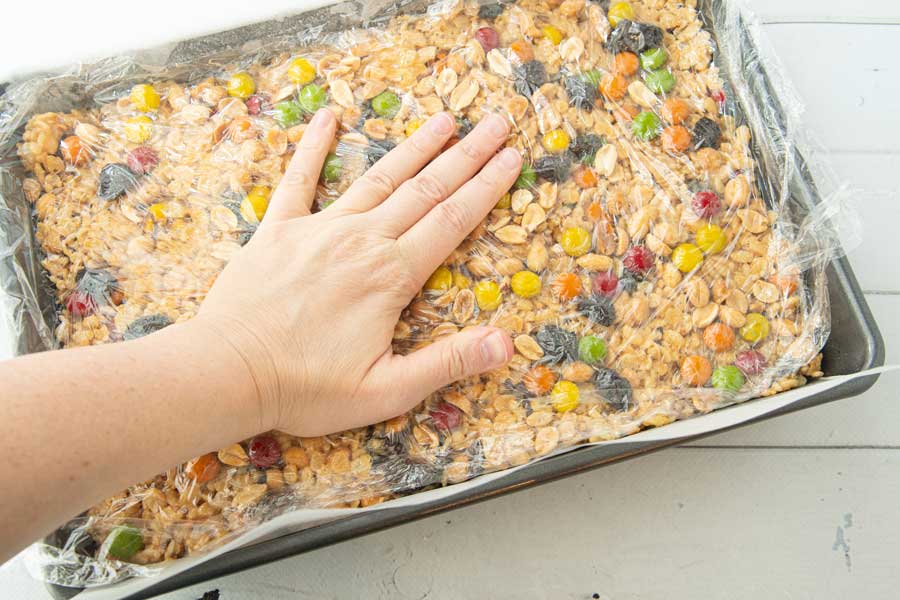
- Quickly scrape the coated cereal into the 9 x 13.
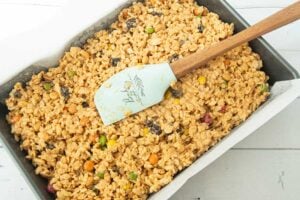 Smooth the mixture into the pan as best you can, and then take a piece of plastic wrap, placing it on top of the bars. Scatter the rest of the trail mix over the top of the bars. Press with your hands to smooth and press the bars into the pan until they’re well packed and the extra trail mix is sticking to the top.
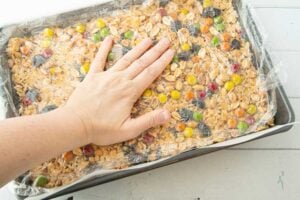
- Let the bars cool and set for about an hour or as long as you can stand it.

- Cut the cooled bars into 24 pieces. Store the bars at room temperature for up to a couple days in an airtight container.


- Prep Time: 10 minutes
- Category: Bar Cookies
- Method: Stovetop
- Cuisine: American
Nutrition
- Serving Size: 1 bar
- Calories: 217
- Sugar: 9
- Sodium: 145
- Fat: 10
- Saturated Fat: 4
- Unsaturated Fat: 0
- Trans Fat: 0
- Carbohydrates: 33
- Fiber: 2
- Protein: 4
- Cholesterol: 10