Easy vegan caramel sauce (gluten free with coconut)
bakingwithtradition.com is a participant in the Amazon Services LLC Associates Program, an affiliate advertising program designed to provide a way for websites to earn advertising revenues by advertising and linking to recommended products. Some of the links below are affiliate links. This means that, at zero cost to you, I will earn an affiliate commission if you click through the link and finalize a purchase.
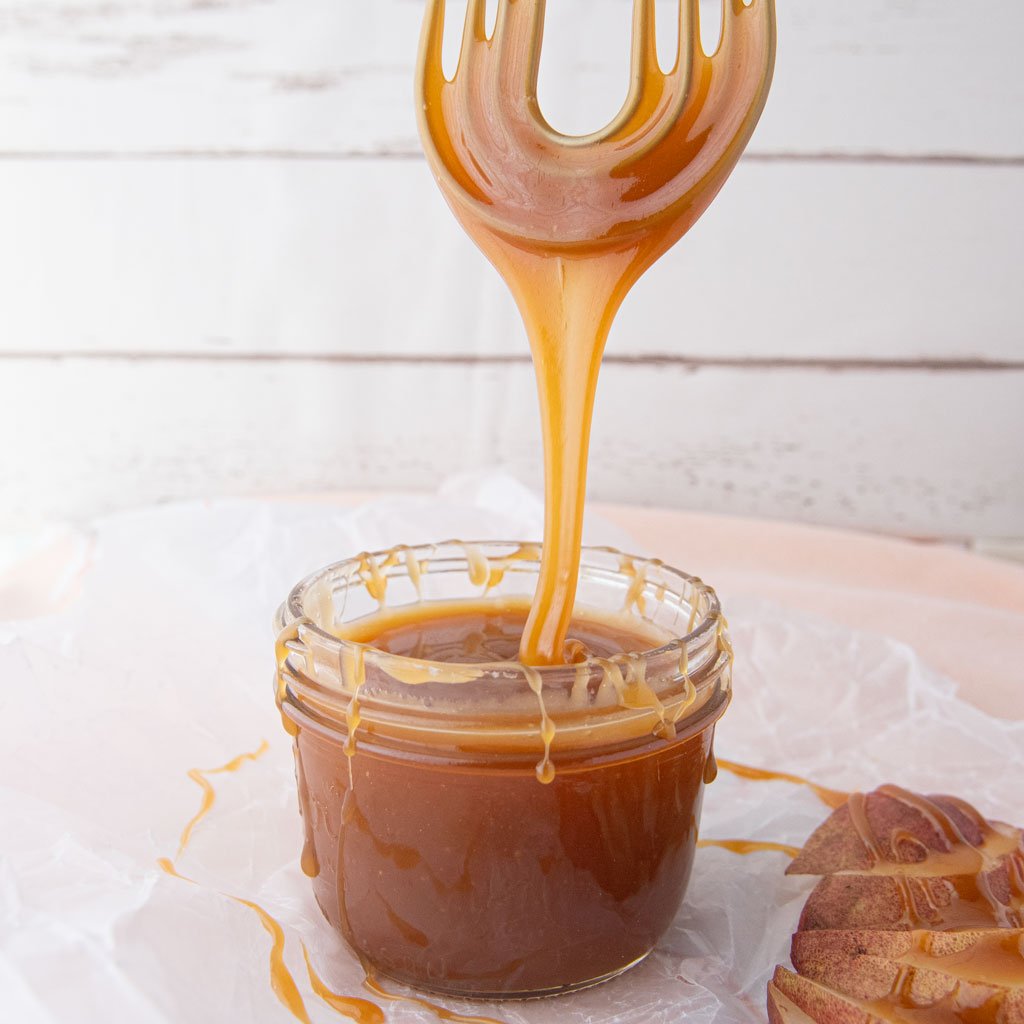
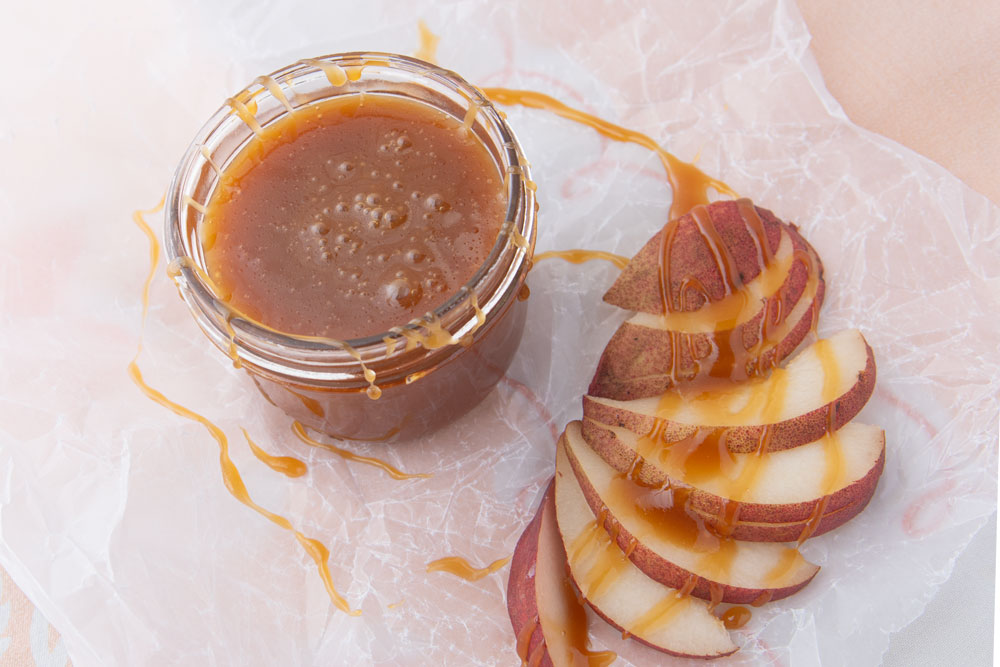
This easy vegan caramel sauce will have you wondering why you ever bought the bottled stuff near the ice cream.
The inspiration for this recipe comes from Claudia Fleming of Gramercy Tavern. I saw her on Martha Stewart when I was in high school, and she was making her legendary chocolate caramel tarts (they’ve earned every bit of their reputation). I have made that caramel dozens and dozens of times since then. Her caramel is the easiest, best tasting caramel hands down. But there was one problem.
Since I’ve been dairy free, plonking down a ton of cream into molten sugar gives me instant heartburn. Ditto the butter. People, that’s a crying shame. If you have food sensitivities you should still be able to enjoy proper caramel!
This recipe is a result of much testing and experimenting to get as close to the original without the heartburn. It includes my Mom’s one trick for absolutely fail-proof caramel. It’s not only easy and quick to make, you’ll wonder why you were ever intimidated by making caramel. Taste it and you’d never know that it’s vegan caramel.
bakingwithtradition.com is a participant in the Amazon Services LLC Associates Program, an affiliate advertising program designed to provide a way for websites to earn advertising revenues by advertising and linking to recommended products. Some of the links below are affiliate links. This means that, at zero cost to you, I will earn an affiliate commission if you click through the link and finalize a purchase.
Easy vegan caramel sauce
Why you should make vegan caramel sauce yourself
This caramel sauce is a great building block for other recipes. The sky is the limit of what you can do here!
My favorite uses:
- Drizzle it on apple or pears.
- Spoon it on ice cream.
- Fill a tart with its glossy sticky goodness.
- Fill a cookie with a cold scoop of caramel before baking.
- Coffee with a spoon of this.
- Just eat it out of the jar (no judgment!): I’ve noticed that the coconut elements make this a little softer and runnier than traditional caramel, so it’s not quite as hard in the fridge. This definitely it makes it easy to scoop!
- Caramel Apple Cookies
- Caramel Peanut chocolate blondies
- Homemade Samoas
- Chocolate caramel swirl ice cream

Wet caramel vs. dry caramel
All caramel involves cooking down sugar until the sugar crystals melt turn dark amber due to the Maillard reaction.
My vegan caramel sauce is what you call a “wet caramel.” This means that the sugar is cooked with added liquid (in this case, golden syrup and water).
“Dry caramel” is made by placing the dry sugar in a pan and cooking it until the sugar melts. Dry caramel can be more finicky and more hands on. If you have an uneven pan or a uneven heat source, your caramel problems can get really hairy really quickly.
For this reason, I always always make caramel sauce with a wet caramel. I have found that it cooks more evenly, more consistently, and I worry less about burning myself (though see my safety tips below).
Cooking with molten sugar and keeping yourself safe
Making caramel means that you will be getting sugar very very hot. Specifically, sugar begins to caramelize at around 320 degrees F. At this heat, sugar being sticky naturally becomes not unlike napalm.
You need to pay attention when you make caramel. Here’s some easy ways to keep yourself safe:
- Back burner: cook your caramel on a back burner. By cooking a little farther away from yourself, you are less likely to get burned by the steam when you add in the coconut milk at the end. This will also keep kids and pets further away from the heat.
- Use a long handled whisk: When you add in the milk, use a long handled whisk and hold it by the end to stir until the steam subsides. This will again keep you away from burning steam.
- Washing the cooking pan: Cover the cooking pan in hot water in your sink and walk away. If you put in cold water or try to scrub immediately, you can create hard sugar bits that are as sharp as glass. I’ve cut myself more than once this way. Shoot, my grandpa cut himself the same way after I told him NOT to do that. Sharp sugar that comes from making caramel is not a joke. It will cut you. After a few minutes, pour out the water and add more if there’s more in the bottom of the pan. Once the sugar is dissolved, the pan is safe to clean.
Vegan caramel sauce ingredients
- Granulated sugar: plain white sugar.
- Water: to moisten the sugar and help the sugar cook more evenly.
- Golden syrup: helps stabilize the caramel; you may substitute corn syrup.
- Sea salt: just a little to balance the sweet flavor.
- Coconut cream: to replace whipping cream in traditional caramel recipes. Get coconut cream by refrigerating a can of full fat coconut milk for 2 hours. The heavier coconut cream will float to the top. From there, scoop out the cream from the top of the can.
- Coconut yogurt: the sour balances the sweet flavor. Cocojune or Forager are the two brands I use if I don’t use homemade coconut milk yogurt.
- Unrefined coconut oil: for silky smoothness, replaces the butter in traditional caramel recipes.
- Vanilla: extract (optional).
Special equipment for making caramel
Make sure you have a heavy bottom saucepan. A heavy bottom will make sure that the heat is more evenly distributed.
Also, have a whisk with a good long handle. No burns in the kitchen allowed!
Easy vegan caramel sauce step by step
Print
Easy Vegan Caramel Sauce
- Total Time: 25 minutes
- Yield: 1 cup 1x
Description
Watching sugar slowly bubble into molten caramel is one of the joys of baking. Luscious with coconut cream, this vegan caramel has all the deep caramel flavor you hope for with a hint of coconut. Put it on ice cream, tarts, drizzle it on cakes or just grab a spoon.
Ingredients
- 1 cup granulated sugar (200 g)
- 1/4 cup water
- 2 Tablespoons golden syrup (see note)
- Pinch of coarse sea salt
- 1/4 cup coconut cream–from one can of full fat coconut milk (see note)
- 2 Tablespoons coconut yogurt
- 2 Tablespoons coconut oil
Instructions
- Combine the sugar, water, golden syrup, and salt in a small bowl just to moisten the sugar evenly.
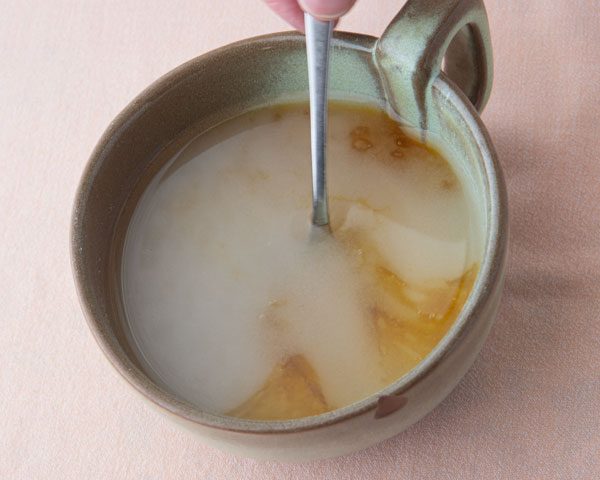
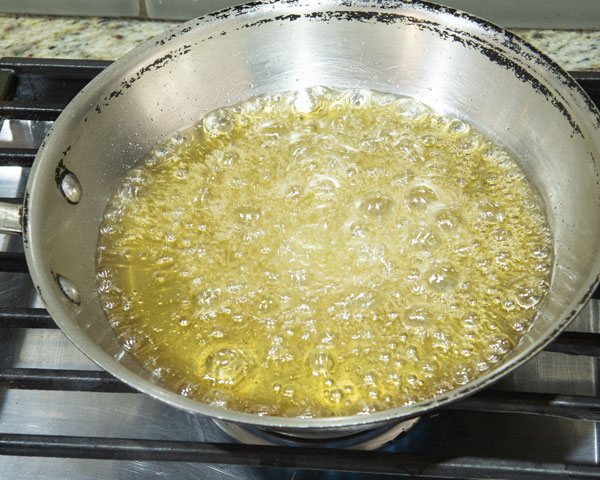
- Pour the sugar into a heavy bottom saucepan. Turn the heat on medium.
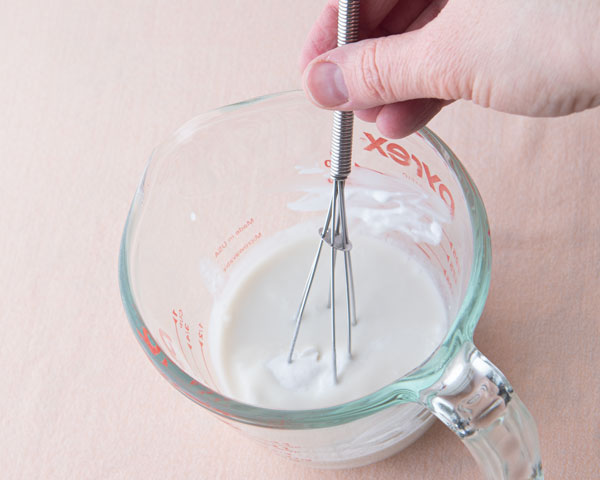
- Whisk the coconut cream and the coconut yogurt together, then place this and the coconut oil near the stove.
- Cook the sugar until you start seeing color around the edges of the pan.
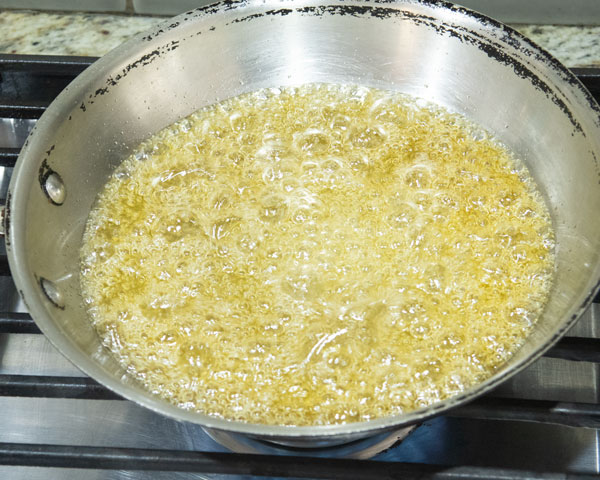
- If you notice that the color seems to be in one spot of the pan but not the rest, gently swirl the sugar in the pan. You may also turn the pan around 180 degrees on the burner to even out the heat.
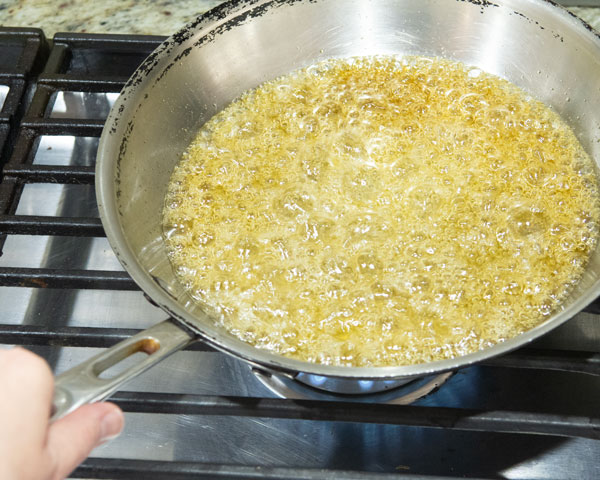
- Do not stir with a spoon or whisk at this point as you can create sugar crystals and threads you will not be able to incorporate back into the caramel.
- Do not leave the stove. Once you start seeing color watch carefully. As the sugar begins to color, you’ll notice the bubbles start to slow down considerably.
- Caramel can go from pale amber to burnt in a few seconds. Start looking for more deep amber color form across the pan. Right at the end of cooking, you should smell just a hint of burnt sugar and you may see a puff of smoky steam. Once you see this, count to 5 and turn off the heat.
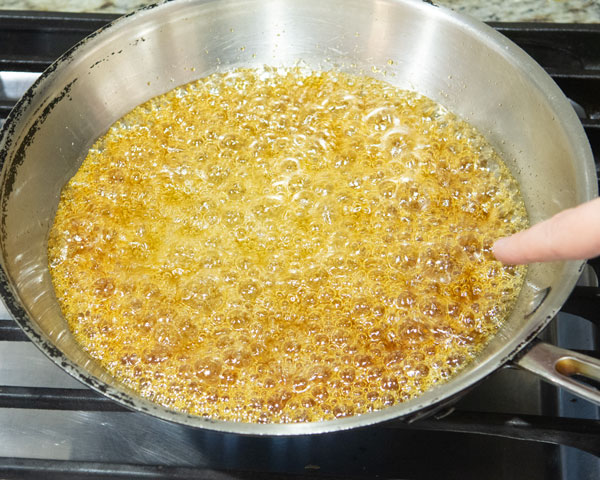
- Have a long whisk handy, then pour in the coconut milk all at once. The caramel will bubble up furiously, so stay back from the steam and whisk furiously until it’s all incorporated.
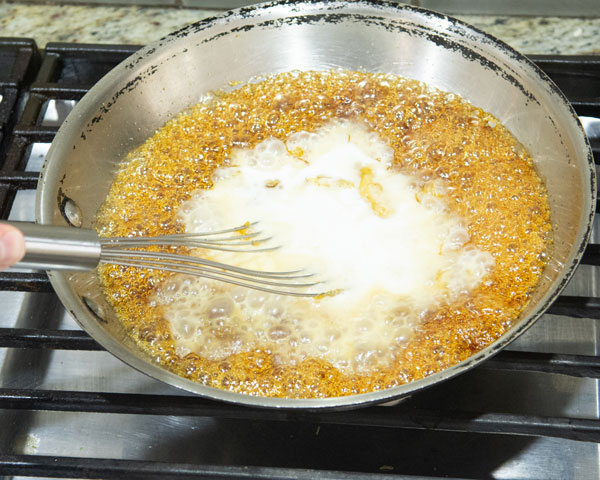
- Throw in the coconut oil, then whisk to incorporate it. You’ll notice that it will separate so that it looks like it has a little bit of an oil slick on it–this is fine. Coconut oil does NOT behave exactly like butter. Be assured that it will emulsify back into the caramel.
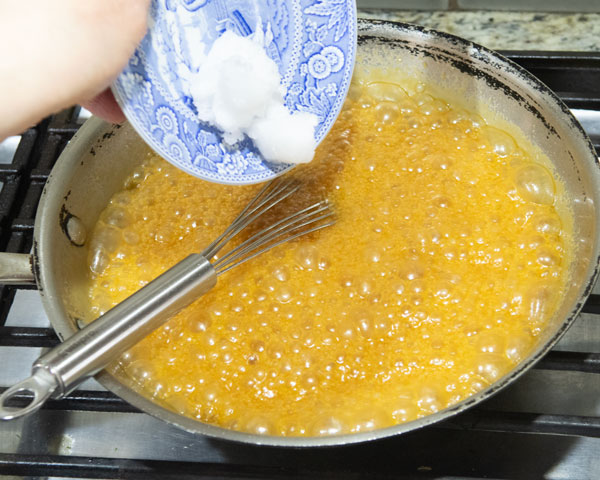
- Over about 10 minutes, stir the cooling caramel periodically until it’s shiny and smooth and you see no oil floating on top.

- Transfer the caramel to a glass jar. It will keep for about 2 weeks in the fridge.
Notes
- Golden syrup is a thick syrup made from cooking down sugar beets. I get Lyle’s Golden Syrup when I find it as it has a deep interesting flavor that makes magical gingerbread among other things. If you can’t find golden syrup, you can substitute light corn syrup. I’ve made this caramel many times with corn syrup to good results.
- Coconut cream: refrigerate a can of coconut milk for 2 hours. Scoop off the thicker coconut cream from the top; the thinner coconut milk will sink to the bottom of the can.
- Prep Time: 5 minutes
- Additional Time: 10 minutes
- Cook Time: 10 minutes
- Category: Baking building blocks
Nutrition
- Serving Size: 1 tablespoon
- Calories: 85
- Sugar: 14
- Sodium: 4
- Fat: 3
- Saturated Fat: 2
- Carbohydrates: 15
- Cholesterol: .32
Have you ever made caramel yourself? How did you use it?

