
Eggnog Cookies: Beautiful Stamped Cookies
Eggnog cookies are the best cutout cookies! Rich with lots of butter and the delicate spice of eggnog, these make delicious crisp cutout cookies that are easy to roll.
| Taste | Texture | ||
| Classic sugar cookie + eggnog | Crisp, delicate |
| Active time | Total time | Yield | Difficulty |
| 30 minutes | 2 hours | 6 dozen cookies | Easy |

My Mom has made cutout cookies enriched with heavy cream for most of my life. Before her, my great-grandma Bee made a cookie laced with nutmeg that had potato-chip addictive qualities. Mom told me I couldn’t say that this was HER recipe (I’ll share that another day!), but the ideas of both these cookies landed me straight on eggnog.
I’ve never met an eggnog I’ve not been willing to try (well, amongst non-alcoholic ones). The flavor is something I crave. I’m the one at the store buying all of the short-dated eggnog because that creamy gentle spice of a cup calls to me every single time. And yes, I’m grating fresh nutmeg on top. My kids do the same and insist on using all my Microplanes for such a task. If THEY know that there’s eggnog in the house, a quart will last precisely 10.97 seconds.
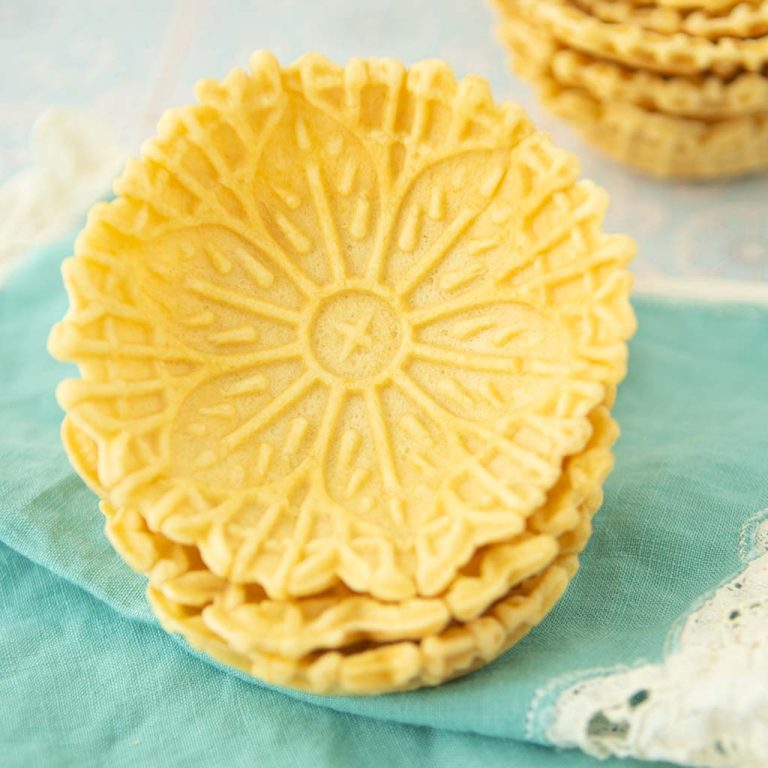
I also thought this recipe would be a good place to try out my cookie stamps that Mom dropped off for me. Turns out this dough is perfect for just such a thing. Let’s get rolling and stamping.

Why You’ll Dream About These Cookies
- So crisp: Butter cookies should be crisp, and these are perfect. If you cut them a little thick, there’s a little pocket of chewiness, but if you cut them thin, they’re delicately crisp in the way that a perfect cutout cookie should be.
- Subtle flavors: Eggnog is a gentle spice not a full-on spice cookie like my soft gingerbread cookies. There is a hint of floral spice that is utterly alluring.
- Big batch: If you’re going through the work of making cutout cookies, you should get a lot for your effort, and that’s what this recipe does. With this recipe, I made about 3 dozen of the stamped cookies and enough for 25 cookie trees! Because these cookies freeze like a champion, you can absolutely work ahead and save yourself some hassle. Bring out your kids; they’re going to want to cut out all the cookies.

Ingredients for Eggnog Cookies
- Butter
- Powdered sugar
- Egg
- Vanilla paste or vanilla extract
- All-purpose flour
- Salt
- Eggnog
What’s the Best Eggnog to Use?
This is a personal choice. Eggnog with dairy tastes better, but dairy brands often have corn syrup in them. One of these days I’ll make a homemade eggnog that I think is worth sharing. Until then, here are my choices:
- Local dairy eggnog: we have a local dairy that makes awesome eggnog where I live.
- So Delicious coconut eggnog: It’s a little thin, but this is a great tasting eggnog that’s sweetened with only cane sugar.
- Elmhurst Oat Nog: I don’t usually love oatmilk, but I appreciate that Elmhurst doesn’t add thickeners like guar gum to their products.
- Nutpods Holiday Nog: Nutpods makes my favorite creamers of all time. I love that most of them are unsweetened, and the ones that aren’t aren’t glutted with sugar.
Helpful Equipment You Need to Make Eggnog Cookies


- Parchment : I always always roll cutout cookies between sheets of parchment . It keeps the mess to a minimum and makes it easy to transfer in and out of the fridge. Also, you’ll have cookies you can transfer to a baking sheet without drama or having to add too much flour. It’s one of my secrets for the best cutout cookies, and I never do anything else.
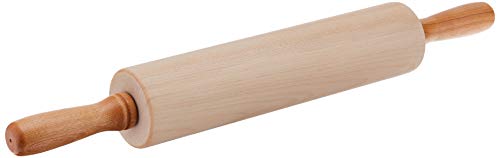
- Rolling pin : use what is comfortable and solid. Since these are cutout cookies, you might consider using rolling pin rings or use a pin that rolls to a certain thickness if you have a tough time rolling an even sheet of dough.
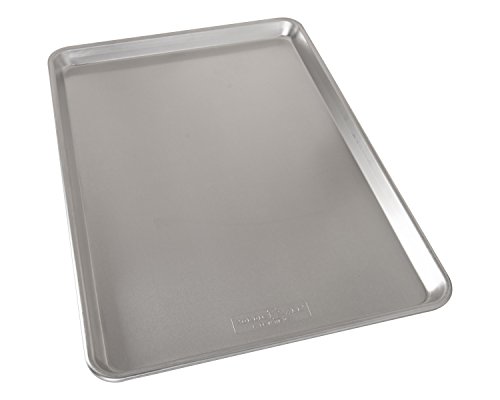
- Sheet trays: You can pretty much never have too many half sheet pans. You can stack them at right angles to each other when they’re cooling if you’re short on space, and the more sheet trays you have, the easier it is to roll and bake without stopping.
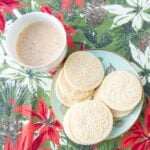
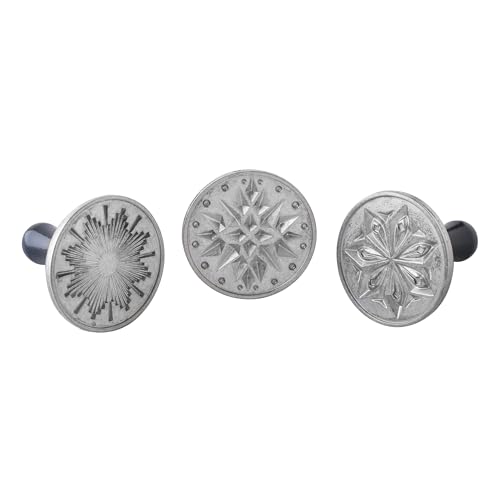
- Cookie stamps : this is totally optional, but cookie stamps will work well with this dough. I’m using an interchangeable cookie stamp press, though I think the standalone cookie stamps work better. In theory the gadget I was using should have cut the cookie and embossed it in one go…it practice, it was not successful until I used the presses on their own.
- Round cutters or other cookie cutters: If you do use a cookie stamp, you’ll need a round cutter to cut around it. If you don’t have a set of round cutters or scalloped round cutters , a Mason jar lid or a glass could also work just fine. Also know that you can make regular cutouts in any shape from this dough.
Eggnog Cookies
- Total Time: about 2 hours
- Yield: about 6 dozen 2 1/2″ cookies 1x
Description
These cutout cookies enriched with the delicate floral richness of eggnog are perfect for cutting into any shape you’d like for decorating or to eat plain. Just cut them thin for the perfect crisp cookies.
Ingredients
- 3 sticks butter (340 g)
- 3 cups powdered sugar (360 g)
- 1 large egg
- 1/4 cup eggnog (59 mL)
- 2 teaspoons vanilla
- 1/2 teaspoon salt
- 4 cups flour (520 g)
Instructions
Make the dough
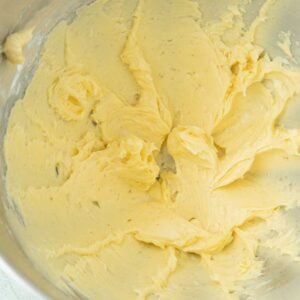
- Using a paddle attachment on a stand mixer, mix the butter, sugar until just combined.

- Add in the egg, eggnog, vanilla and the salt to the butter to combine. The mixture should be well-combined but not fluffy.
- Pour in the flour, then pulse the mixer a few times before letting it run just long enough for the flour to disappear–about 15 seconds. Turn off the mixer, and use a baking spatula to squish in any flour that’s hanging out at the bottom of the bowl.
- Stick two large pieces of plastic wrap together on a counter. Dump the dough into the middle of the plastic wrap. Use the edges of the wrap to gather the dough into one large square disc. Place the dough on a plate or a sheet tray and chill in the refrigerator for 30 minutes.


Rolling the cookies
- Get 2 pieces of parchment out and have 2 sheet trays at hand.
- Divide the dough into quarters.
- Lightly sprinkle one of the sheets of parchment with flour, and then sprinkle flour on the top of your dough flat.
- Place one of the dough quarters unfloured side down on top the floured parchment, and then cover it with the second piece of parchment.
- Bring the edge of the parchment to the edge of the counter and hold it in place with your hip.
- Roll the dough between the two sheets of parchment into a sheet about 1/8″ thick.

- Slide the parchment onto a baking sheet and chill for 15 minutes in the fridge or 10 minutes in the freezer.
- Preheat the oven to 350 degrees F (180 C).
- After 15 minutes, peel off the top piece of parchment. If the parchment does not easily peel off the dough, place it back in the fridge to chill for a little longer.
- Cut out cookies using the cookie cutters of your choice. If you’re using cookie stamps, dip the stamps first in a bowl of flour, and then press down on the dough to leave an embossed design. Use a cookie cutter to cut around the embossed design. Transfer embossed cookies to a sheet tray lined with parchment. Chill embossed cookies in the freezer for an additional 10 minutes.
- If you’re not using cookie stamps, transfer the cookies once you cut them to a sheet tray. You may bake these immediately.
- Bake for 5 minutes, and then rotate the baking sheet 180 degrees.
- Reroll any scraps into a second sheet of dough, and chill the dough as other cookies bake. Bake for 4-5 more minutes until the edges are set and just beginning to take on color.
- Let the cookies sit on the sheet tray until the baking sheet is cool.
- Bake subsequent batches of cookies the same way as the first.
- Store cookies in an airtight container for up to a week or freeze them for up to 3 months.


Notes
To decorate: If you want to decorate these cookies, I highly recommend baking them ahead of time. Store the cookies at room temperature until you’re ready to decorate. When you are ready, set out paper on a counter or a large table. Set out bowls of easy powdered sugar icing (powdered sugar with enough milk to make a thin, dippable icing) and sprinkles. Invite your kids or guests to dip the cookies (shake off the excess) and shiny them up with some sprinkles. Set the finished cookies on the paper to dry. Iced cookies will keep for a couple days at room temperature.
- Prep Time: 30 minutes
- Cook Time: 60 minutes
- Category: Cookies
- Method: Oven
- Cuisine: American