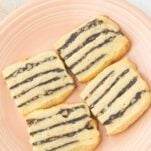
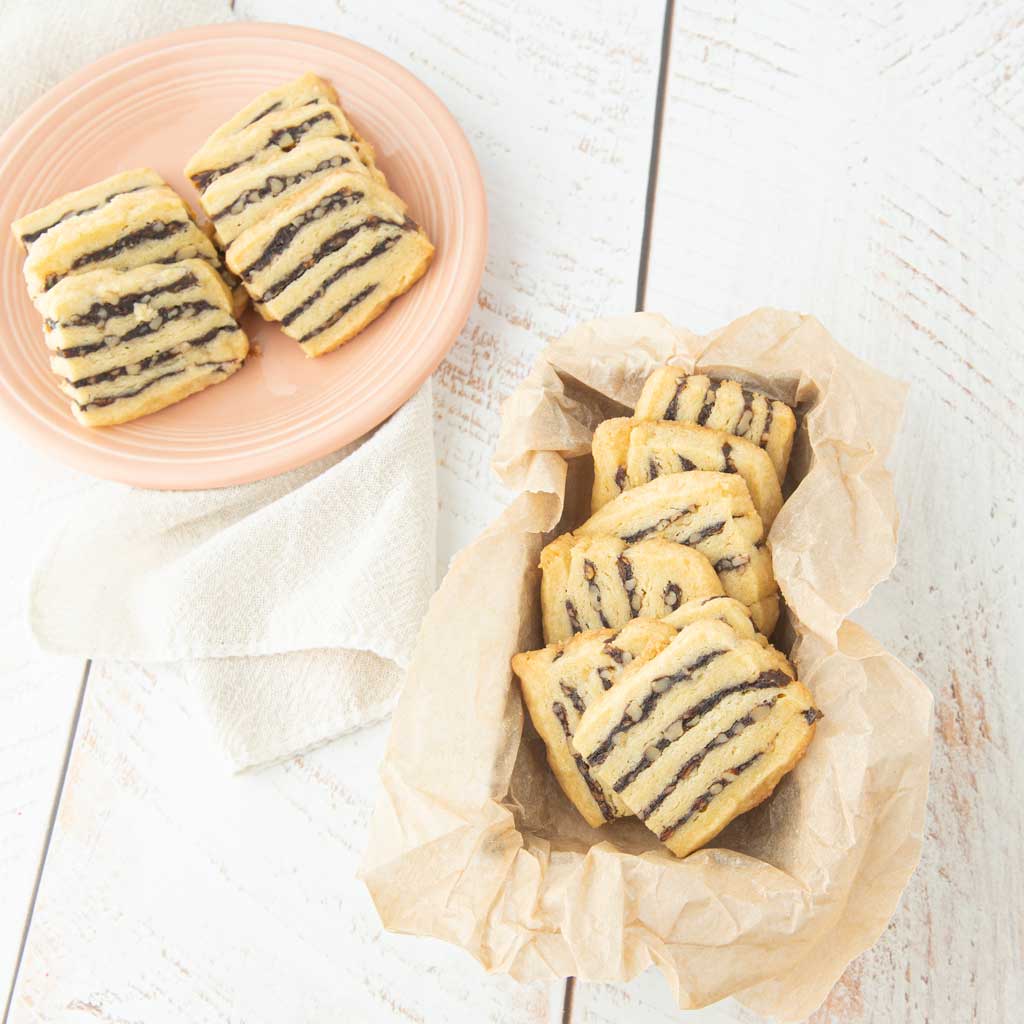
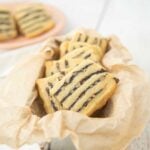
Striped Date Cookies: Traditional Flavor in an Easy Slice and Bake
These striped date cookies are made of layers of buttery shortbread dough and date walnut filling. They’re full of the old-fashioned flavor of clove and plum butter (you could also use apple butter or pear butter) and they’re the perfect split between tender cookie and chewy filling.
| Taste | Texture | ||
| Dates, nuts, buttery | Crumbly crisp, chewy |
| Active time | Total time | Yield | Difficulty |
| 30 minutes | 2 hours, 50 minutes | 36 Cookies | Easy |

This would have been a greatest of all time cookie on my Czech great-grandma’s list. Her personal favorite cookie was a date pinwheel, and she always requested them of my Mom. I love the pinwheels too, and feel free to use this filling in place of the cranberry in cranberry swirl cookies.
Personally, I like the contrast of the dark filling in the stripes with the cookie dough. This is a looker of a cookie and they’re plain elegant to eat with a cup of strong black tea or coffee.
I think you’ll have a good time making these cookies, so let’s get cracking.

Why These Cookies Are Going to Stay With You
- Symphony of flavor and texture: There’s a lot of flavor packed into these cookies. The tannic crunch of walnuts with the chew from the clove spiked dates against the buttery shortbread gives you something to think about. This is not a cookie that will bowl you over with sweetness; it’s a sit and enjoy it slowly kind of cookie. Eat them while you’re reading a cook book in a cozy chair; something by Agatha Christie or Dickens.
- These are genuinely fun to make: It might seem hard or complicated to make the layers, but the opposite is true. This dough rolls easily and so does the filling.
- Make now, bake later: Like my other slice and bake cookies like pecan sandies and cranberry swirls, once you’ve made up the dough log, you can pretty much make these whenever you feel like it. Want a midnight fresh cookie? Cut a slice off the log and bake it!

Ingredients for Striped Date Cookies
Date Walnut Filling
- Dates
- Plum butter (no sugar plum jam), or pear butter or apple butter
- Walnuts
- Ground clove
Butter Cookie Dough
- All-purpose flour
- Butter
- Powdered sugar
- Egg yolk
- Vanilla extract or vanilla paste
- Salt

Helpful Equipment for Making Date Stripe Cookies


- Double rolling pin : This little tool is awesome for rolling INSIDE a pan. You can absolutely get away with just pressing the dough into the pan, though you won’t get as neat of layers. You can of course roll with a larger rolling pin and press the dough into the corners with your hands. That also works.
- Plastic wrap: This is one time to roll the dough between two pieces of plastic wrap. This way you won’t have to add any flour to the dough and you’ll be able to keep an eye on the size of the sheet.
A Note About Plum Butter
Plum butter is a special kind of plum jam. It’s pretty common in Eastern Europe to make plum butter at the height of plum season when the plums are at their sweetest. When picked this way, the plums are cooked down without sugar into a very thick spread, not dissimilar to our apple butter or pear butter.
This is one time where I will advise you to buy the real thing (you’ll know you’ve found the right thing when the only ingredient is plums). Unless you’re a backyard gardener, it will be hard to find the right variety of damson plums that make this incredible jam. Also, in this recipe, you want a thicker jam so that the cookies don’t get too too soft. Lastly, the thick plum butter is so thick, that once combined you can actually ROLL this filling, which makes making the stripes in this cookie both really fun and easy.
I have a European market in drivable range of me where I can find this butter year round. If you can’t find it, no worries; just use apple butter, which almost has the right texture out of the jar, and 100% has the right texture if you used my apple butter recipe.

Striped Date Cookies
- Total Time: 2 hours 50 minutes
- Yield: 36 cookies 1x
Description
This slice and bake cookie is full of the old-fashioned flavor of dates and walnuts with a little spice from clove.
Ingredients
Filling
- 3 ounces dried dates (85 g)
- 1/3 cup plum jam, plus a little more (120 g)
- 1/2 cup walnuts, chopped finely (64 g)
- 1/2 teaspoon ground cloves
Dough
- 1 cup all-purpose flour (130 g)
- 1 stick of butter at room temperature (113 g)
- 1/2 cup (60 g) powdered sugar
- 1 egg yolk
- 1 tsp vanilla extract or vanilla paste
- pinch of salt
Instructions
Make the filling
- Place the dates with the jam in a blender jar and pulse until the dates are smooth.
- Scoop the date mix into a small pan and heat it over medium just until it comes to a boil.
- Stir the walnuts and cloves into the dates.
- This filling can be made up to a week ahead of time (just pop it in the fridge, covered).


Make the dough log
- Using a paddle attachment on a stand mixer, mix the powdered sugar, butter and egg yolk until just combined.
- Add in the vanilla and the salt to the butter to combine. The mixture should be well-combined but not fluffy.
- Pour in the flour, then pulse the mixer a few times before letting it run just long enough for the flour to disappear–about 10 seconds. Turn off the mixer, and use a baking spatula to squish in any flour that’s hanging out at the bottom of the bowl.
- Place two large pieces of plastic wrap together on the counter. Scoop the dough into the middle of the plastic, and then use the edges of the plastic to press the dough into a rectangular log. Divide the dough into 5 pieces.
- Line the bottoms and sides of a 8.5” x 4.5” loaf pan with plastic wrap.
- Roll each portion of dough into a rough rectangle. Place one of the portions of dough between two pieces of plastic. Use a small rolling pin or a double ended rolling pin to roll the dough into a rectangle that’s close to the size of the pan. Peel the dough off the plastic and then press the sheet of dough into the pan so that it covers the bottom. You may need to press the dough into the corners.

- Roll a quarter of the filling into a rough log and then roll it between the same pieces of plastic into a sheet just as you did with the dough. Peel off the date filling (it will look like a fruit roll-up) and place it on top of the dough. Alternatively, you can spoon out filling enough to cover the dough, using the spoon to smooth it out. If the filling doesn’t entirely cover the dough, feel free to add a little extra pinch of the filling to cover the dough in a thin layer.
- Keep rolling the dough and filling, alternating layers of dough and filling ending with dough on top.
- Bring the overhanging plastic of the dough around all the layers. Wrap it well and then pop the loaf pan in the freezer to freeze for at least 2 hours or up to 1 month ahead.

 Peel the dough off the plastic and then press the sheet of dough into the pan so that it covers the bottom. You may need to press the dough into the corners.


Baking the cookies
- When you’re ready to bake, preheat the oven to 350 F (180 F). Line 2 baking sheets with parchment paper.
- Cut and bake: Cut the loaf in half down the short side, and then cut 1/4″ slices of dough. Bake for 20-22 minutes until the bottoms are lightly browned and the cookies are firm.
- Cool and enjoy: Let the cookies cool thoroughly on the baking sheets. Store cookies in an airtight tin for up to 2 weeks. You can also freeze them for up to 2 months.


Notes
Date Pinwheels: If you’d rather have a spiral of filling, roll the dough into one large rectangle. Spread the filling in an even layer over the dough and then roll it up into a log. Wrap the log tightly in plastic wrap, and then slide the log inside a paper towel tube (cut a slit down the middle so it fits). Roll the dough inside the tube to keep everything round. Freeze the log and then follow the same baking directions.
- Prep Time: 30 minutes
- + 2 hours freezing time:
- Cook Time: 20 minutes
- Category: Cookies
- Method: Oven
- Cuisine: American