Easy Strong Gingerbread House Recipe For Fail-Free Building
A good gingerbread house starts with a solid strong gingerbread house recipe that won’t warp or buckle.
| Active time | Total time | Yield | Difficulty |
| 1 hour | 4 hours | 2 mini gingerbread houses | Easy |

Making a gingerbread house does not need to be a giant kitchen-wrecking disaster that ends in frazzled nerves and sticky surfaces for miles. While I’ve never had a full on in the trash disaster, I’ve definitely had houses that were on the “needs serious renovation” list with patches of this and that to hide structural damage.
Because I want you to attempt making your own gingerbread house, I’ve combined my years of trial and error with some better knowledge to create a solid gingerbread house recipe that will help you build with confidence.
In the end, I want you to be able to make a sweet little house that will let you build memories with your family without either wasting a whole day or ingredients in a house that will fall apart on you. Nobody wants that!
Why Gingerbread for Houses is Different Than Gingerbread Cookies or Cakes
- No leavening: For strong gingerbread houses, it’s crucial to take OUT the baking soda. That baking soda which makes a light airy good crisp brown gingerbread cookie makes for a holey gingerbread in a house. Those holes mean possible weakening of the structure of the gingerbread. The leavening also makes the dough puff up in the oven. When the dough does this, square edges that you cut might end up not square in the end, or you might have to cut your pieces mid baking and after baking. All this adds a time-crunch stress to the process that doesn’t need to be there.
- Long baking time: Gingerbread cookies don’t take much time to bake, but for a house, you need to have a sturdy dough that bakes for a long time. This long baking time adds strength to the house by drying out any excess moisture. While you can eat gingerbread houses ala Hansel and Gretel, a soft gingerbread cookies are much better for eating.
- Solid fat: Since gingerbread houses aren’t really much for eating, I prefer to bake them with a solid fat like shortening or my fresh rendered lard. This saves your good butter for other Christmas cookies without compromising the structure of the house.
Ingredients for Gingerbread House Dough
- Shortening or lard
- Brown sugar
- Molasses
- All-purpose flour
- Gingerbread spice (or cinnamon, ginger, cloves, and nutmeg)
- Salt
- Water
- 1 batch of Sturdy Royal Icing
- Assorted candy for decorating
Helpful Equipment for Making Gingerbread Houses
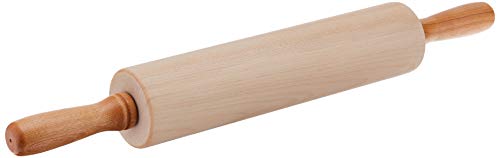
- Rolling pin
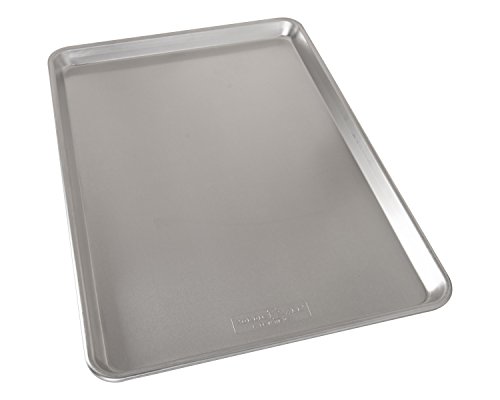
- Sheet trays: This recipe makes a little more than 1 full sheet pan’s worth of dough and can be baked in one batch in 2 half sheet pans.
- Mini gingerbread house cookie cutter : You can easily cut 2 mini houses with this 2-piece gingerbread cutter. After years of using paper templates I laminated, I will always use this cutter for the ease of use and the small scale.
- Flat surface to build on: A square of foam core board is my #1 choice. A flat platter or a sheet tray can also be used.
What to Decorate Your Gingerbread Houses With
Nearly anything goes here. Any lightweight cracker, candy, or cookie with bright colors will make a beautiful gingerbread house. Here are some of the best options:
- Twizzlers
- Necco wafers
- Chocolate rocks (pricey, but amazing for stone work)
- Wafer cookies
- Pretzels
- Jelly beans
- Snickers (great for stone work)
- Starlight mints
- Candy canes
- Jolly Ranchers: melt them in the oven on parchment for easy sugar glass for windows
- Gummy candies
- Gum: makes beautiful brickwork

Gingerbread House
- Total Time: about 4 hours, largely unattended
- Yield: 2 miniature gingerbread houses (4x4x5″) 1x
Description
A sturdy gingerbread that will glue up into strong houses that you don’t have to worry about crumbling. This makes two mini houses plus extras for any other features you can imagine.
Ingredients
- 1/2 cup shortening or lard (113 g)
- 1/2 cup brown sugar (106 g)
- 3/4 cup molasses (180 mL)
- 1 Tablespoon gingerbread spice (or 1 and 1/2 teaspoons cloves and 1 whole nutmeg plus the cinnamon and ginger below)
- 1 Tablespoon ground ginger
- 1 Tablespoon ground cinnamon
- 1/2 teaspoon salt
- 2 and 1/2 cups all-purpose flour (325 g)
- 2 Tablespoons water
- 1 batch sturdy royal icing
- Assorted candy, crackers and/or cookies for decorating
Instructions
Make the dough
- Mix the shortening or lard with the brown sugar, molasses, spices, and salt in a mixer until smooth.

- Add in the flour and water. Mix until the flour just disappears.
- Stick together two large pieces of plastic wrap on a work surface. Dump the dough in the middle of the plastic wrap and then gather up the dough into a flat disc.

Bake the gingerbread
- Preheat the oven to 300 F (150 C).
- Lightly flour a piece of parchment paper. Place the dough on top of the parchment and sprinkle on a little more flour. Cover the dough with a second piece of parchment. Slide the parchment sandwich to the edge of the counter and anchor the edge in place with your hip. Roll the dough between the parchment into as even of a thickness as you can manage. 1/4″ thick is ideal.
- Use your mini gingerbread house cutter pieces to cut out 2 house shapes and 4 side/roof pieces for each house. It’s easier to leave a little bit of space between the pieces, but it’s not necessary.
- Peel away the excess dough and reroll the scraps to make enough pieces for 2 full houses (4 house shapes, 8 side/roof pieces total). Cut away window and door shapes with smaller cutters or with just a knife.

- All of your pieces should fit now on two baking sheets. Bake the gingerbread for 30 minutes.
- After another 30 minutes, lower the heat to 275 F (135 C) and bake for another 30 minutes.
- Lower the heat one more time to 250 F (120 C) and bake for 30 more minutes (90 minutes total). The gingerbread will be very dark and feel dry to the touch at this point. Set aside the gingerbread to cool completely. If any of your pieces are touching, use a sharp knife to cut between them right when you pull the gingerbread out of the oven. While the gingerbread finishes cooling, you can make your royal icing.
 Cover the dough with a second piece of parchment. Slide the parchment sandwich to the edge of the counter and anchor the edge in place with your hip. Roll the dough between the parchment into as even of a thickness as you can manage. 1/4″ thick is ideal.
How to build your gingerbread house
- Scrape the icing into a pastry bag fitted with a 1/4″ plain piping tip. There should be enough icing to fill 2 bags, which is enough to build two houses. You can also use the same icing in a thinner consistency to decorate your house if you want to pipe any decorations (see note).
- Decorate now or later?: It’s up to you, but it is easier to decorate the sides, front and back, and roof pieces first before you glue them together. If you’re short on time, glue on your decorations later with the royal icing and follow the rest of the steps here for building.
- Front and side #1: Use a piece of foam core, a sheet tray, or a large flat platter as a base for building your house. Sit up a square container (Harney and Sons tins are the PERFECT size) in the middle of your base. Pipe a bead of royal icing on the base against the bottom front edge of the tea tin. Pipe a second bead of icing against the left (or right) bottom edge of the tin. Stick the front right down into the icing. Add royal icing to the back side of the front piece and the side edge of one of the side pieces. Join the pieces, using the tin to keep the edges square and also offer support while they dry. Allow the pieces to dry for at least 15 minutes.
- Front and side #2: Add royal icing to the second side piece and the backside of the front piece. Keep the tin in place as you set these pieces. Dry for at least another 15 minutes.
- Back and sides: Gently slide the tea tin out. At this point you can add royal icing to the back house piece and the sides. Use the tea tin to keep things square on the outside of the house. Dry for at least 1 hour, preferably 2 hours. If there are any gaps anywhere, simply fill them in with more icing.
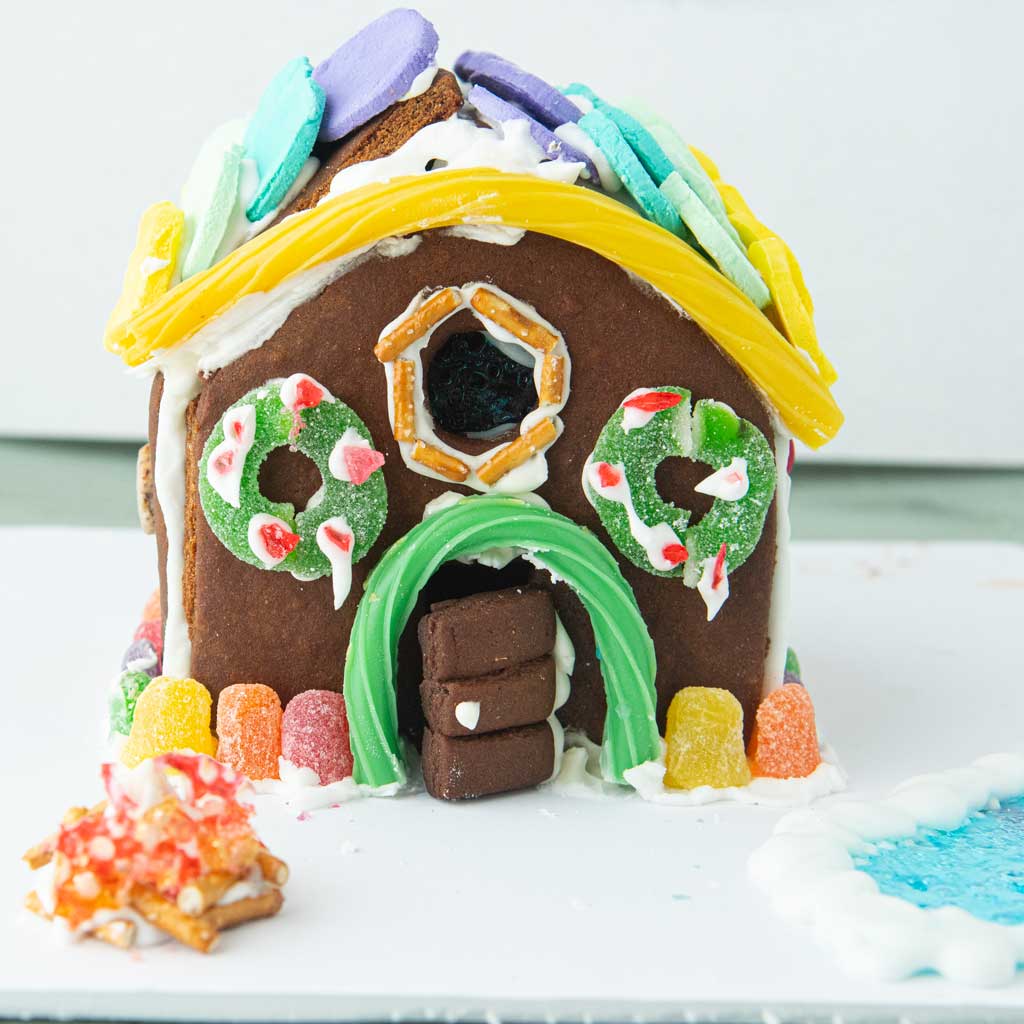
- Roof: Decorate your roof pieces with everything while the walls dry. After the base is solid, pipe royal icing on one roof line and the top of one of the sides. Gently place the roof in this icing. If it does not stick or you have a gap, you may need to either add more royal icing, glue in a piece of a wafer cookie as a cross support, or place a small cup to fill the gap and hold the weight of the roof while it dries. Let the first side of the roof dry for at least 15 minutes before attempting the second side.
- When you’re ready to glue on the second side of the roof, pipe an additional line of icing at the ridgeline of the roof. There should be a full rectangle’s worth of icing holding down the second side of the roof. Let the second side dry for another 15 minutes. During this 15 minutes, do add candy/other decorations to the roof line along the front and back pieces. There will be a good space for adding in something fun like halves of starlight mints (cut them in half with scissors THROUGH the wrapper so they don’t shatter), other hard candies, or gumdrops.


Decorating your house
- Glue on candy, cookie pieces, or any other decorations to the outside of your house. The rule goes that everything gets a little bit of royal icing. You can squeeze out the icing from the pastry bag or spread it on with an offset spatula . Try to work in a small area at a time so that the icing doesn’t set before you’ve glued on everything you want to glue on. If anything ever falls off, just add a little more icing and replace the missing piece. Glue on other decorations to your base around the house to give it a little scene. Anything edible work, so have fun and enjoy creating the atmosphere of your gingerbread house! Set your house in a safe corner to dry completely. Brush off any cookie, icing, or candy crumbs before displaying it. You can pop a pack of fairy lights on the inside of your house to make a truly magical little scene.
- Sides of houses: Sticks of gum make excellent bricks. Cut each stick into 6 pieces and set it over a thin layer of royal icing on the side of your house. After a few minutes, you can cut away any excess with a knife. Pretzel sticks also make for a good log cabin feel side. Try to use straight pretzel sticks…tiny pioneers would want that.
- Chimneys: You can stack up just about any candy for a good chimney. Snickers cut in half make really nice brickwork and starlight mints make a whimsical kind of chimney. If you can find any, cotton candy will make whispy “smoke” for the top of your chimney.
- Jolly Rancher fun: You can crush and melt Jolly Ranchers or other hard candy to make windows or water features. Simply crush up the pieces and sprinkle them on a piece of parchment. Bake at 400 until the candy melts. Let it cool before peeling it off the paper. If you want to use this “glass” for windows, you can put the side of the gingerbread house on the sheet and sprinkle the Jolly Rancher dust in the windows. Bake the same way just until the sugar melts. If you’ve already built your house, you can also just use royal icing to glue on a piece of sugar glass into the window frame on the inside of the house. Puddles of Jolly Rancher glass also make great ponds on the outside of your house. Pop a couple Swedish Fish in there and a Sour Patch kid to go fishing, and you’ll have a proper fishin’ hole. Inevitably you’ll have shards of Jolly Ranchers–turn those into a fire pit made from pretzel sticks and a ring of jelly beans or marshmallows.


Notes
Nutrition data: Gingerbread houses are largely for decoration, though everything is in fact edible. Do you really want to eat a house after it’s been sitting on a shelf for a couple weeks? My kids say yes, hence the nutrition data below that was calculated without additional candy since it’s hard to know how much of any kind and what kind you might use.
- Prep Time: 1 hour
- Cook Time: 90 minutes
- Category: Cookies
- Method: Oven
- Cuisine: European