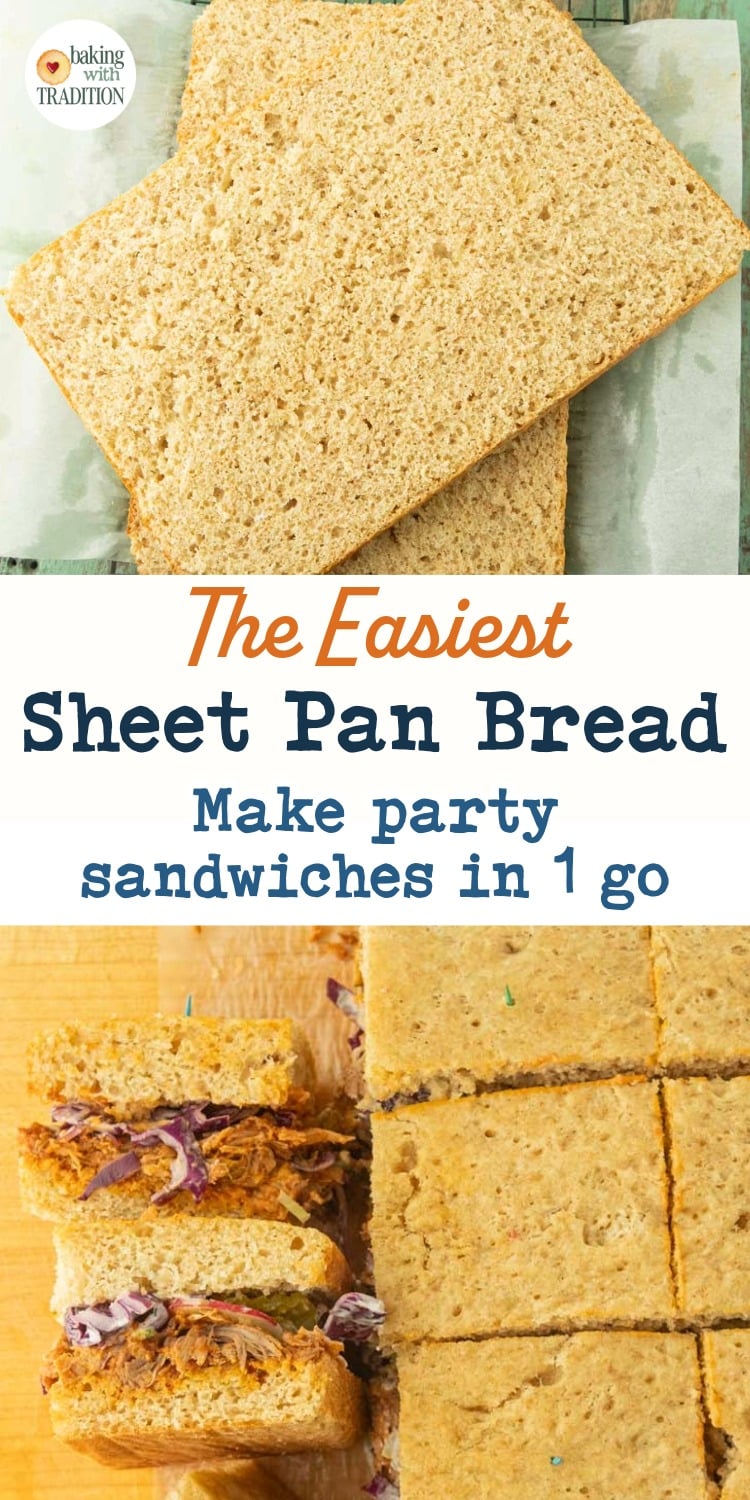
Sheet Pan Bread: The Easiest Sandwich Bread For a Crowd
I’m not exaggerating when I say this sheet pan will change your life. You will never find a bread that almost makes itself or can be cut up into easier sandwiches with nearly any filling.
This is the party bread you’ve been looking for, and you can make it with 5 minutes of work.
| Taste | Texture |
| Delicious homemade bread | Airy, chewy, soft |
| Active time | Total time | Yield | Difficulty |
| 5 minutes | 1 hour 30 minutes | 9×13 pan | Easy |

How I Came to Make Sheet Pan Bread Once a Week
For years I struggled with making good loaves of homemade sandwich bread. I took me a long time to get the texture and shaping right. I’ve since fixed that with my everyday bread and fresh-milled whole wheat bread, and English muffin bread, but given a choice, I will still pick this sheet pan bread every single time.
A few years ago, in the midst of not making awesome sandwich breads, I came across a recipe in one of Nick Malgieri’s books for a sheet tray bread. No doubt inspired by focaccia, Nick took an everyday sandwich bread and baked it in a sheet pan. My first thought was, “You can do that?!” I immediately baked that recipe and I’ve been a sheet pan bread fan ever since. Here’s why:
You’re Slicing Sandwich Bread All Wrong, and Here’s Why Sheet Pan Bread is Better
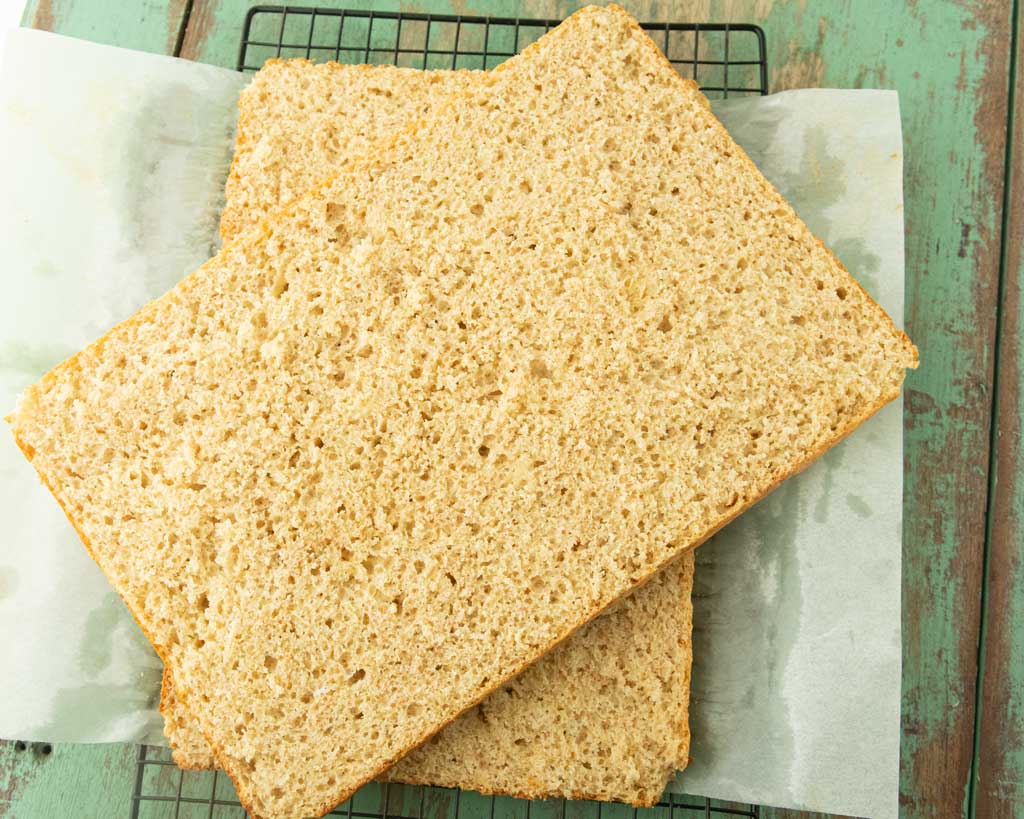
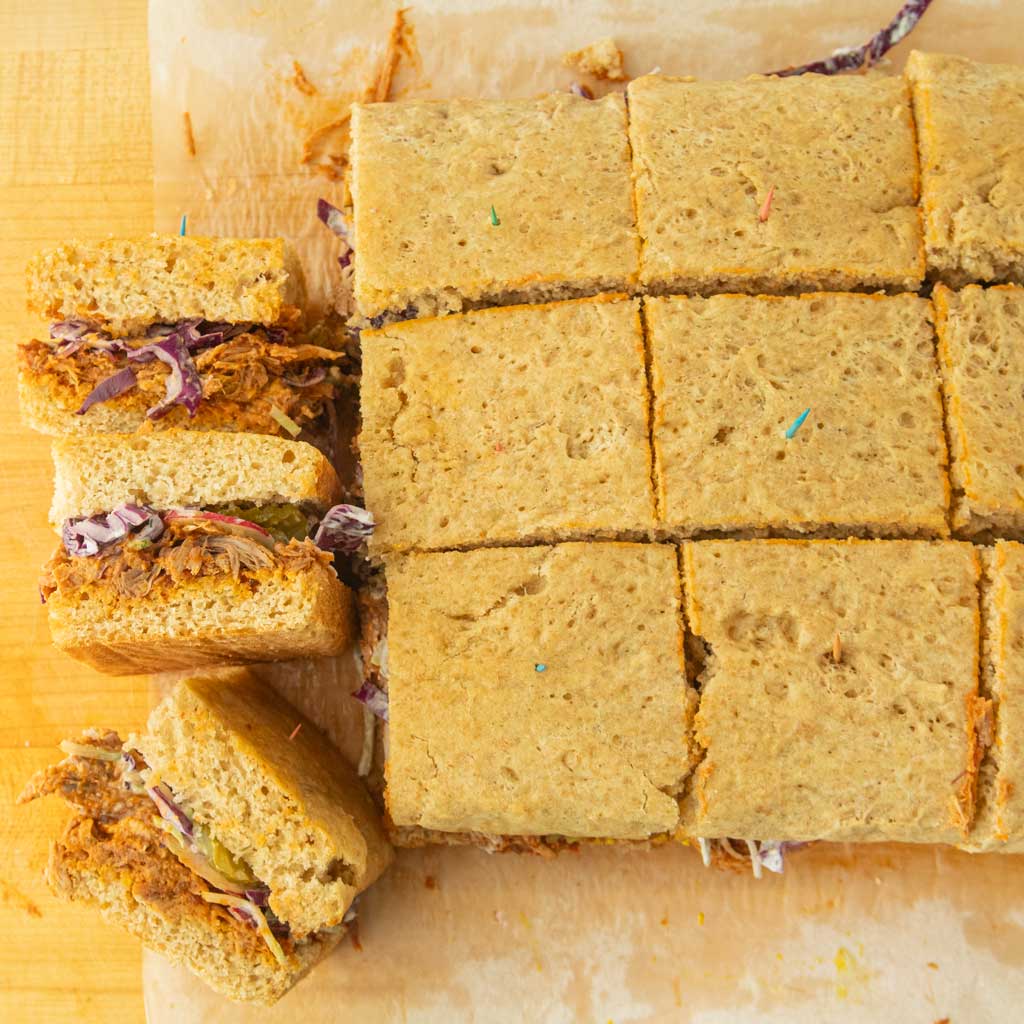
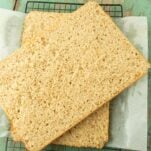
- Structure: By baking the bread in a shallower pan, you get more of the bread contacting the metal. This gives you more surface area of toasted crust on the bottom and a softer bit on the top. When you go to cut this bread, it holds together without crumbling or shredding.
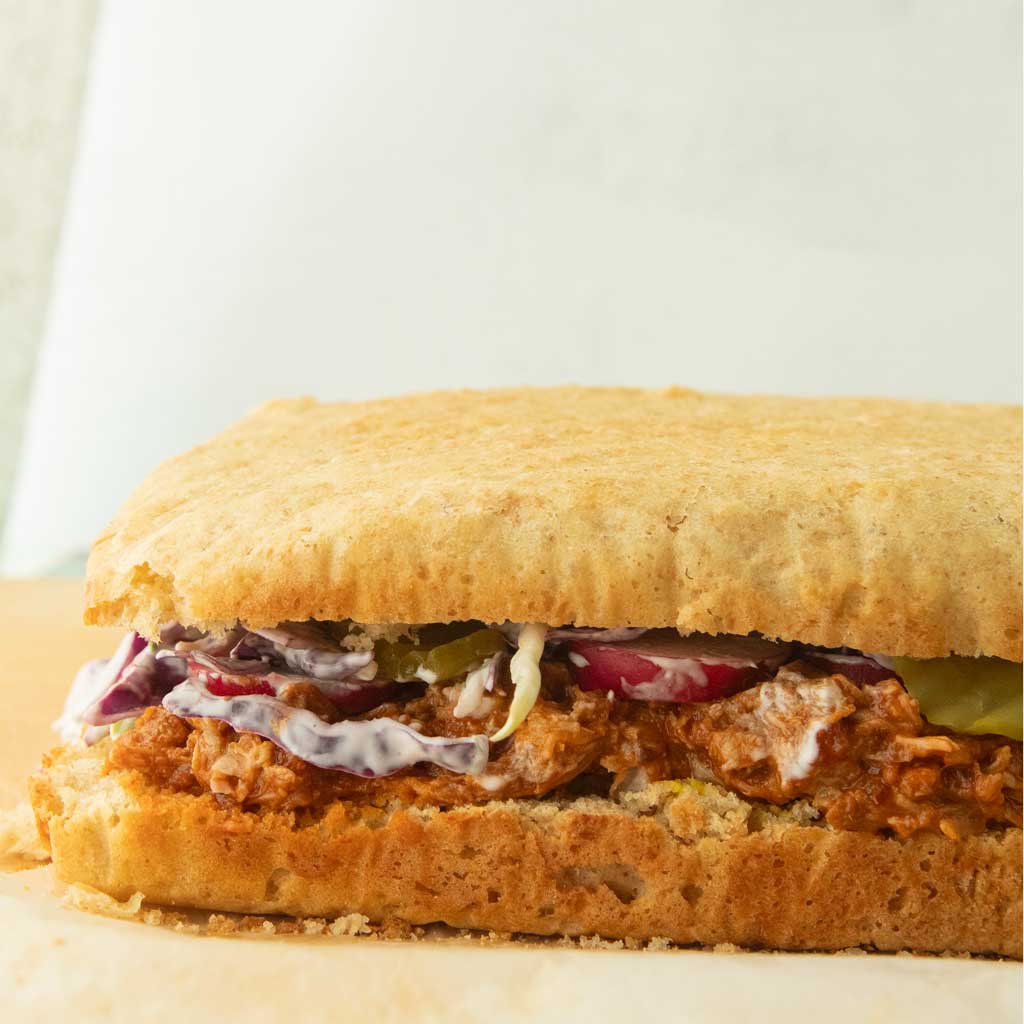
- Horizontal vs. vertical slicing: To make a sandwich with sheet pan bread, you slice it horizontally, not vertically as you would in a regular loaf bread. This means you put less pressure on the loaf itself. You’re able to cut straighter slices that are never squished by the weight of the knife.
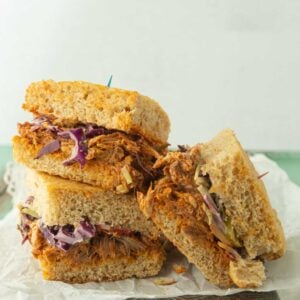
- Better for sandwiches: Because sheet pan bread has a toasty bottom, it holds together better in sandwich builds. Saucy fillings won’t leak through, and yet the bread is soft inside without the mouth-cutting crust you can get on chewy sourdough breads. If you’ve ever had the pleasure of eating a Schlotzsky or a muffaletta, sheet pan bread is in that same family of breads built specifically for sandwiches.
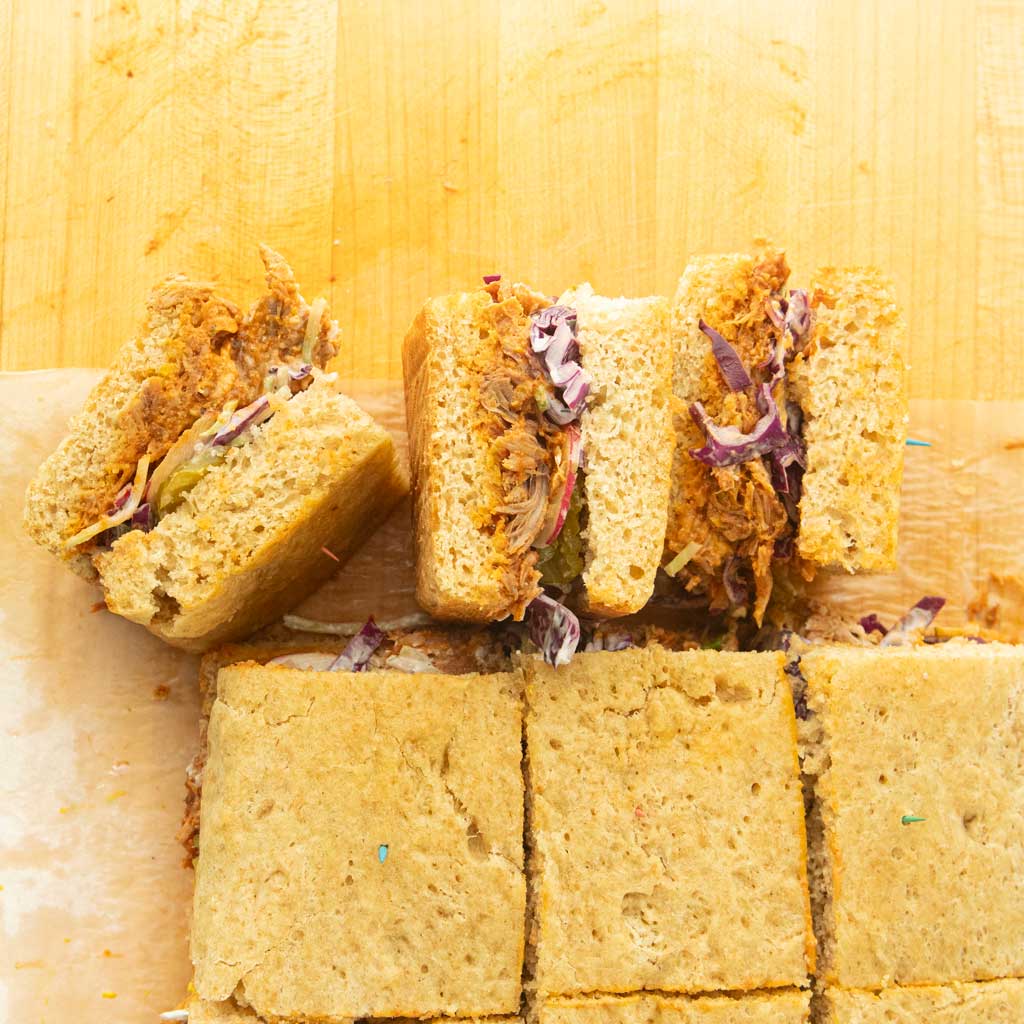
- Basically an instant party: Once you slice and fill your bread, you can cut this bread up into as big or small of sandwiches as you want. I’ve made party sandwiches for guests with all manner of fillings for years. They’re always a hit, they feed a ton, and you can make them with very little work.
- Portable to the max: Once you make up your sandwiches, you can take them practically anywhere. Stack the sandwiches in a lidded container (enter my favorite Rubbermaid 1-gallon TakeAlong containers) , and you’ve got an instant picnic, potluck offering, baseball watching dinner, or meal to take on the top of a mountain. If you have a place where you need to transport dinner to, this bread will make it easy for you.
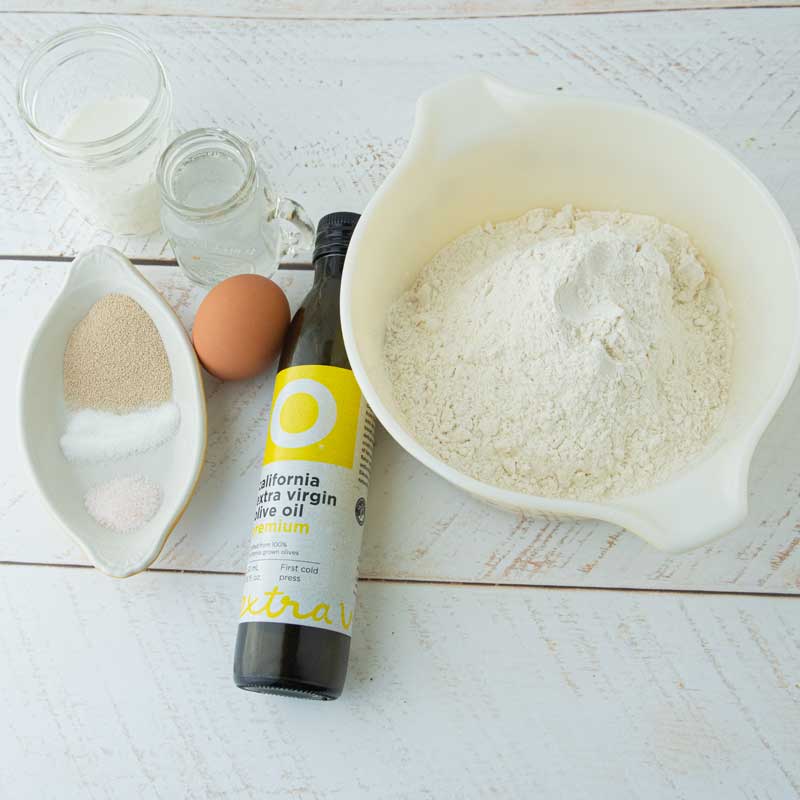
Ingredients for Sheet Pan Bread
- Water
- Yeast
- Honey
- Milk: Enriches the dough for a softer crumb.
- Olive oil: For flavor and a little fat in the dough.
- Eggs: Add protein, fat, flavor and structure so the buns can handle anything you put on them.
- All-purpose flour, or up to 50/50 all-purpose flour and whole grain flour (I used 50% all-purpose + 25% spelt and 25% whole wheat flour, both fresh-milled)
- Salt
Equipment Needed
How to Make Sheet Pan Bread


Making the Dough
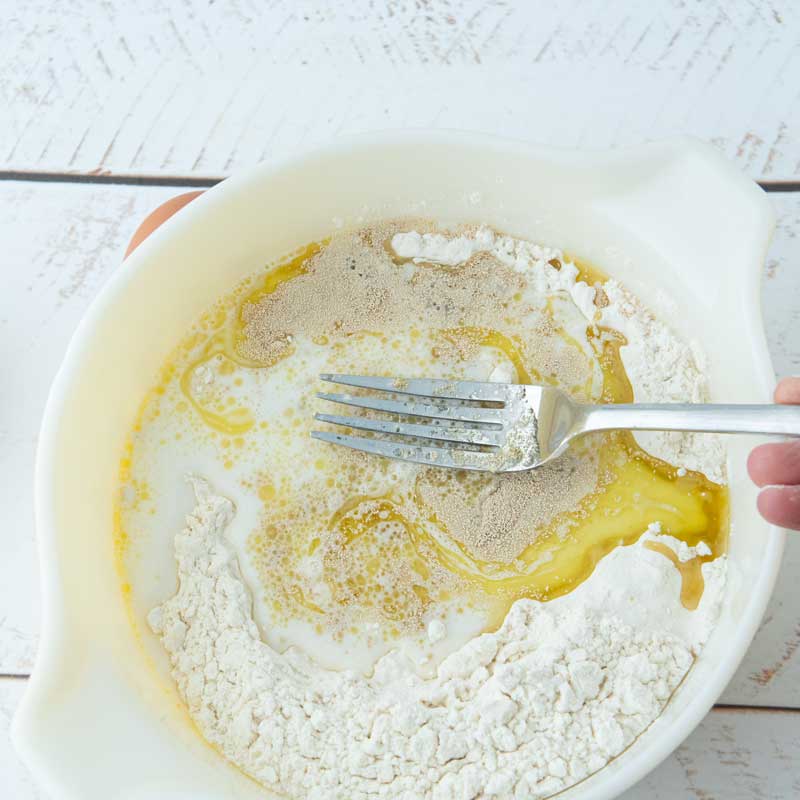
- Warm: Measure out the milk and water into a cup. Zap it in the microwave for about 15-20 seconds. Add in the honey and stir.
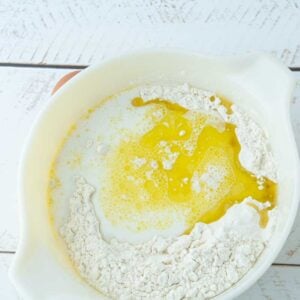
- Dissolve: Measure out the flour and salt into a bowl. Make a well in the middle of the flour and pour in the warmed up water and milk. Sprinkle the yeast over the liquid and let it dissolve for a minute.
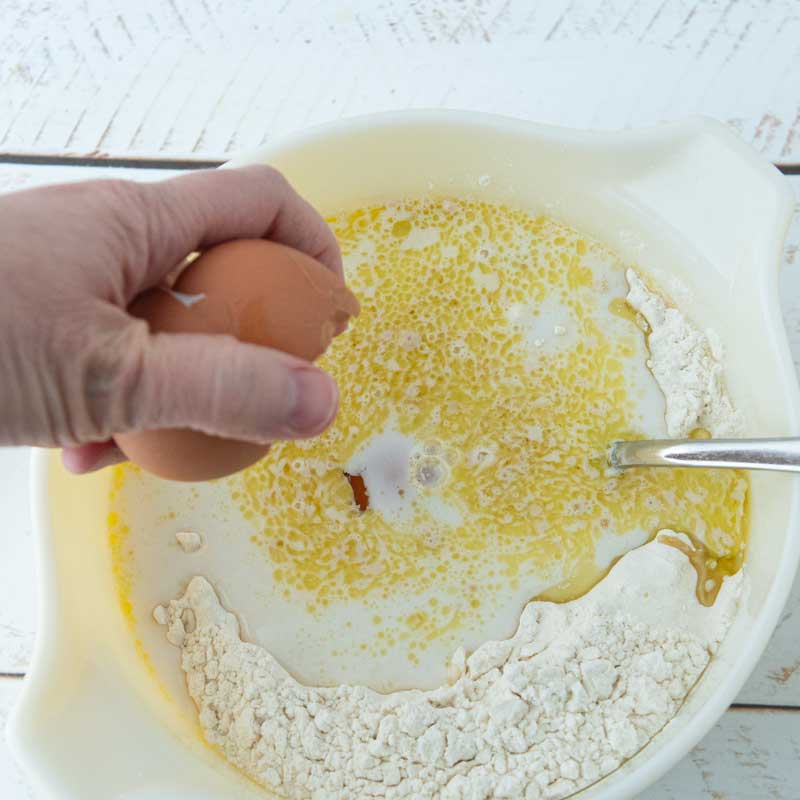
- Mix: Crack in the eggs and add the olive oil to the liquid and beat the eggs to break them up into a scrambled egg consistency. Do your best to just beat the eggs, but if you get some flour in there, that’s okay.
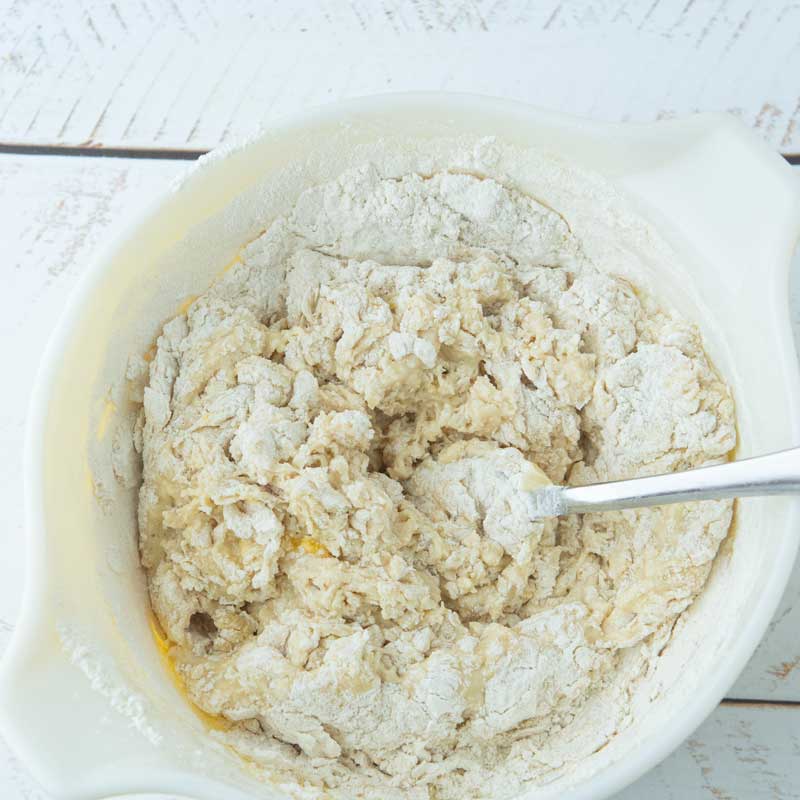
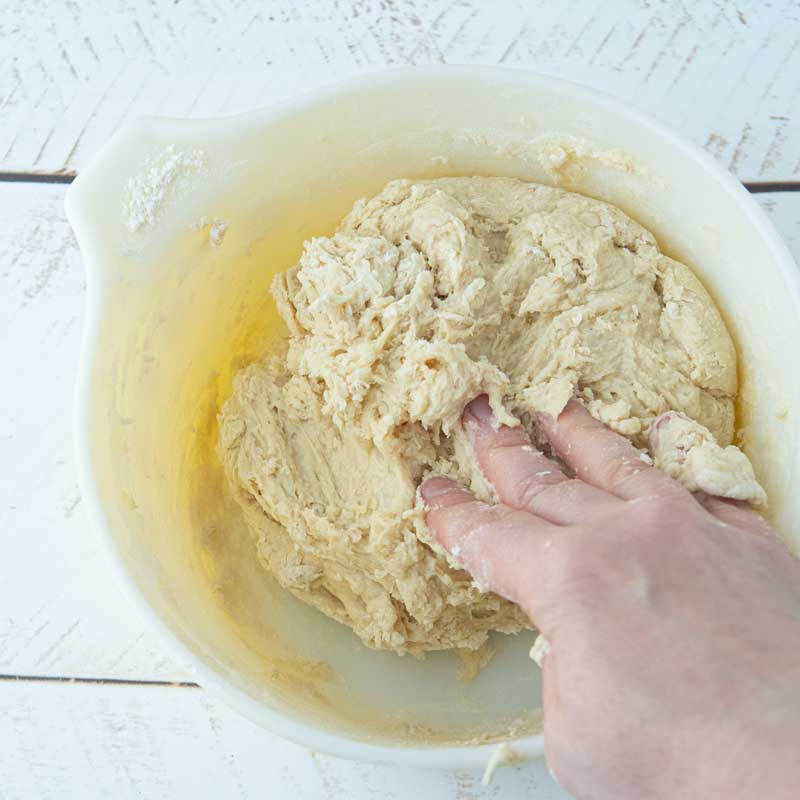
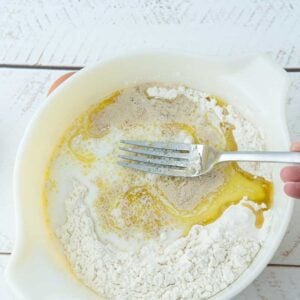
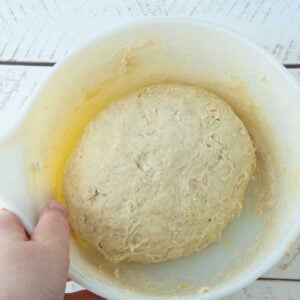
- Knead: Stir the liquid into the flour to make a shaggy dough. Fold the dough over on itself a few times to smooth out the top. It does not need to be perfect. You can do this with your hands or use a dough scraper to help.
Rising and Baking
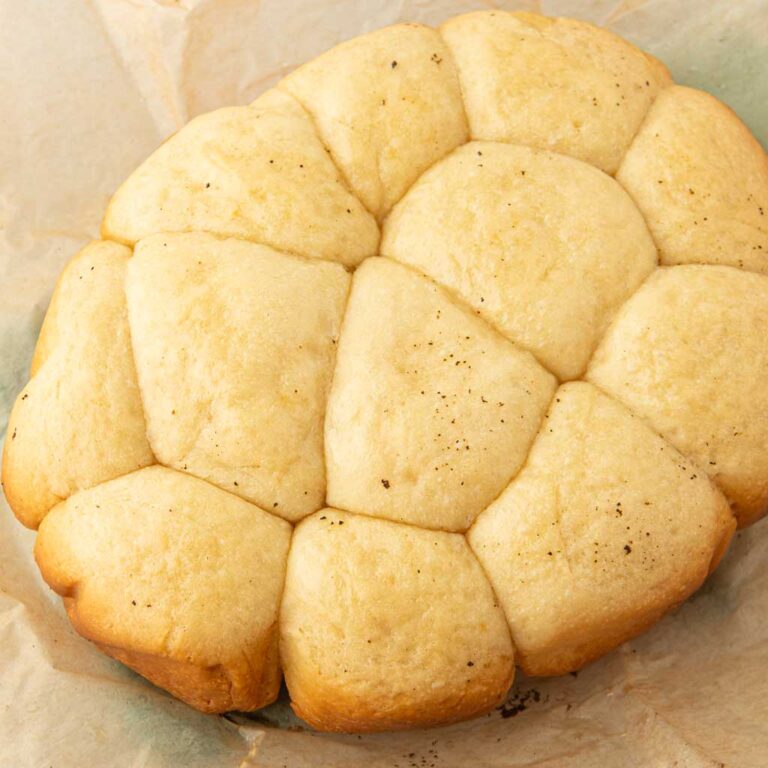
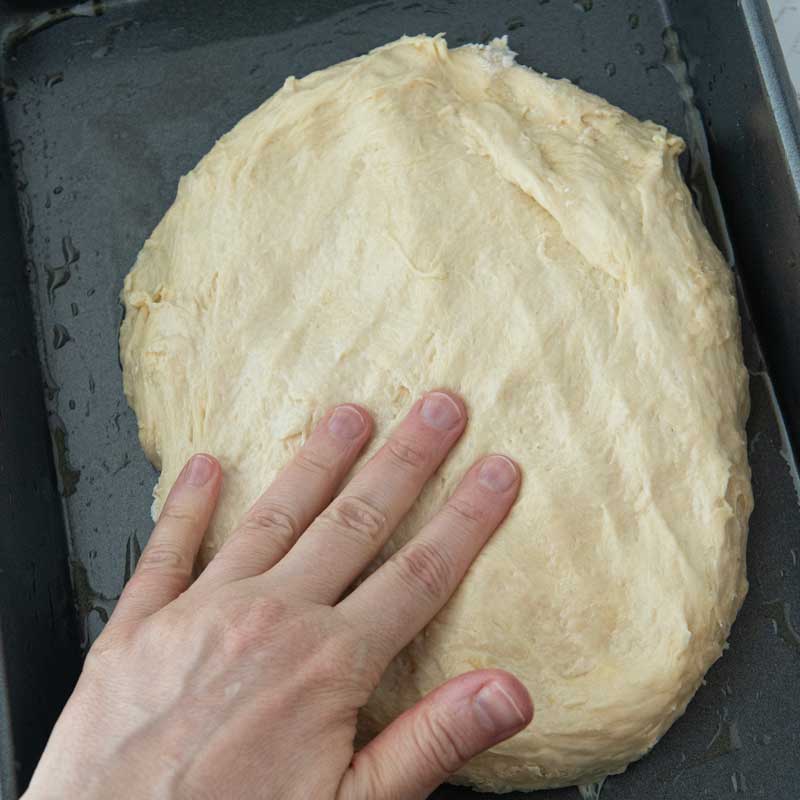
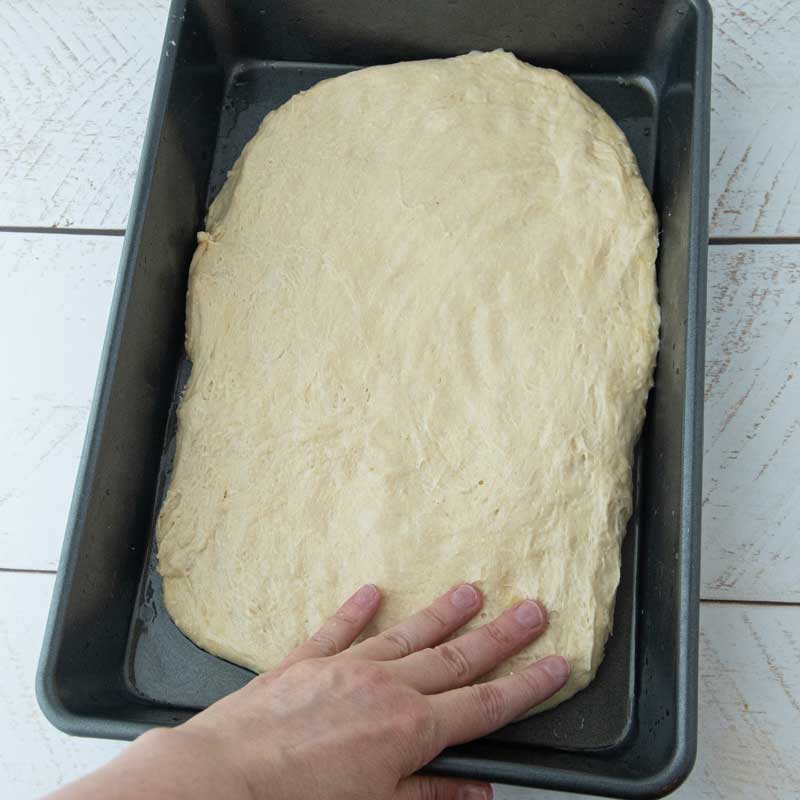
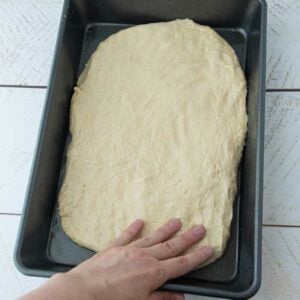
- Press in the pan: Cover the bottom of a sheet tray or 9×13 pan with a piece of parchment . Drizzle a little olive oil over the bottom. Press the dough into the bottom of the pan using wet hands. If the dough resists stretching, let it relax for a minute before stretching it further. When you’ve stretched the dough into the corners of the pan, cover the dough with a piece of oiled plastic wrap for 1 hour. After 1 hour, the dough should be well risen and bubbly in the pan.
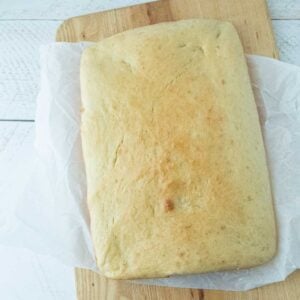
- Bake: Brush the top of the bread with about a tablespoon of olive oil. Bake the bread for 25-30 minutes at 350 F until the bread is golden brown around the edges and hollow sounding when you tap the top. If you have an instant-read thermometer, the bread should be 200 F internally.
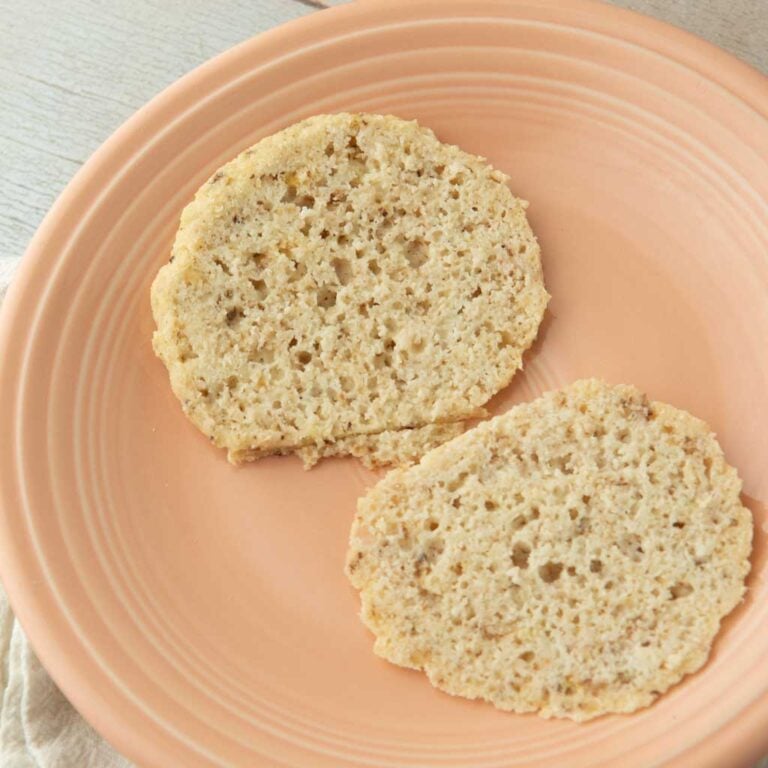
- Cool and fill: When the bread is completely cool (this takes about 30 minutes), use a serrated knife to split the bread horizontally. From here you can fill it with whatever sandwich filling you’d like. Cut through all the layers to make as big or as little sized sandwiches as you want. Definitely try pulled pork with this homemade keto BBQ sauce on this bread with coleslaw!


Sheet pan bread
- Total Time: 90 minutes
- Yield: Bread for 12 large sandwiches 1x
Description
Build better sandwich bread by baking it in a sheet pan instead of in loaves. That way you can slice the bread horizontally, giving you cleaner cuts on a bread that will not fall apart. This one-bowl bread rises just once and lets you make an entire batch of sandwiches in one go, making this the perfect bread for parties and any occasion where you need to feed a crowd.
Ingredients
Sheet Pan Bread dough
- 1 cup water (236 mL)
- 2/3 cup whole milk (156 mL)
- 2 Tablespoons honey (42 g)
- 1 Tablespoon instant yeast or active dry
- 3 cups all-purpose flour (390 g)
- 1 and 1/2 cups whole wheat flour (195 g)
- 1 and 1/4 teaspoons salt
- 3 Tablespoons olive oil (45 mL)
- 1 large egg
For baking
- Olive oil for drizzling
Equipment
- 9×13 pan or deeper sheet pan such as Nordicware high sided sheet pan
Instructions
- Warm: Measure out the milk and water into a cup. Zap it in the microwave for about 15-20 seconds. Add in the honey and stir.
- Dissolve: Measure out the flour and salt into a bowl. Make a well in the middle of the flour and pour in the warmed up water and milk. Sprinkle the yeast over the liquid and let it dissolve for a minute.

- Mix: Crack in the eggs and add the olive oil to the liquid and beat the eggs to break them up into a scrambled egg consistency. Do your best to just beat the eggs, but if you get some flour in there, that’s okay.
- Knead: Stir the liquid into the flour to make a shaggy dough. Fold the dough over on itself a few times to smooth out the top. It does not need to be perfect. You can do this with your hands or use a dough scraper to help.
- Press in the pan: Cover the bottom of a sheet tray or 9×13 pan with a piece of parchment . Drizzle a little olive oil over the bottom. Press the dough into the bottom of the pan using wet hands. If the dough resists stretching, let it relax for a minute before stretching it further. When you’ve stretched the dough into the corners of the pan, cover the dough with a piece of oiled plastic wrap for 1 hour. After 1 hour, the dough should be well risen and bubbly in the pan. Towards the end of the rising time, preheat the oven to 350 F (180 C).
- Bake: Brush the top of the bread with about a tablespoon of olive oil. Bake the bread for 25-30 minutes until the bread is golden brown around the edges and hollow sounding when you tap the top. If you have an instant-read thermometer, the bread should be 200 F internally.
- Cool and fill: When the bread is completely cool (this takes about 30 minutes), use a serrated knife to split the bread horizontally. From here you can fill it with whatever sandwich filling you’d like. Cut through all the layers to make as big or as little sized sandwiches as you want. Definitely try pulled pork with this homemade keto BBQ sauce on this bread with coleslaw!


Notes
Make it ahead: For easy entertaining, you can freeze the whole pan of this bread. Pop the bread, uncut into a giant 2.5 gallon ziploc bag. Remove as much air as possible, and then freeze the bread flat. When you’re ready to build sandwiches for your party, set out the bread on the counter for a couple hours or warm in a 300 F oven just to defrost it. From there you can split and fill the bread before cutting it into sandwiches.
Change up your flour: You can make this dough entirely with all-purpose flour or do a mix of half all-purpose and whole grain flours. I would not go above 50% whole grain flour as you still need some structure for the bread to slice well as a sandwich. I find that 2/3 of the total flour in all-purpose with 1/3 as whole grain flours is the best of all possible worlds, giving you all the flavor of whole grain with the light airy quality that the all-purpose lends to the bread. I’ve made this with entirely all-purpose flour, all bread flour, a mix of whole wheat and all-purpose, and my favorite, a mix of all-purpose, spelt, and whole wheat.
- Prep Time: 5 minutes
- Cook Time: 25 minutes
- Category: Breads
- Method: Baking
- Cuisine: American
If You Make One Recipe from Bakingwithtradition.com, Let It Be This Bread
I cut my sandwiches from a loaf of sheet pan bread in real time when I had a friend over recently. She’s asking me questions as I do this, and I’m seeing the lightbulbs go off in her mind as I’m doing this. Being the get it done kind of person she is who also has 4 kids, I would not be surprised if she’s made it since. If I haven’t waxed poetic about this bread enough, I challenge you to make this recipe. You just might never visit a sandwich shop again.